
SA-DA8, SA-DA10 specifications
The Technics SA-DA8 and SA-DA10 are renowned audio receivers that were pivotal in the evolution of home audio systems in the late 1990s and early 2000s. Both models reflect Technics' commitment to high-quality sound and innovative technology, appealing to audiophiles and casual listeners alike.One of the standout features of the SA-DA8 and SA-DA10 is their extensive multi-channel audio capabilities, which support various surround sound formats. These receivers are equipped to handle Dolby Digital, DTS, and THX surround sound, creating an immersive listening experience that rivals even high-end home theaters. The SA-DA10, in particular, provides a more advanced digital signal processing capability, making it suitable for both music and movie enthusiasts.
Both models incorporate Technics' proprietary "Digital Signal Processor" technology, which allows users to customize sound fields to match their preferred listening environment. This is especially beneficial for home theaters, where room acoustics can significantly impact audio performance. The receivers also boast a range of inputs, including multiple digital and analog connections, making it easy to integrate various media devices, such as DVD players, gaming consoles, and CD players.
Audio quality is a central aspect of the SA-DA8 and SA-DA10. They feature high-performance 24-bit DACs that enhance audio resolution, ensuring a clean and detailed sound. The dynamic power output ensures that even the most demanding soundtracks can be played without distortion, making them ideal for high-energy action movies or concert recordings.
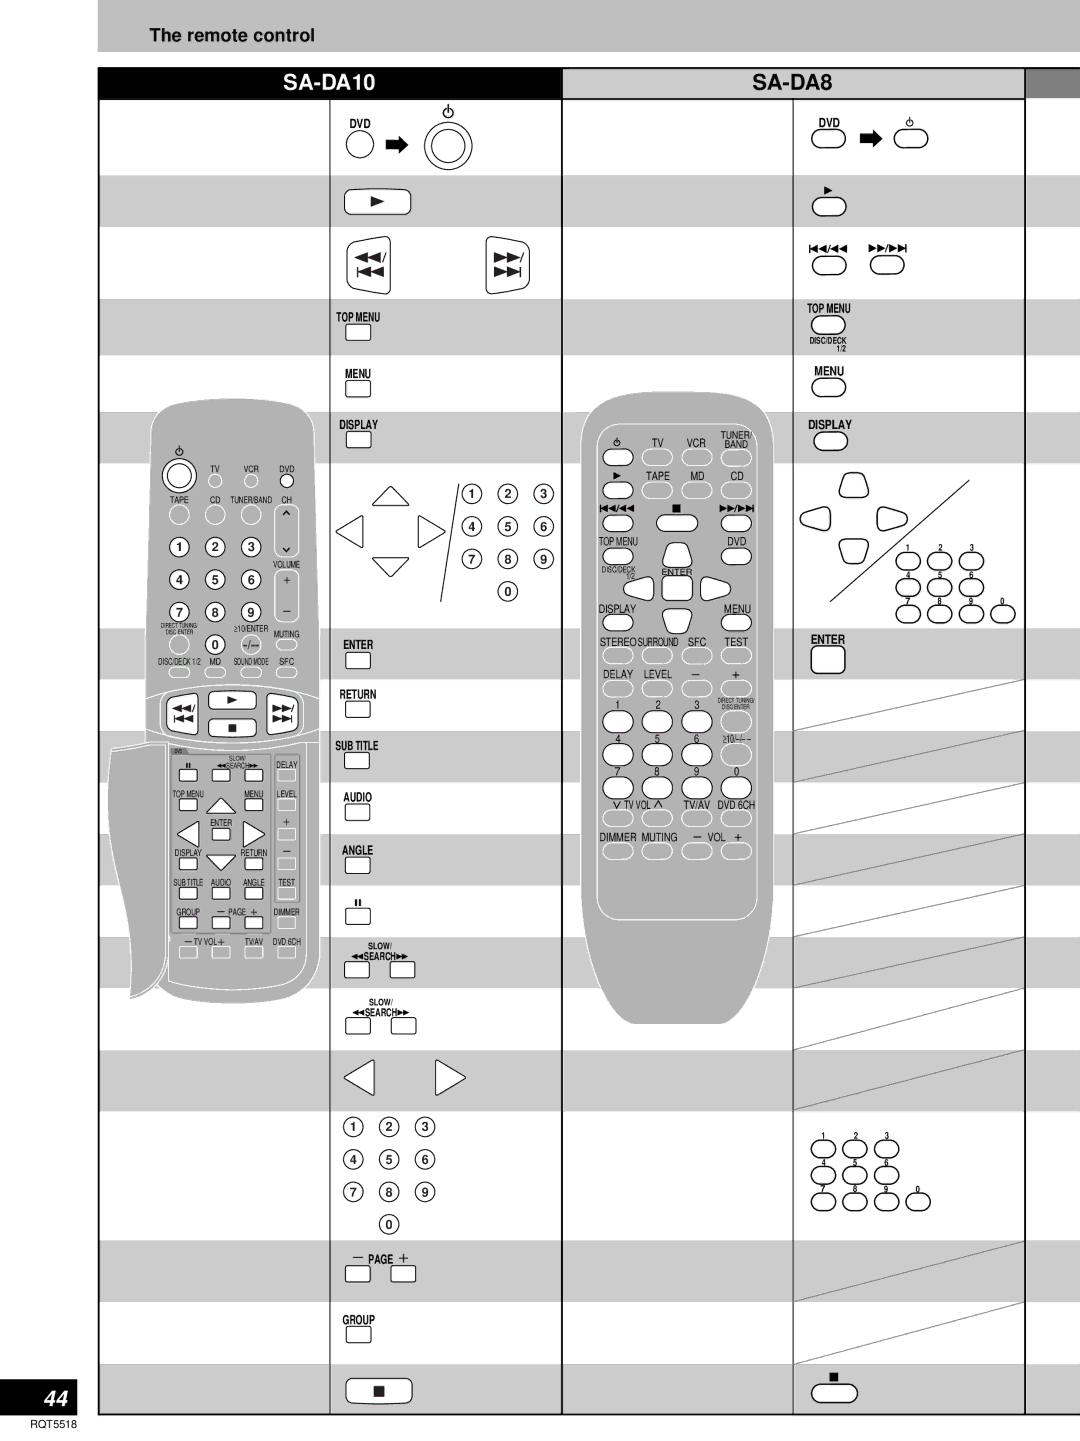
Another notable characteristic of these receivers is their user-friendly design. The front panel includes an easy-to-navigate display and controls for adjusting settings on the fly. Additionally, the receivers feature a remote control that provides full access to all functions, elevating the convenience of handling multiple audio sources.
The build quality of the Technics SA-DA8 and SA-DA10 is robust, with a design that resonates with the brand's stature in the audio industry. Their timeless aesthetic, coupled with modern capabilities, have allowed these models to remain popular in retro audio circles.
In summary, the Technics SA-DA8 and SA-DA10 exemplify superior sound engineering through their multi-channel audio support, advanced DSP technology, and high-quality construction. These receivers continue to exemplify Technics' legacy of delivering exceptional audio experiences for enthusiasts around the globe.