STEP 8 Attaching LNB to Antenna
The
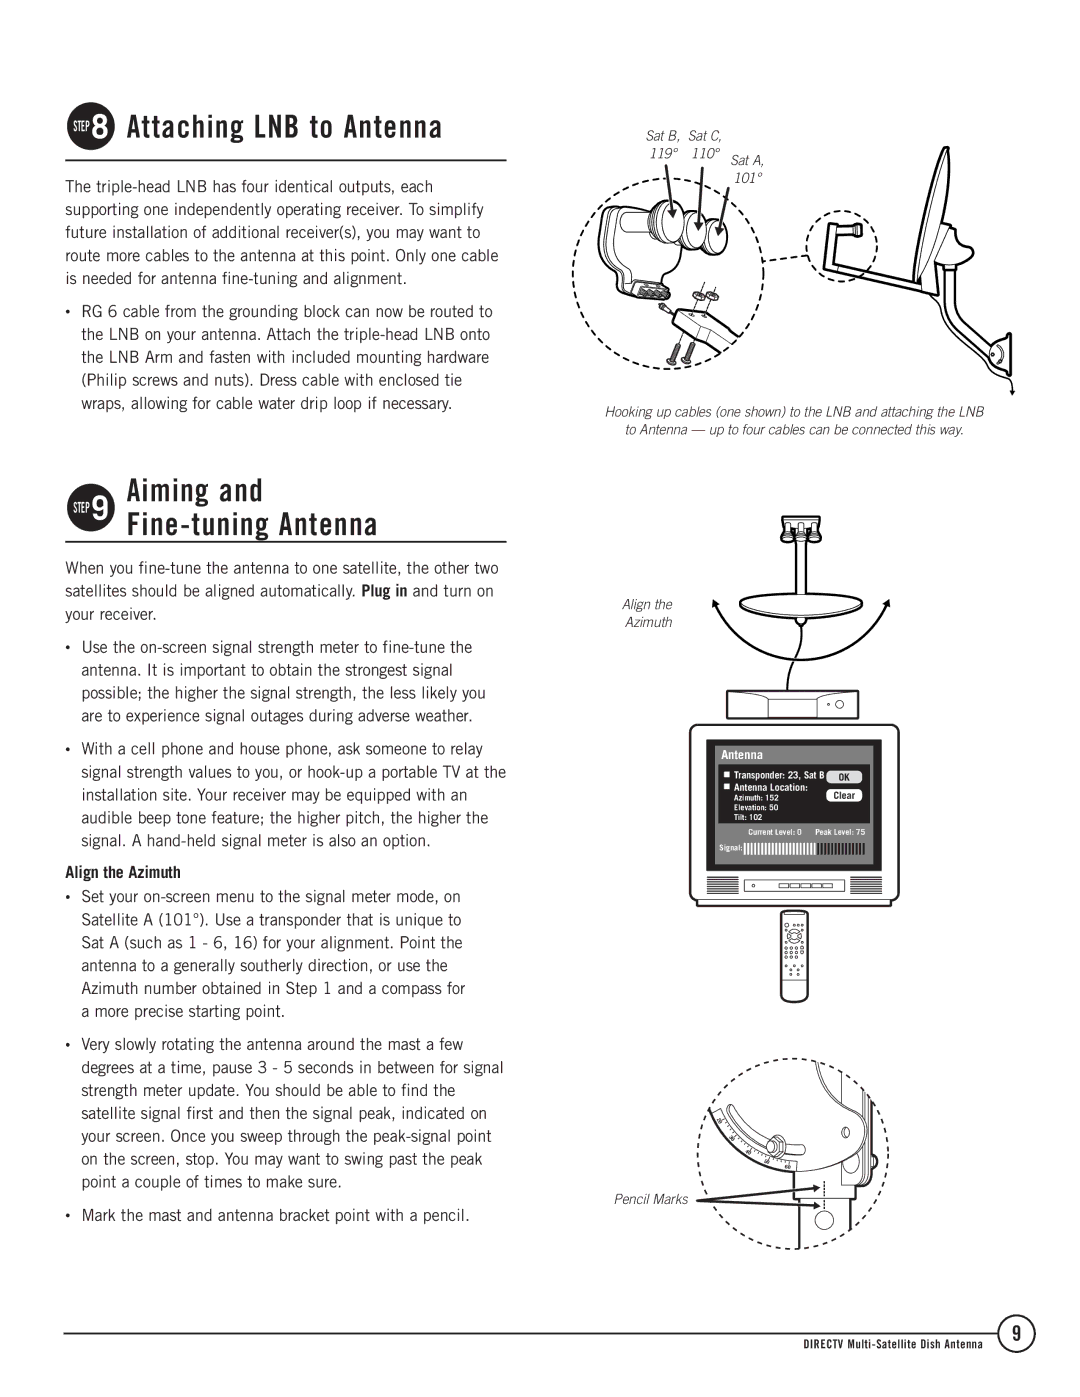
•RG 6 cable from the grounding block can now be routed to the LNB on your antenna. Attach the
Aiming and
STEP 9 Fine-tuning Antenna
When you
•Use the
•With a cell phone and house phone, ask someone to relay signal strength values to you, or
Align the Azimuth
Sat B, Sat C,
119° 110° Sat A,
101°
Hooking up cables (one shown) to the LNB and attaching the LNB
to Antenna — up to four cables can be connected this way.
Align the
Azimuth
Antenna
![]() Transponder: 23, Sat B OK
Transponder: 23, Sat B OK
![]() Antenna Location:
Antenna Location:
| Azimuth: 152 | Clear |
| ||
| Elevation: 50 |
|
|
| |
| Tilt: 102 |
|
|
| |
|
| Current Level: 0 | Peak Level: 75 |
| |
| Signal: |
|
|
| |
|
|
|
| ||
|
|
|
|
|
|
|
|
|
|
|
|
|
|
|
|
|
|
|
|
|
|
|
|
|
|
|
|
|
|
|
|
|
|
|
|
|
|
|
|
|
|
•Set your
•Very slowly rotating the antenna around the mast a few degrees at a time, pause 3 - 5 seconds in between for signal strength meter update. You should be able to find the satellite signal first and then the signal peak, indicated on your screen. Once you sweep through the
•Mark the mast and antenna bracket point with a pencil.
2 0
3 0
40
50
Pencil Marks
60
DIRECTV
9