9.3. Joining the Enclosure to the Rigging Frame
Flying Plates are mounted at both the front and rear of the enclosure’s sides. Follow the procedure below to mount the enclosure to the Rigging Frame, as shown in the assembly diagrams.
Fix a supplied Joint Plate securely to the left side of the Rigging Frame and another to the right side of the enclosure, each using 4 supplied bolts with plain washers and spring washers.
Before securing the Joint Plate, determine whether the enclosure’s horn will face right or left. (This is not required for the
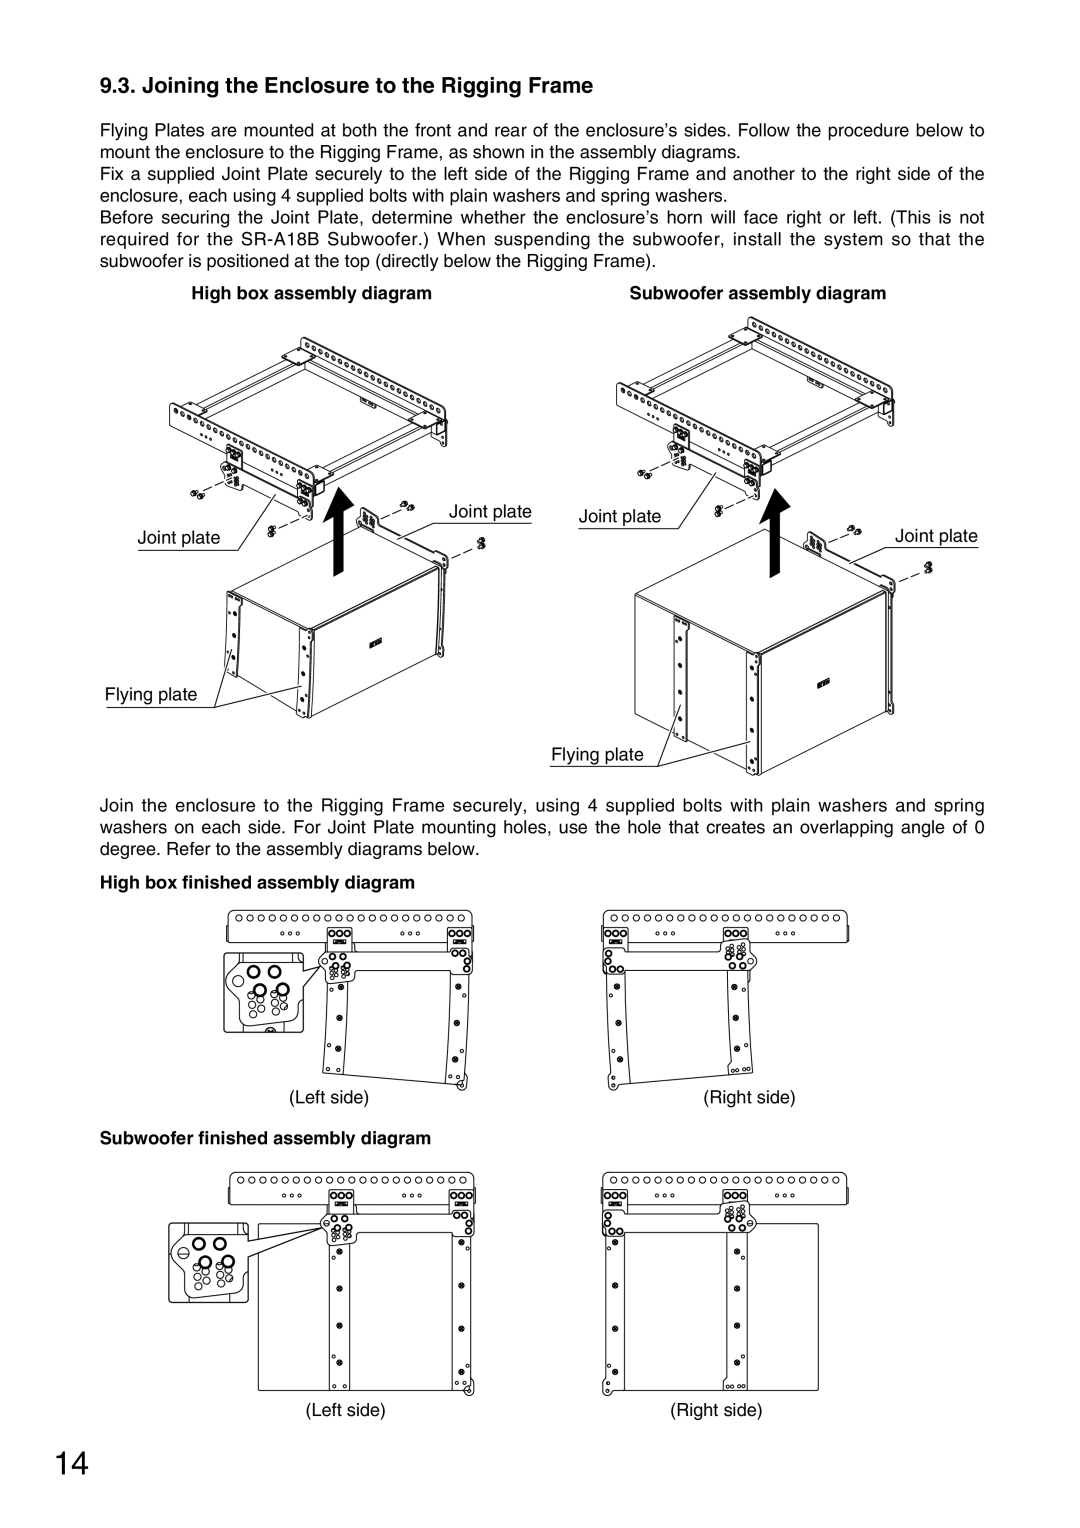
High box assembly diagram | Subwoofer assembly diagram |
Joint plate | Joint plate |
Joint plate | Joint plate |
Flying plate
Flying plate
Join the enclosure to the Rigging Frame securely, using 4 supplied bolts with plain washers and spring washers on each side. For Joint Plate mounting holes, use the hole that creates an overlapping angle of 0 degree. Refer to the assembly diagrams below.
High box finished assembly diagram
(Left side) | (Right side) |
Subwoofer finished assembly diagram
(Left side) | (Right side) |
14