Satellite 2400 Series Disassembly Overview
The information offered in this section is an overview of the Maintenance Manual, Chapter 4, Replacement Procedures. If you have any questions or concerns regarding the proper procedure please refer to the Mainte- nance Manual through the Toshiba Service and Support Website before you proceed.
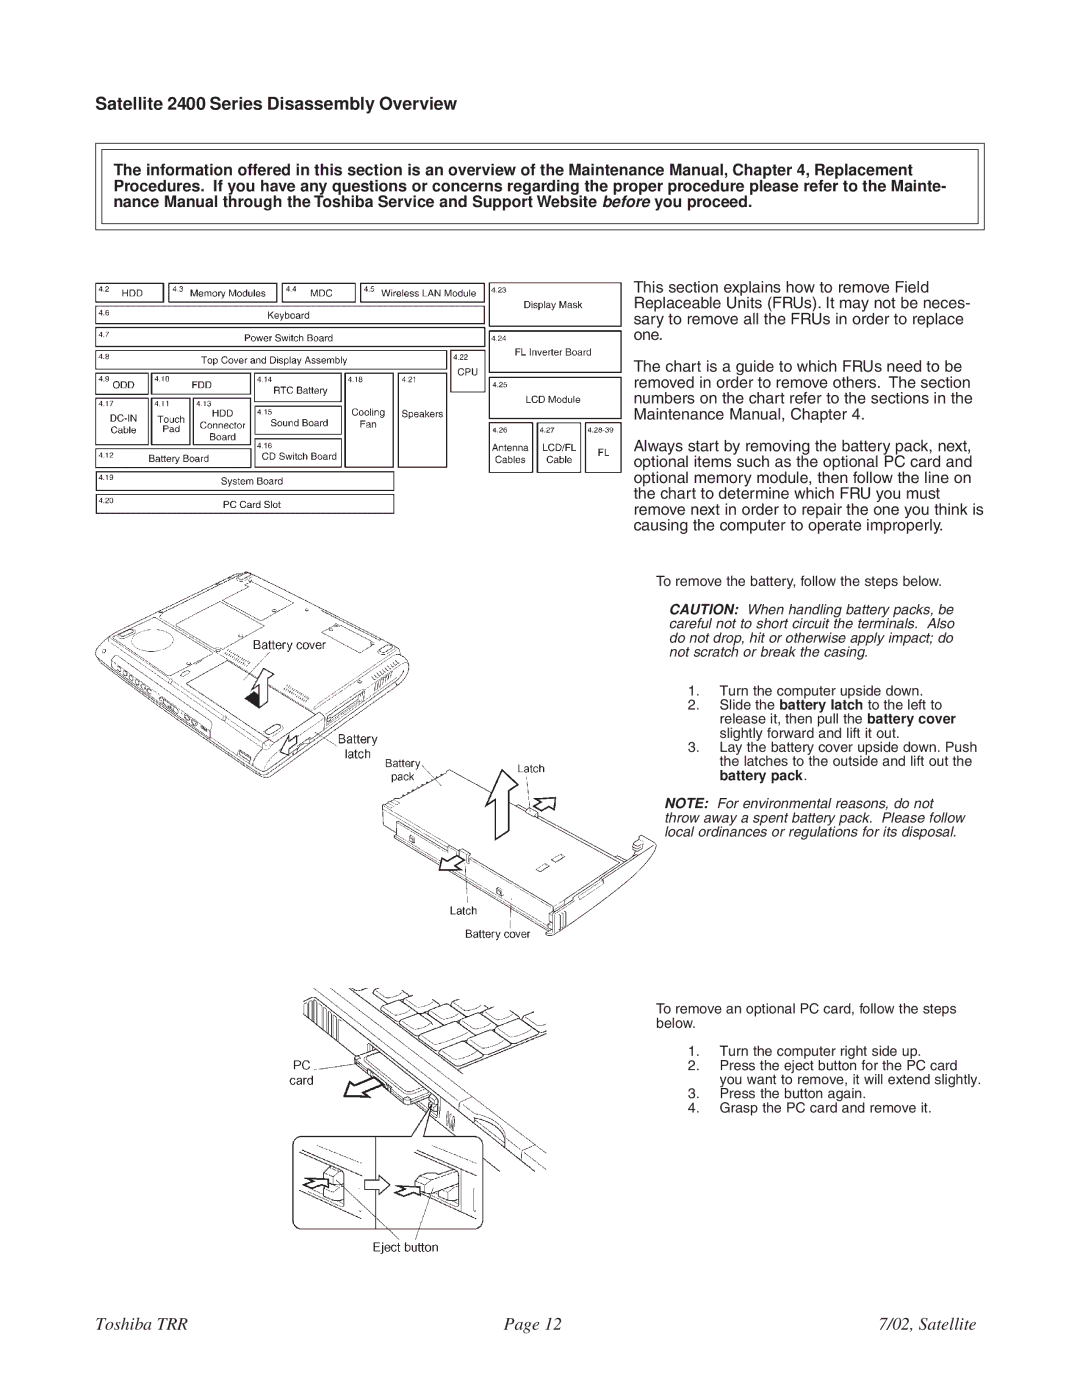
This section explains how to remove Field Replaceable Units (FRUs). It may not be neces- sary to remove all the FRUs in order to replace one.
The chart is a guide to which FRUs need to be removed in order to remove others. The section numbers on the chart refer to the sections in the Maintenance Manual, Chapter 4.
Always start by removing the battery pack, next, optional items such as the optional PC card and optional memory module, then follow the line on the chart to determine which FRU you must remove next in order to repair the one you think is causing the computer to operate improperly.
To remove the battery, follow the steps below.
CAUTION: When handling battery packs, be careful not to short circuit the terminals. Also do not drop, hit or otherwise apply impact; do not scratch or break the casing.
1. Turn the computer upside down.
2. Slide the battery latch to the left to release it, then pull the battery cover slightly forward and lift it out.
3. Lay the battery cover upside down. Push the latches to the outside and lift out the battery pack.
NOTE: For environmental reasons, do not throw away a spent battery pack. Please follow local ordinances or regulations for its disposal.
To remove an optional PC card, follow the steps below.
1. Turn the computer right side up.
2. Press the eject button for the PC card you want to remove, it will extend slightly.
3. Press the button again.
4. Grasp the PC card and remove it.
Toshiba TRR | Page 12 | 7/02, Satellite |
