Satellite 2400 Series Disassembly Overview, cont.
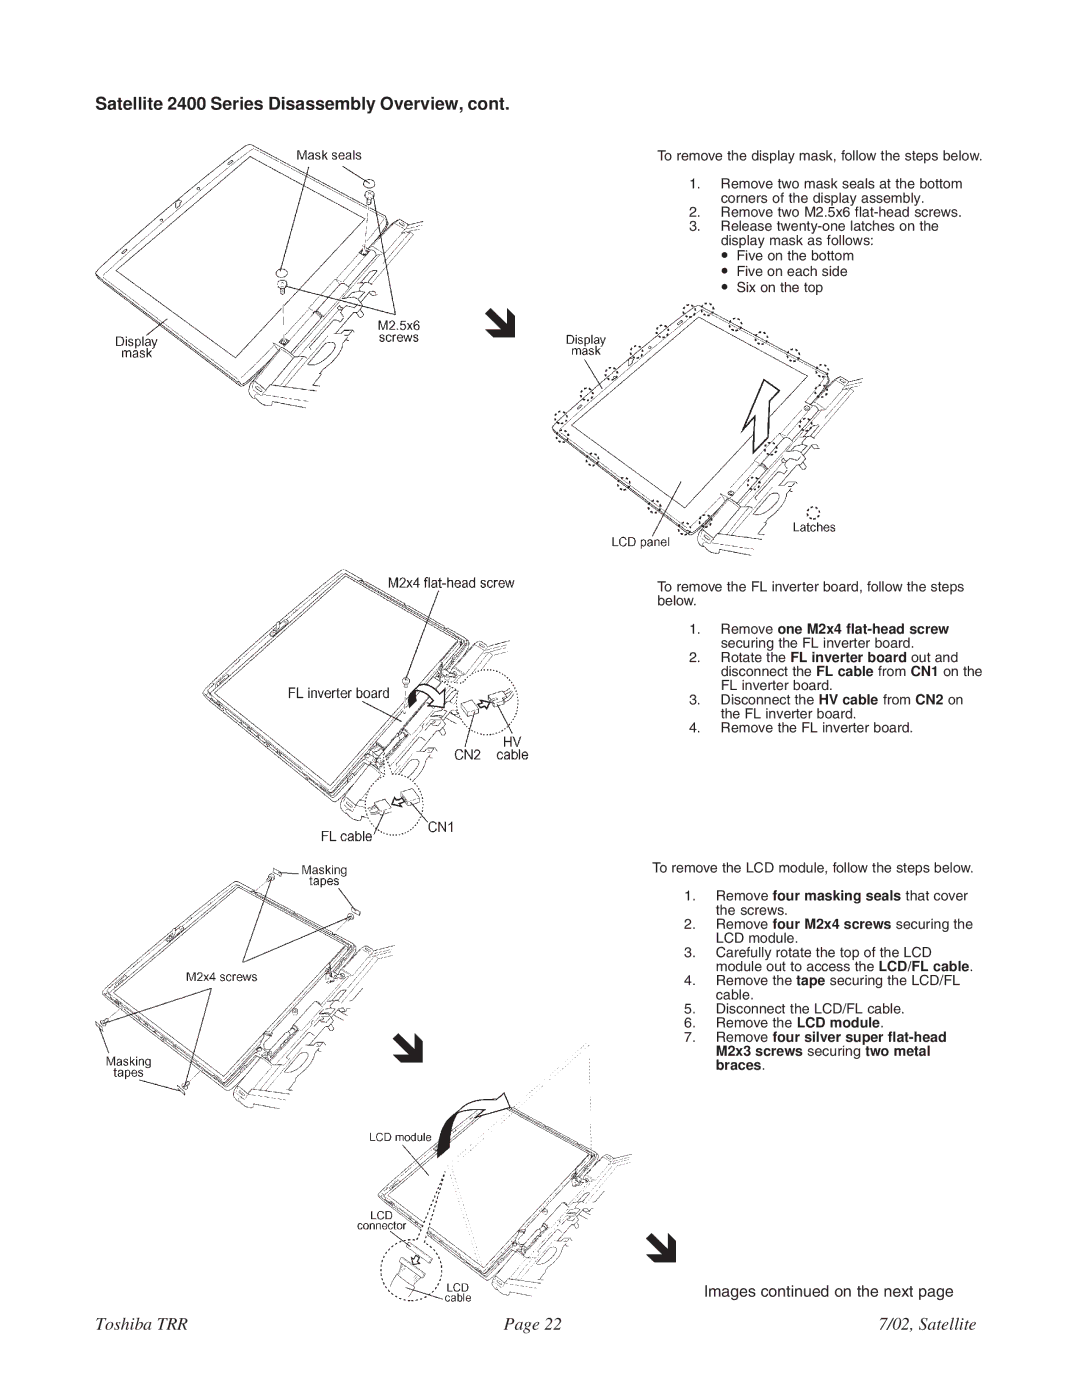
To remove the display mask, follow the steps below.
1. Remove two mask seals at the bottom corners of the display assembly.
2. Remove two M2.5x6
3. Release
• Five on the bottom
• Five on each side
• Six on the top
!
!
To remove the FL inverter board, follow the steps below.
1.Remove one M2x4
2.Rotate the FL inverter board out and disconnect the FL cable from CN1 on the FL inverter board.
3.Disconnect the HV cable from CN2 on the FL inverter board.
4.Remove the FL inverter board.
To remove the LCD module, follow the steps below.
1.Remove four masking seals that cover the screws.
2.Remove four M2x4 screws securing the LCD module.
3.Carefully rotate the top of the LCD module out to access the LCD/FL cable.
4.Remove the tape securing the LCD/FL cable.
5.Disconnect the LCD/FL cable.
6.Remove the LCD module.
7.Remove four silver super
!
Images continued on the next page
Toshiba TRR | Page 22 | 7/02, Satellite |