Connecting your TV
Setting the HDMI audio mode
You can select sound of an HDMI or DVI device connected to the HDMI input terminals (- page 23) from three modes:
Auto, Digital or Analog.
Note:
This function is available only when the PC/HDMI audio mode is set to HDMI.
1 Press M, then press I or i to display the SET UP menu.
SET UP |
|
| |
Language |
| English |
|
Auto tuning | OK | ||
Manual tuning | OK | ||
AV connection | OK | ||
Picture position | OK | ||
|
|
|
|
MENU Back EXIT Watch TV |
|
| |
2 Press u or U to select AV connection, then press Q to display the AV connection menu.
o
AV connection
PC/HDMI audio | HDMI |
|
|
HDMI audio | Auto |
MENU Back EXIT Watch TV
3 Press u or U to select HDMI audio, then press I or i to select Auto, Digital or Analog.
When the sound is not audible:
If no sound comes out while receiving HDMI signal, the sound may be audible when using this function set to off.
1 From the HDMI audio item in the AV connection, press and hold Q until the Lip Sync Latency menu appears on the screen.
Lip Sync Latency | On |
|
2 Press I or i to select Off.
3 Press J on the remote control or ! on the TV right side panel to switch to the standby mode.
4 Press J on the remote control or ! on the TV right side panel again to switch the power on.
Note:
Depending on some external equipment, the sound may be audible by turning it off and on again.
Connecting a computer
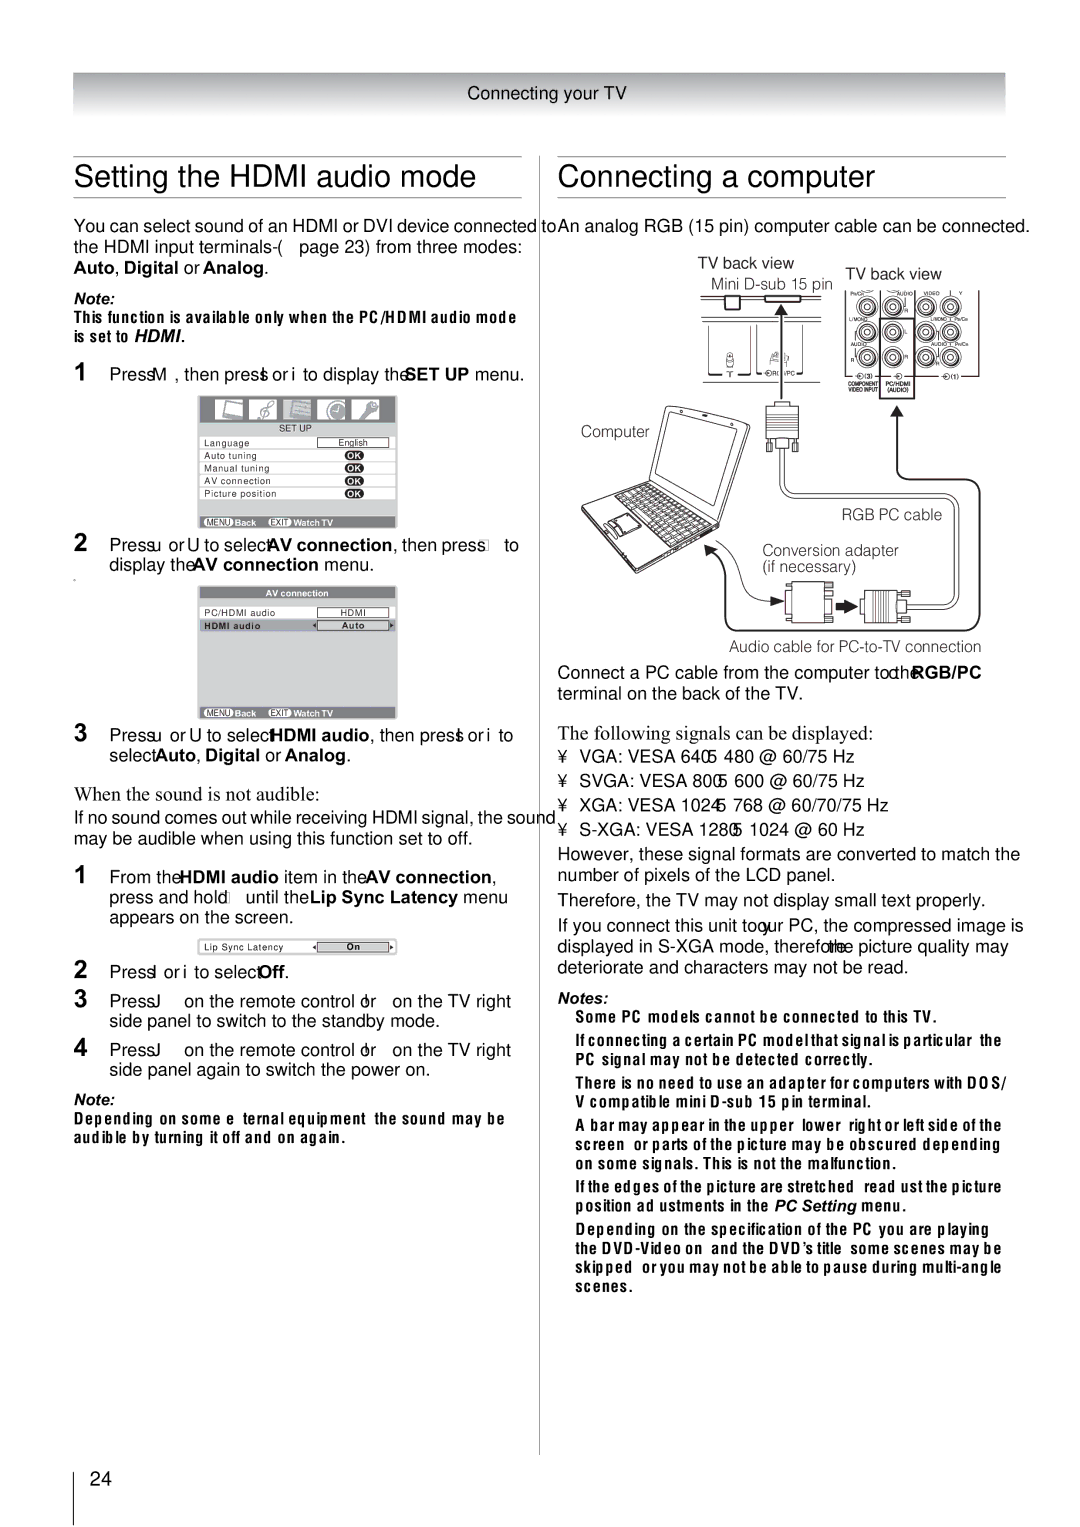
An analog RGB (15 pin) computer cable can be connected.
TV back view
TV back view
Mini
Computer
RGB PC cable
Conversion adapter (if necessary)
Audio cable for
Connect a PC cable from the computer to the o RGB/PC terminal on the back of the TV.
The following signals can be displayed:
•VGA: VESA 640 5 480 @ 60/75 Hz
•SVGA: VESA 800 5 600 @ 60/75 Hz
•XGA: VESA 1024 5 768 @ 60/70/75 Hz
•
However, these signal formats are converted to match the number of pixels of the LCD panel.
Therefore, the TV may not display small text properly.
If you connect this unit to your PC, the compressed image is displayed in
Notes:
•Some PC models cannot be connected to this TV.
•If connecting a certain PC model that signal is particular, the PC signal may not be detected correctly.
•There is no need to use an adapter for computers with DOS/ V compatible mini
•A bar may appear in the upper, lower, right or left side of the screen, or parts of the picture may be obscured depending on some signals. This is not the malfunction.
•If the edges of the picture are stretched, readjust the picture position adjustments in the PC Setting menu.
•Depending on the specification of the PC you are playing the
24