2. PRINTER SETUP
ENGLISH VERSION
2.9 Loading the Ribbon
2.9 Loading the Ribbon
WARNING!
∙ The Print Head may |
become hot. Do not |
touch the Print Head. |
∙ The Top Cover can be |
opened during the |
operation for control |
purposes only. It should |
be closed during normal |
operation. |
∙ Risk of injuries. Do not |
touch moving parts. |
Disconnect the mains |
1.Raise the Top Cover and release and raise the Print Head Block as described in section 2.7.3, steps 1 and 2.
2.Hold the Ribbon Supply Roll in your left hand and the Ribbon Take up Roll in your right hand.
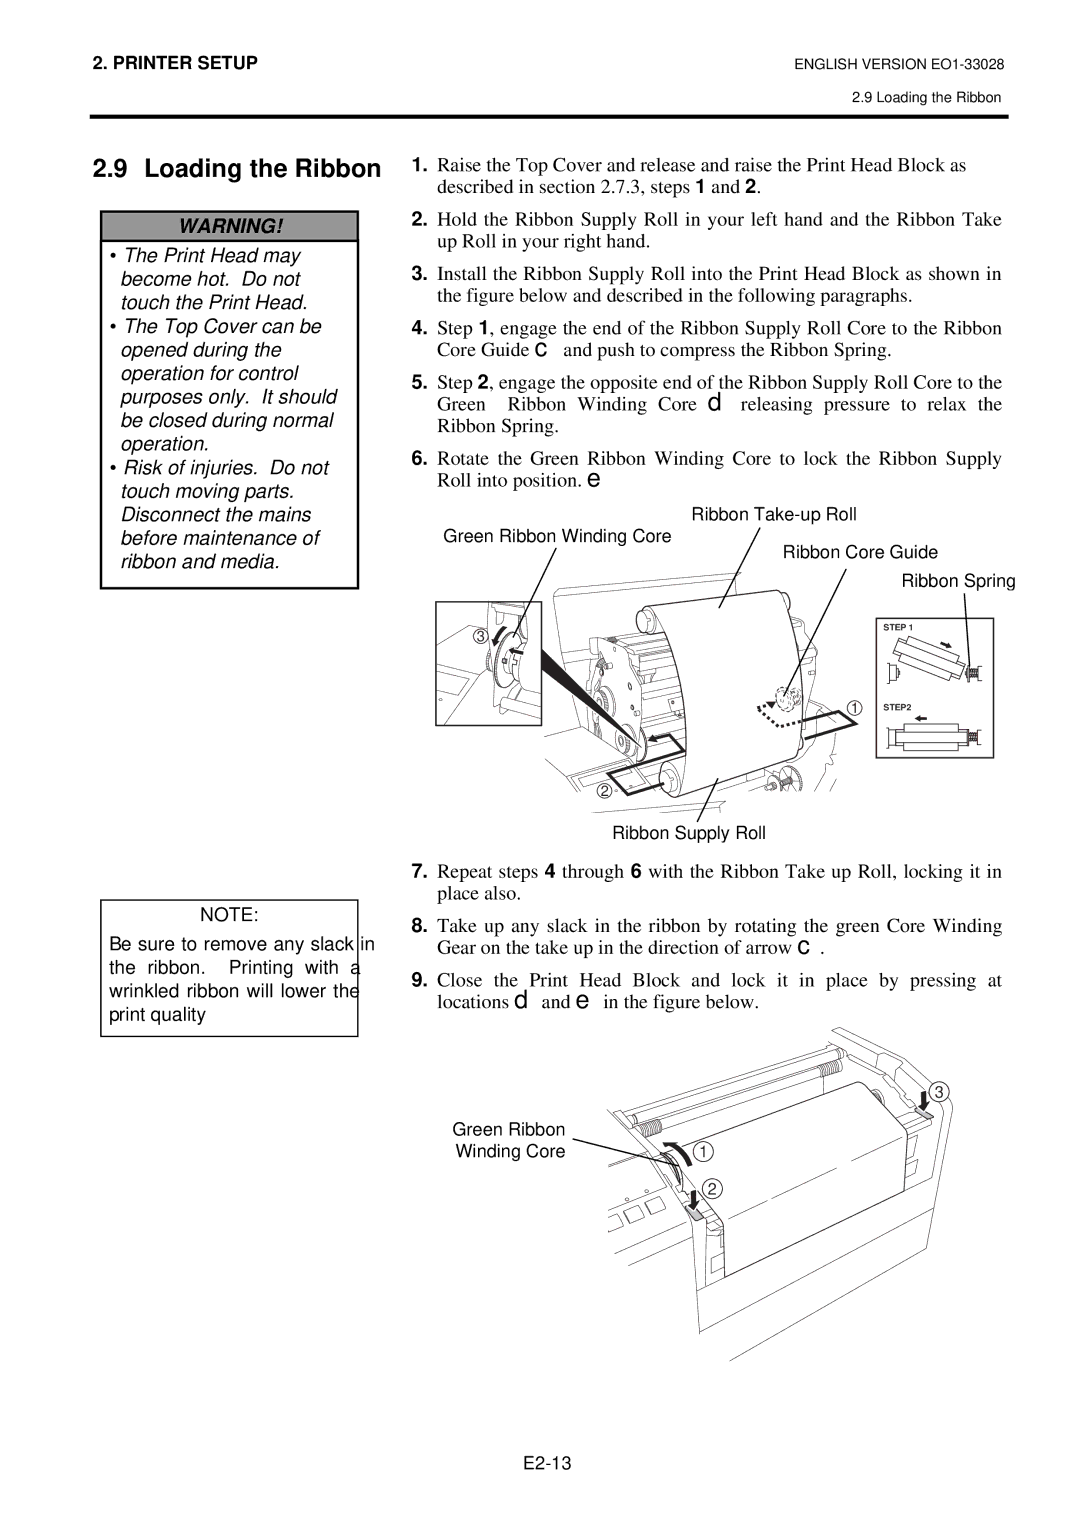
3.Install the Ribbon Supply Roll into the Print Head Block as shown in the figure below and described in the following paragraphs.
4.Step 1, engage the end of the Ribbon Supply Roll Core to the Ribbon Core Guide c and push to compress the Ribbon Spring.
5.Step 2, engage the opposite end of the Ribbon Supply Roll Core to the Green Ribbon Winding Core d releasing pressure to relax the Ribbon Spring.
6.Rotate the Green Ribbon Winding Core to lock the Ribbon Supply Roll into position. e
Ribbon
before maintenance of |
ribbon and media. |
Green Ribbon Winding Core
3 |
Ribbon Core Guide Ribbon Spring
| STEP 1 |
1 | STEP2 |
2
NOTE:
Be sure to remove any slack in the ribbon. Printing with a wrinkled ribbon will lower the print quality
Ribbon Supply Roll
7.Repeat steps 4 through 6 with the Ribbon Take up Roll, locking it in place also.
8.Take up any slack in the ribbon by rotating the green Core Winding Gear on the take up in the direction of arrow c.
9.Close the Print Head Block and lock it in place by pressing at locations d and e in the figure below.
![]() 3
3
Green Ribbon
Winding Core ![]() 1
1
![]() 2
2