BEFORE USING THE NETWORK SCANNER FUNCTION
Storing Groups (Scan to E-mail)
You can send a scanned image to multiple
![]() Note Up to 100 destinations can be stored in one group.
Note Up to 100 destinations can be stored in one group.
1 | Click [Destination] in the menu frame |
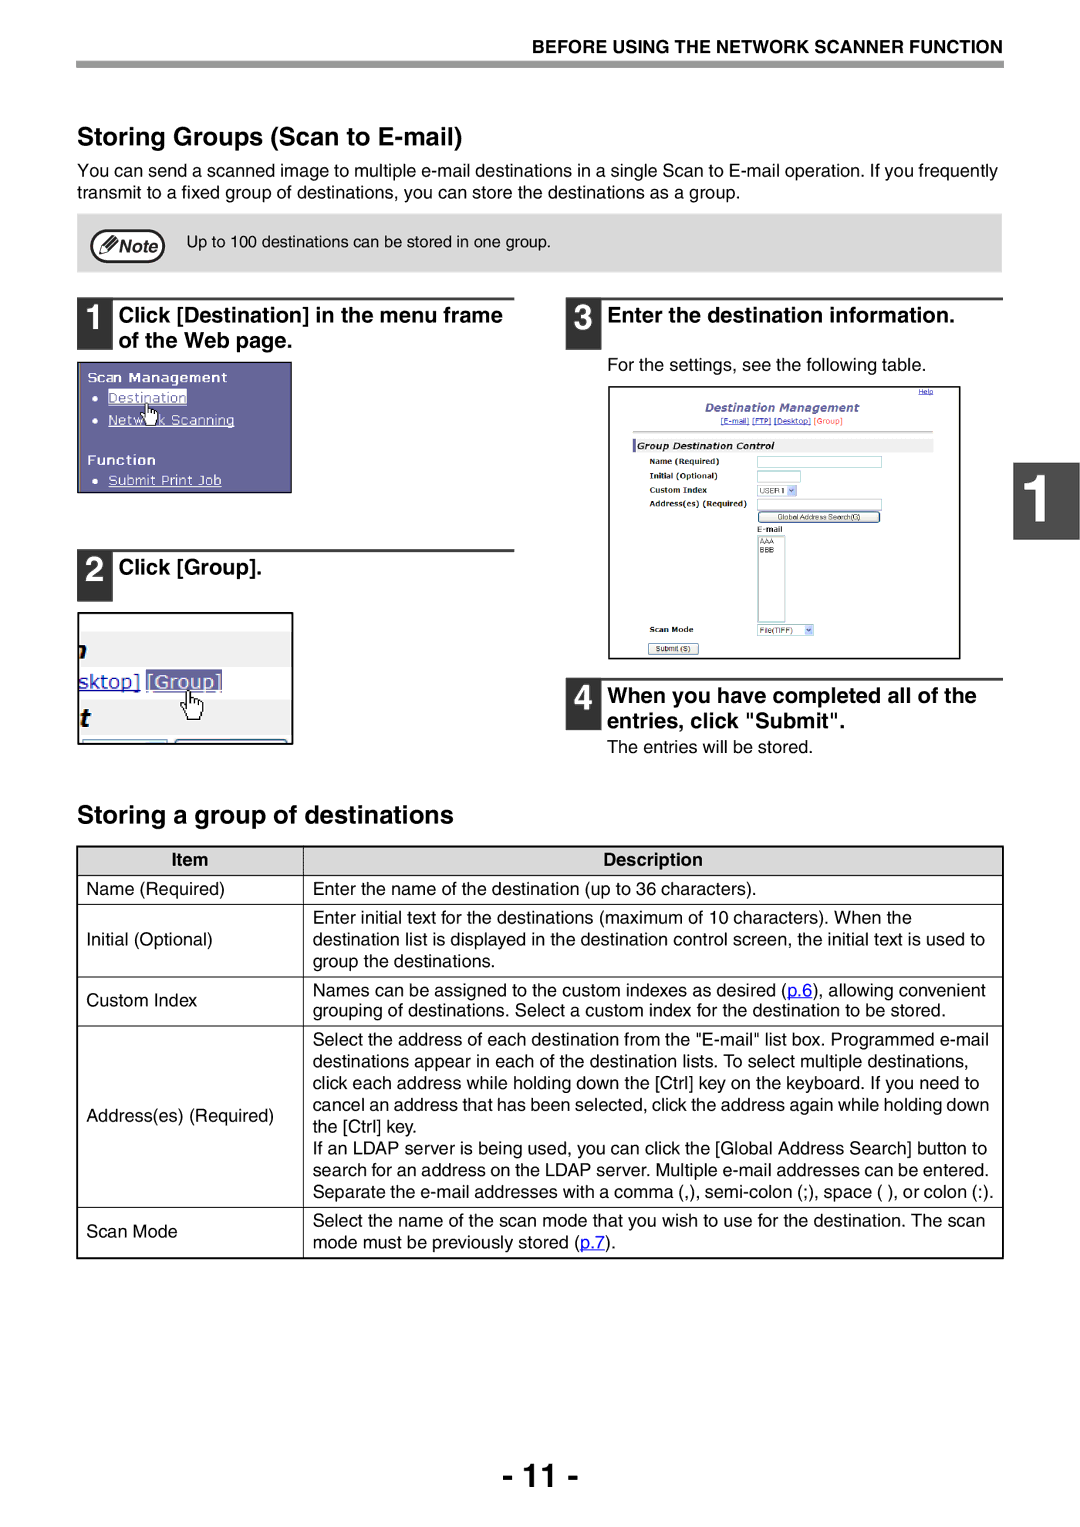
| 3 | Enter the destination information. |
| of the Web page. |
|
|
|
|
|
|
| For the settings, see the following table. |
2 Click [Group].
1
|
| 4 | When you have completed all of the | |
|
|
| entries, click "Submit". | |
|
|
| The entries will be stored. | |
Storing a group of destinations | ||||
|
|
|
| |
Item |
|
| Description | |
Name (Required) | Enter the name of the destination (up to 36 characters). | |||
|
| |||
| Enter initial text for the destinations (maximum of 10 characters). When the | |||
Initial (Optional) | destination list is displayed in the destination control screen, the initial text is used to | |||
| group the destinations. | |||
|
| |||
Custom Index | Names can be assigned to the custom indexes as desired (p.6), allowing convenient | |||
grouping of destinations. Select a custom index for the destination to be stored. | ||||
| ||||
|
| |||
| Select the address of each destination from the | |||
| destinations appear in each of the destination lists. To select multiple destinations, | |||
| click each address while holding down the [Ctrl] key on the keyboard. If you need to | |||
Address(es) (Required) | cancel an address that has been selected, click the address again while holding down | |||
the [Ctrl] key. | ||||
| ||||
| If an LDAP server is being used, you can click the [Global Address Search] button to | |||
| search for an address on the LDAP server. Multiple | |||
| Separate the | |||
|
| |||
Scan Mode | Select the name of the scan mode that you wish to use for the destination. The scan | |||
mode must be previously stored (p.7). | ||||
| ||||
|
|
|
| |
- 11 -