Mounting continued
2 Remote User Interface
(RUI) Mounting
Mount the RUI to the top edge of the mounting bracket with included screws.
Or, if desired, use the included
the cart. Read caution on page 6 concerning 2
Mounting on a Bottom Shelf (Replacing Existing Shelf)
Note: The dimensions of the included replacement shelf are 22 inches x 17.26 inches [55.88 cm. x 43.84 cm.]
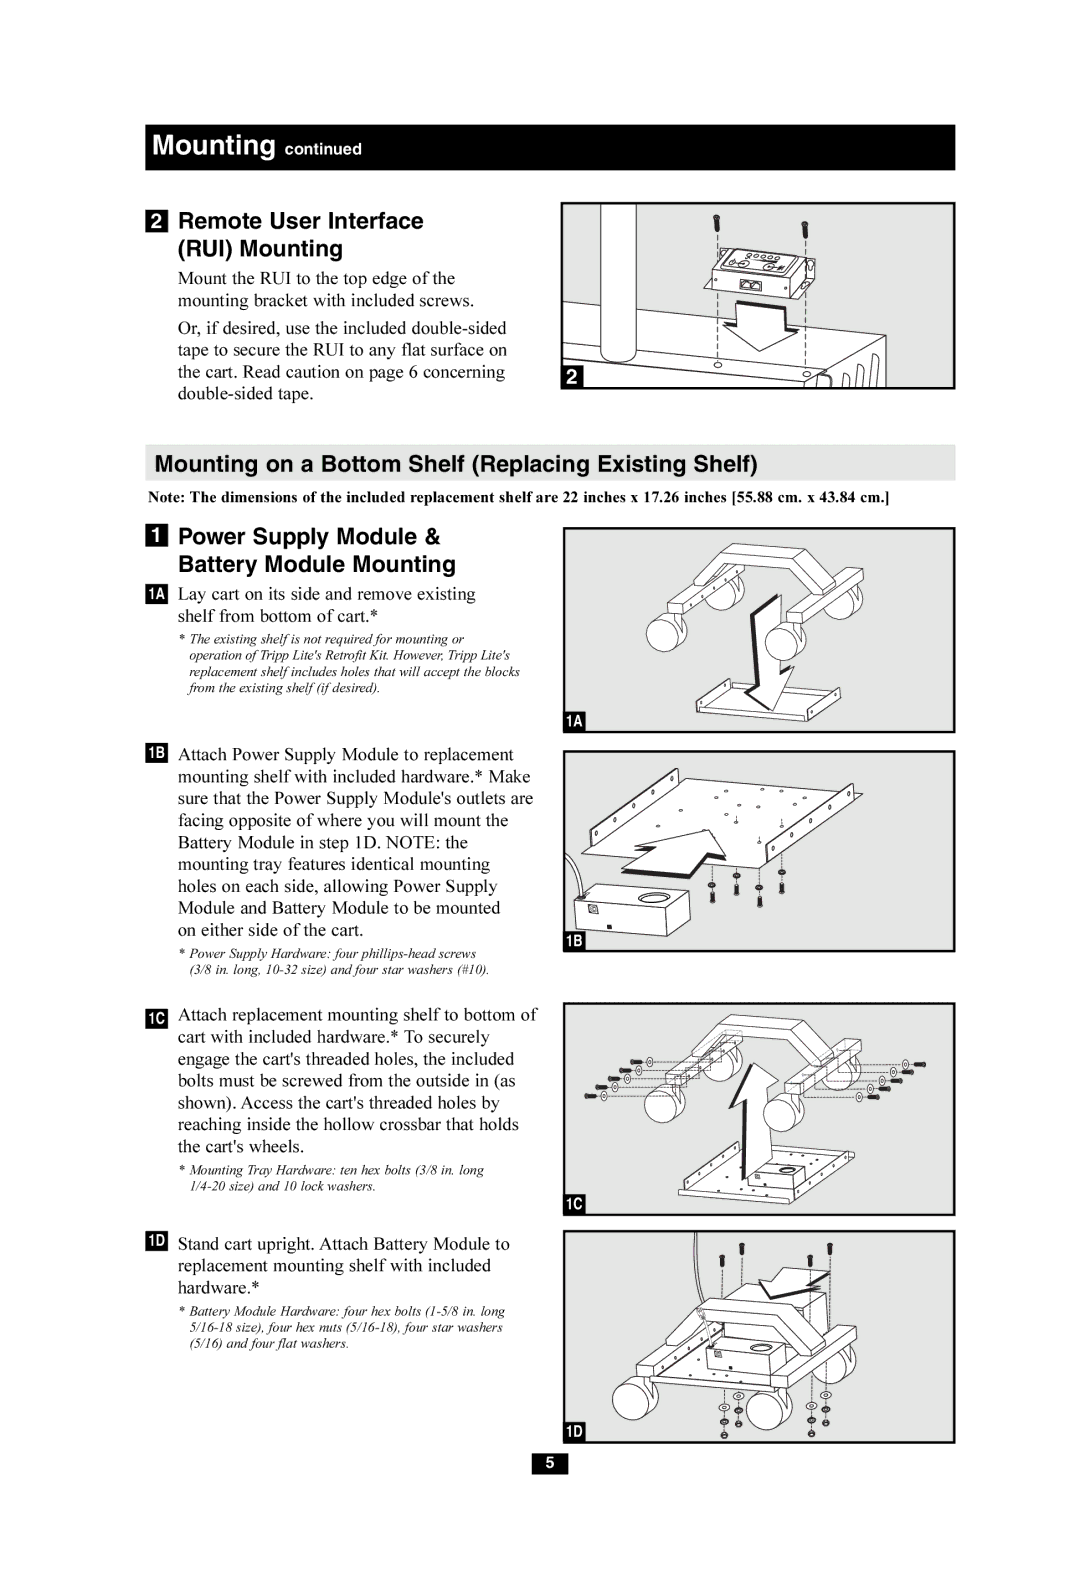
1Power Supply Module & Battery Module Mounting
1A Lay cart on its side and remove existing shelf from bottom of cart.*
*The existing shelf is not required for mounting or operation of Tripp Lite's Retrofit Kit. However, Tripp Lite's replacement shelf includes holes that will accept the blocks from the existing shelf (if desired).
1B Attach Power Supply Module to replacement mounting shelf with included hardware.* Make sure that the Power Supply Module's outlets are facing opposite of where you will mount the Battery Module in step 1D. NOTE: the mounting tray features identical mounting holes on each side, allowing Power Supply Module and Battery Module to be mounted on either side of the cart.
*Power Supply Hardware: four
1C Attach replacement mounting shelf to bottom of cart with included hardware.* To securely engage the cart's threaded holes, the included bolts must be screwed from the outside in (as shown). Access the cart's threaded holes by reaching inside the hollow crossbar that holds the cart's wheels.
*Mounting Tray Hardware: ten hex bolts (3/8 in. long
1D Stand cart upright. Attach Battery Module to replacement mounting shelf with included hardware.*
*Battery Module Hardware: four hex bolts
1A |
1B |
1C |
1D
5