Mounting continued
2Remote User Interface (RUI) Mounting
Mount the Remote User Interface in a variety of positions on any flat surface using included
CAUTION!
![]()
![]() The
The
into place.
Mounting on a Bottom Shelf (Using Existing Shelf)
Note: The diagrams below represent a suggested arrangement of the power supply and battery module. Depending on the size of the existing shelf, you can arrange the power supply and battery module any way you desire as long as you don't cover up any outlets, ports, ventilation fans/slots or other features.
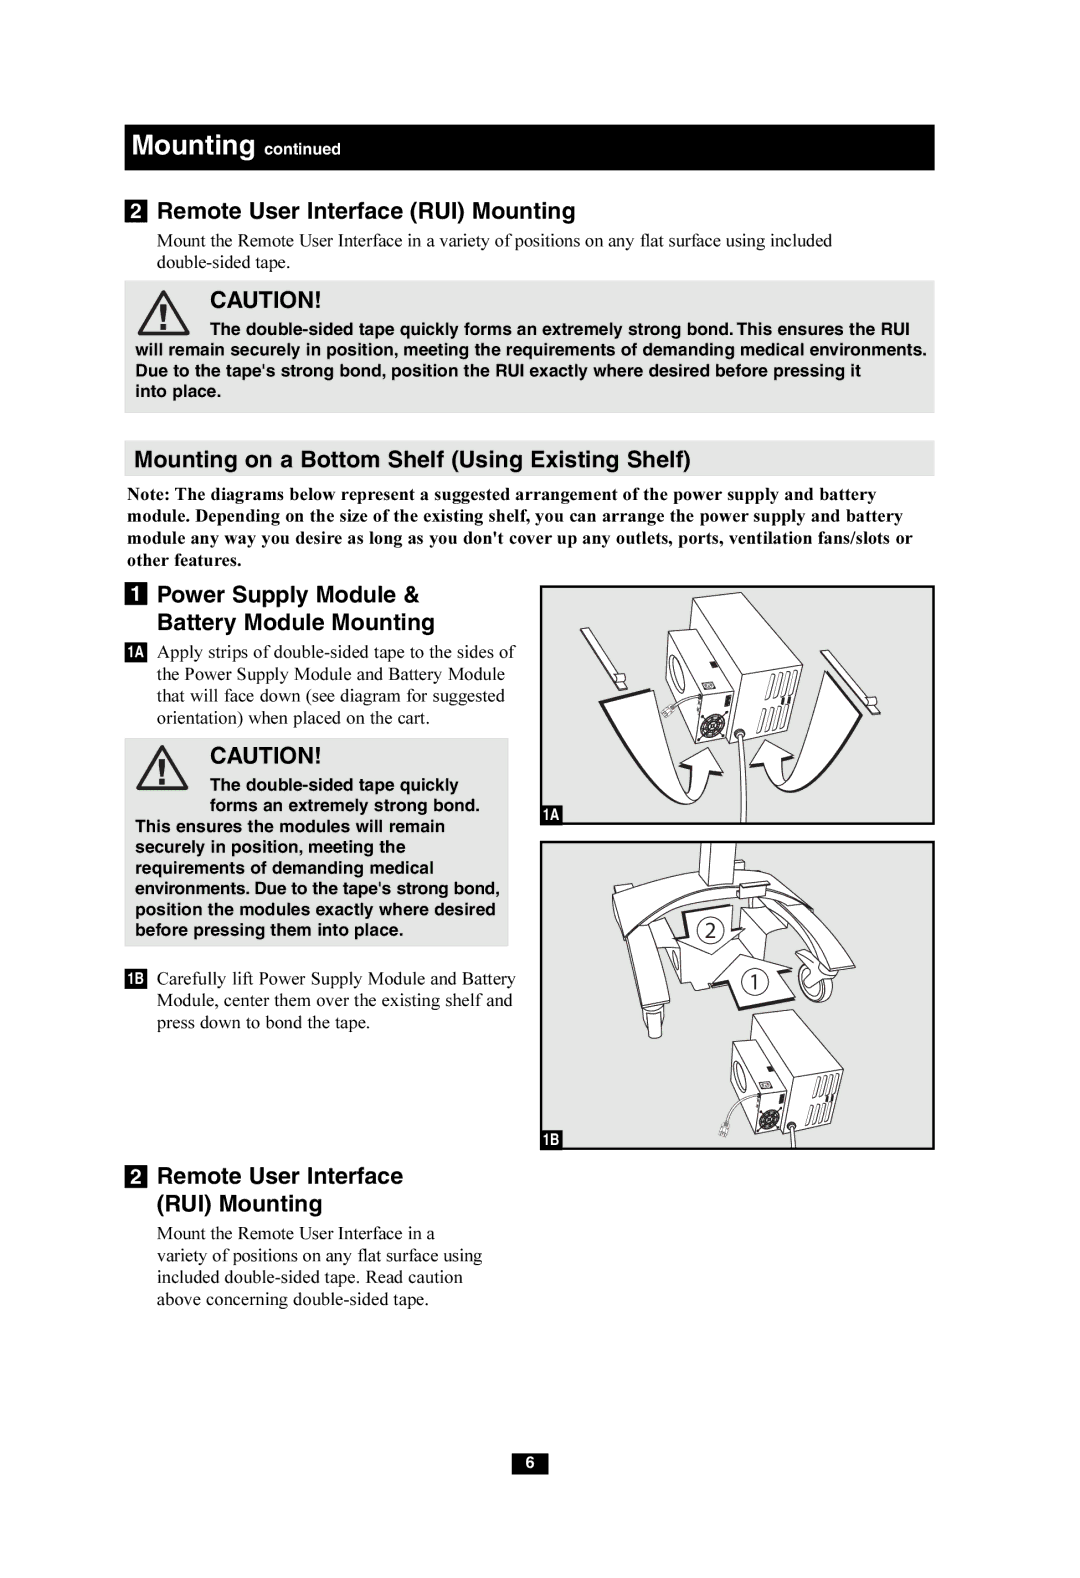
1Power Supply Module & Battery Module Mounting
1A Apply strips of
CAUTION!
The
This ensures the modules will remain securely in position, meeting the requirements of demanding medical environments. Due to the tape's strong bond, position the modules exactly where desired before pressing them into place.
1B Carefully lift Power Supply Module and Battery Module, center them over the existing shelf and press down to bond the tape.
1A |
2
1
1B
2Remote User Interface (RUI) Mounting
Mount the Remote User Interface in a variety of positions on any flat surface using included
6