
SU1000RT2UHV specifications
The Tripp Lite SU1000RT2UHV is a robust and reliable uninterruptible power supply (UPS) designed for critical applications. Ideal for IT infrastructure, telecom systems, and other sensitive electronic devices, this UPS provides seamless power protection and optimized performance. With a 1000VA (volt-ampere) capacity, it offers extended runtime and scalability for various power demands.One of the standout features of the SU1000RT2UHV is its line-interactive topology. This technology enables the UPS to automatically adjust voltage fluctuations, ensuring that connected equipment receives a consistent and clean power supply. This reduces the wear and tear on electronic devices, extending their lifespan. Additionally, the UPS incorporates Automatic Voltage Regulation (AVR), which boosts low voltages and reduces high voltages without switching to battery mode, conserving battery life during minor power problems.
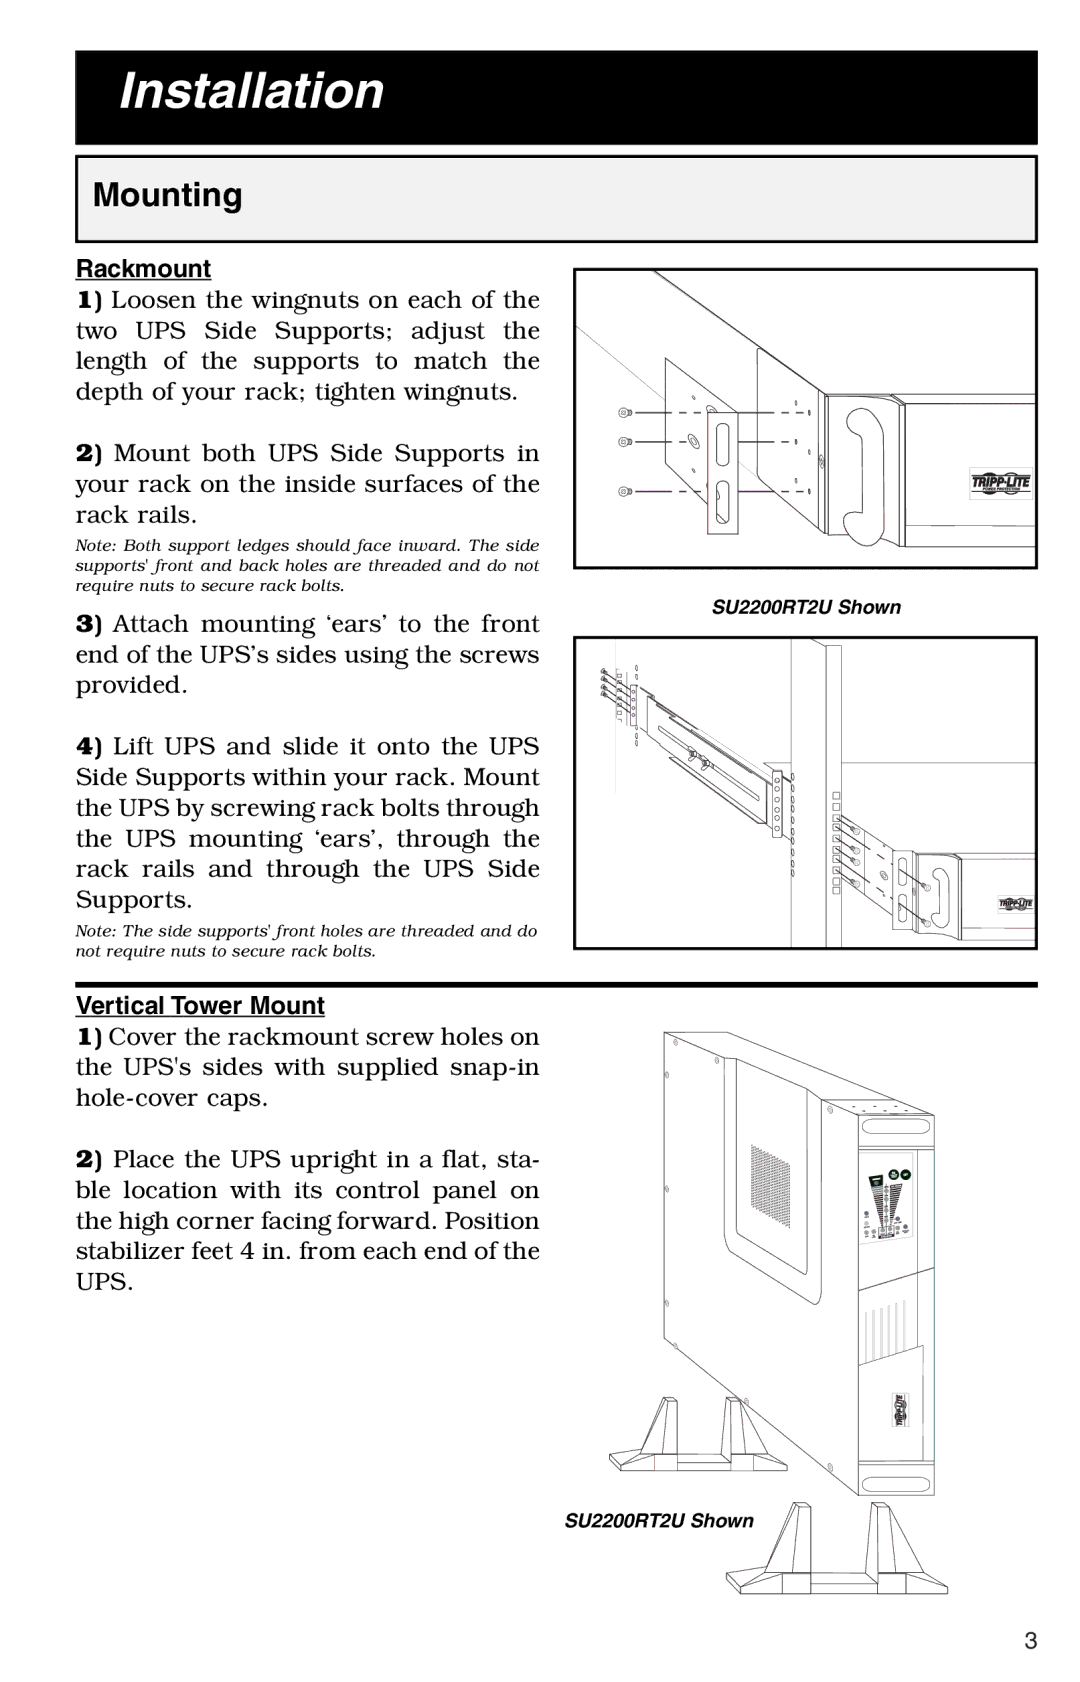
The SU1000RT2UHV is equipped with multiple outlets, including 8 NEMA 5-15R outlets, providing versatility for connecting multiple devices. Its space-saving 2U rackmount design makes it suitable for data centers and server rooms, where rack space is often at a premium. The unit can be easily integrated into existing IT infrastructure, and it supports a wide range of mounting options.
Another key characteristic of the SU1000RT2UHV is its user-friendly LCD display. This display provides real-time information on UPS status, battery capacity, runtime, and input/output voltage, allowing users to monitor performance at a glance. The UPS also features an audible alarm that activates during critical events, providing alerts for power issues such as overloads or low battery.
The SU1000RT2UHV supports hot-swappable batteries, ensuring that users can replace batteries without shutting down connected equipment. This feature is especially important in environments where downtime is not an option. The UPS is compatible with Tripp Lite’s PowerAlert software, which allows for advanced monitoring and management of power resources, further optimizing performance.
For connectivity, the SU1000RT2UHV offers USB and serial ports, enabling users to connect the UPS to a computer or network for monitoring and management. This connectivity is essential for integrating the UPS into a larger power management ecosystem.
In summary, the Tripp Lite SU1000RT2UHV combines advanced technologies and features with a user-centric design, providing essential power protection for critical systems. Its reliability, scalability, and comprehensive monitoring capabilities make it an invaluable asset for any organization relying on uninterrupted power supply.