Quick Installation
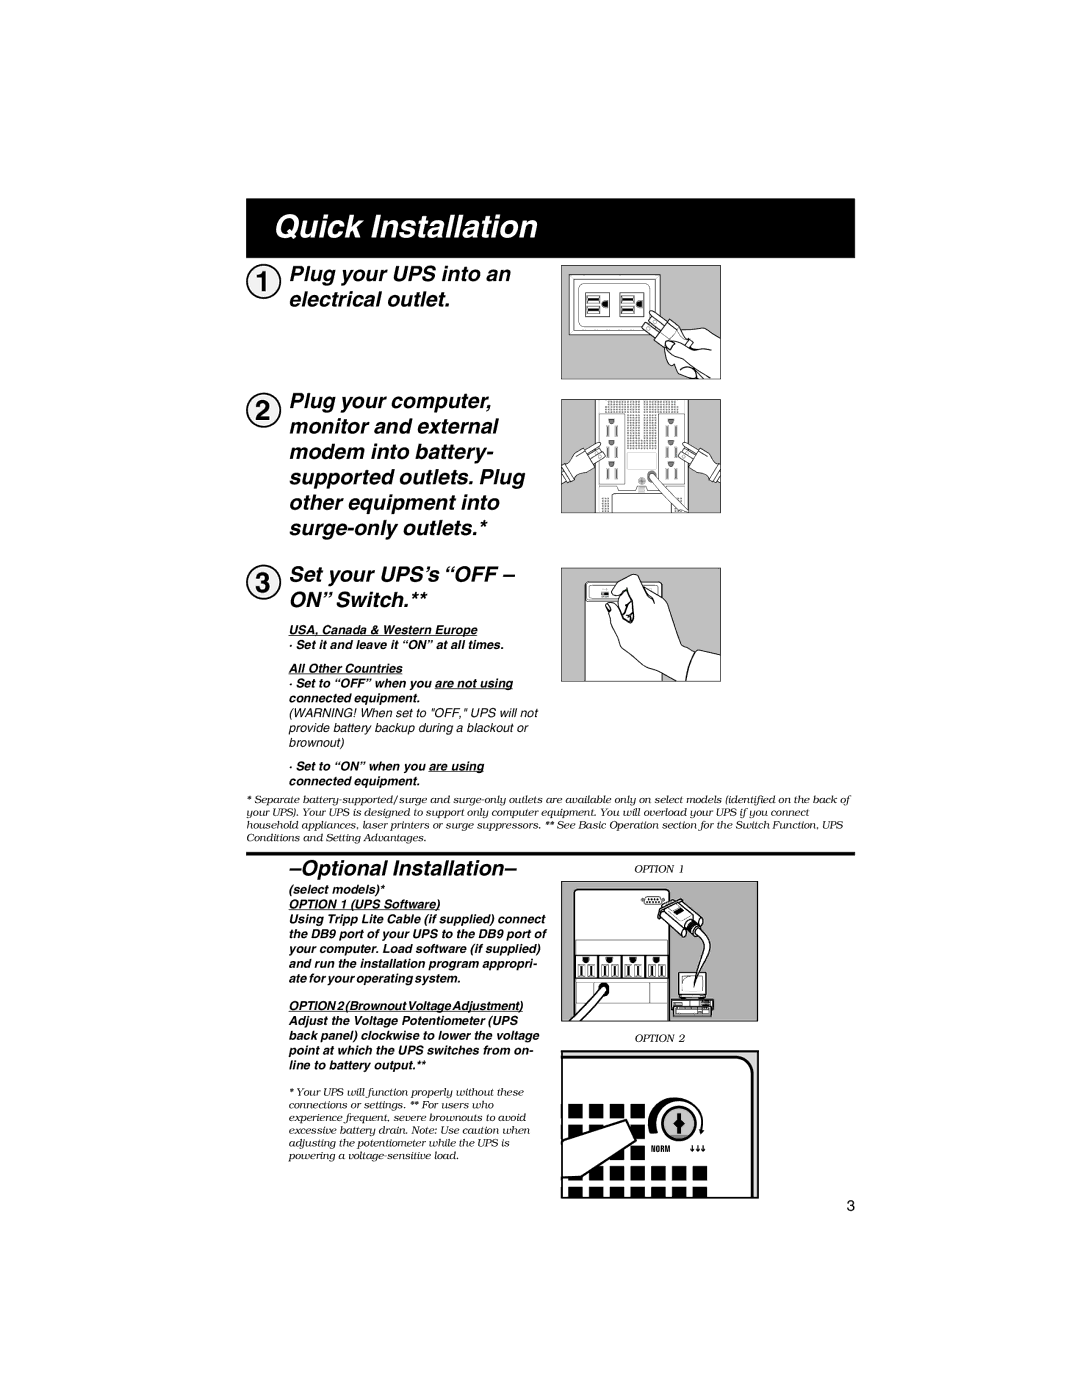
1 Plug your UPS into an electrical outlet.
2 Plug your computer, monitor and external modem into battery- supported outlets. Plug other equipment into
3 | Set your UPS’s “OFF – |
| ON” Switch.** |
USA, Canada & Western Europe
· Set it and leave it “ON” at all times.
All Other Countries
·Set to “OFF” when you are not using connected equipment.
(WARNING! When set to "OFF," UPS will not provide battery backup during a blackout or brownout)
·Set to “ON” when you are using connected equipment.
*Separate
| OPTION 1 |
(select models)*
OPTION 1 (UPS Software)
Using Tripp Lite Cable (if supplied) connect the DB9 port of your UPS to the DB9 port of your computer. Load software (if supplied) and run the installation program appropri- ate for your operating system.
OPTION 2 (Brownout Voltage Adjustment) |
| |
Adjust the Voltage Potentiometer (UPS |
| |
back panel) clockwise to lower the voltage | OPTION 2 | |
point at which the UPS switches from on- |
| |
line to battery output.** |
| |
* Your UPS will function properly without these |
| |
connections or settings. ** For users who |
| |
experience frequent, severe brownouts to avoid |
| |
excessive battery drain. Note: Use caution when |
| |
adjusting the potentiometer while the UPS is | NORM | |
powering a | ||
|
3