Hard Drive Installation Instructions
1.Unscrew the four screws on the enclosure and remove the upper case from the housing.
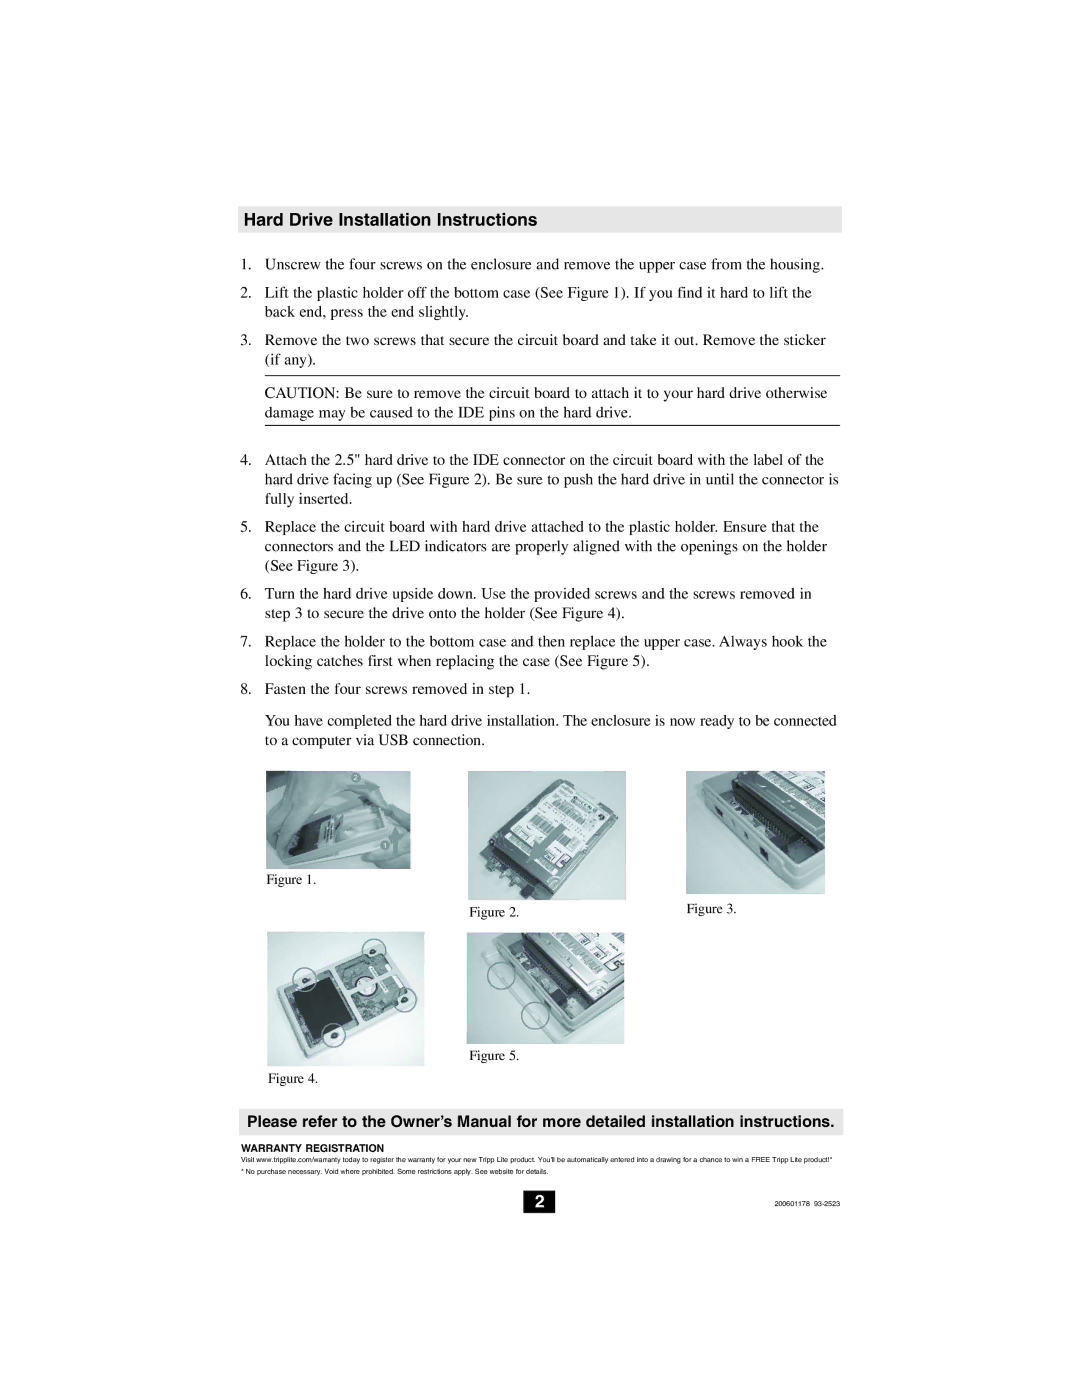
2.Lift the plastic holder off the bottom case (See Figure 1). If you find it hard to lift the back end, press the end slightly.
3.Remove the two screws that secure the circuit board and take it out. Remove the sticker (if any).
CAUTION: Be sure to remove the circuit board to attach it to your hard drive otherwise damage may be caused to the IDE pins on the hard drive.
4.Attach the 2.5" hard drive to the IDE connector on the circuit board with the label of the hard drive facing up (See Figure 2). Be sure to push the hard drive in until the connector is fully inserted.
5.Replace the circuit board with hard drive attached to the plastic holder. Ensure that the connectors and the LED indicators are properly aligned with the openings on the holder (See Figure 3).
6.Turn the hard drive upside down. Use the provided screws and the screws removed in step 3 to secure the drive onto the holder (See Figure 4).
7.Replace the holder to the bottom case and then replace the upper case. Always hook the locking catches first when replacing the case (See Figure 5).
8.Fasten the four screws removed in step 1.
You have completed the hard drive installation. The enclosure is now ready to be connected to a computer via USB connection.
Figure 1.
Figure 2. | Figure 3. |
Figure 5.
Figure 4.
Please refer to the Owner’s Manual for more detailed installation instructions.
WARRANTY REGISTRATION
Visit www.tripplite.com/warranty today to register the warranty for your new Tripp Lite product. You'll be automatically entered into a drawing for a chance to win a FREE Tripp Lite product!* * No purchase necessary. Void where prohibited. Some restrictions apply. See website for details.
2 | 200601178 |