Assembly & Set-Up
3
Contents of Carton
• | One Electric Snow Thrower | • | One Upper Handle | • | One Mid Handle |
• | One Chute Assembly | • | One Electric Snow Thrower | • | One Product Registration Card |
|
|
| Operator’s Manual |
|
|
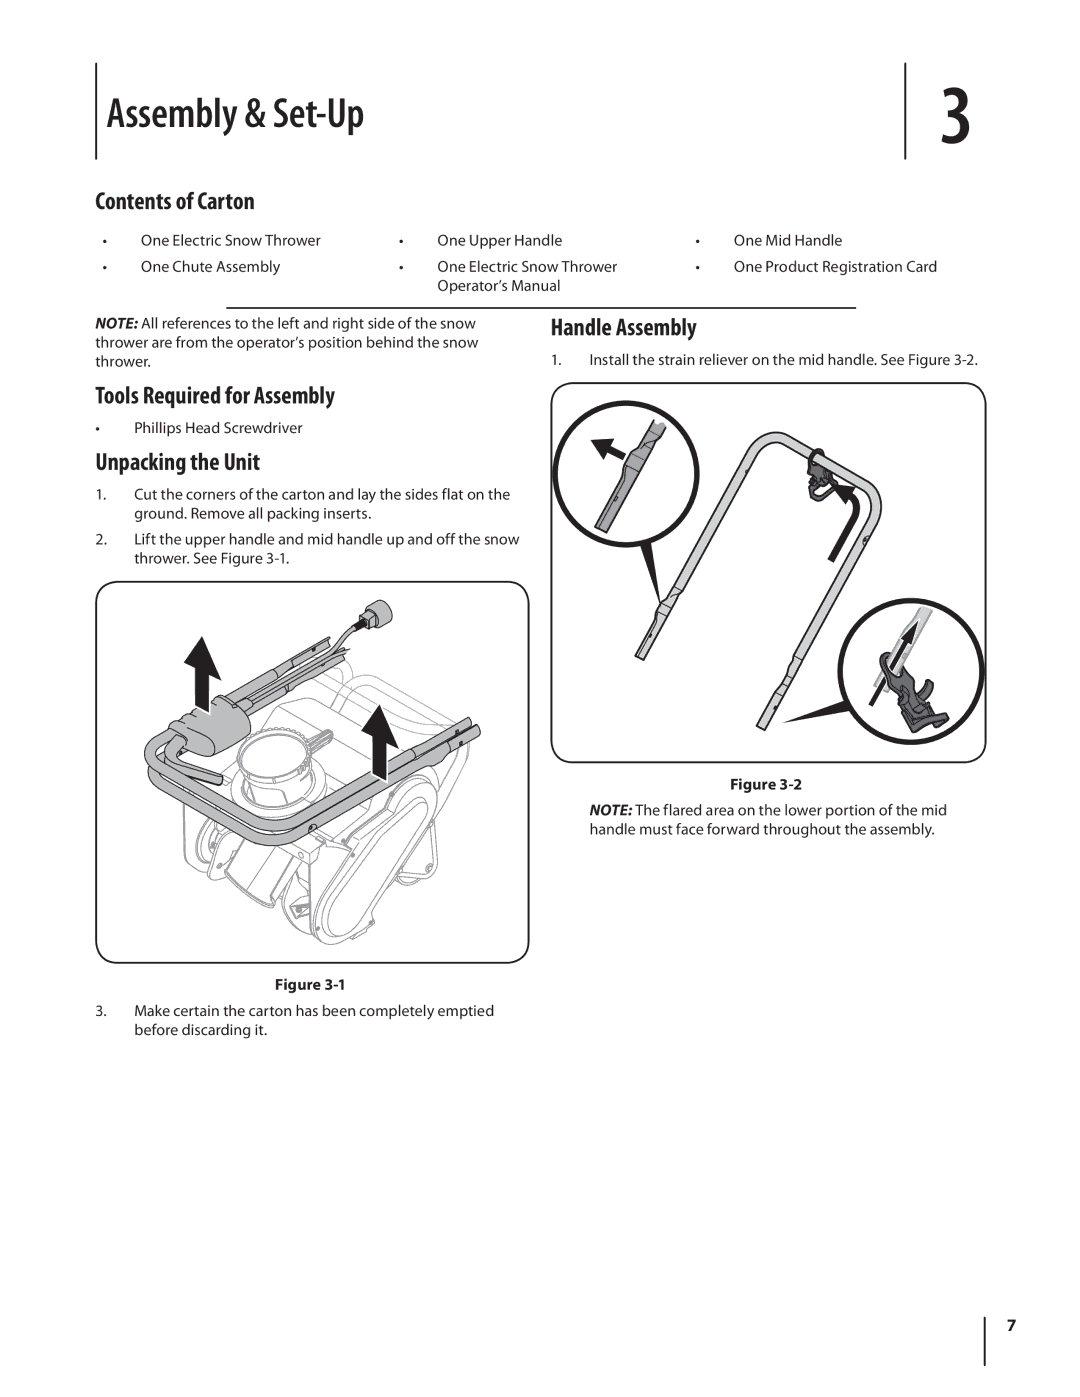
NOTE: All references to the left and right side of the snow | Handle Assembly |
thrower are from the operator’s position behind the snow | 1. Install the strain reliever on the mid handle. See Figure |
thrower. | |
Tools Required for Assembly |
|
•Phillips Head Screwdriver
Unpacking the Unit
1. Cut the corners of the carton and lay the sides flat on the ground. Remove all packing inserts.
2. Lift the upper handle and mid handle up and off the snow thrower. See Figure
Figure
NOTE: The flared area on the lower portion of the mid handle must face forward throughout the assembly.
Figure
3.Make certain the carton has been completely emptied before discarding it.
7