2.Attach the left corner trim to the mantel assembly using one (1)
3.Attach the right corner trim to the mantel assembly using one (1)
12)
4.Attach the center trim to the mantel as- sembly between the left and right ends using one (1)
5.Using four (4) flat washers and four (4)
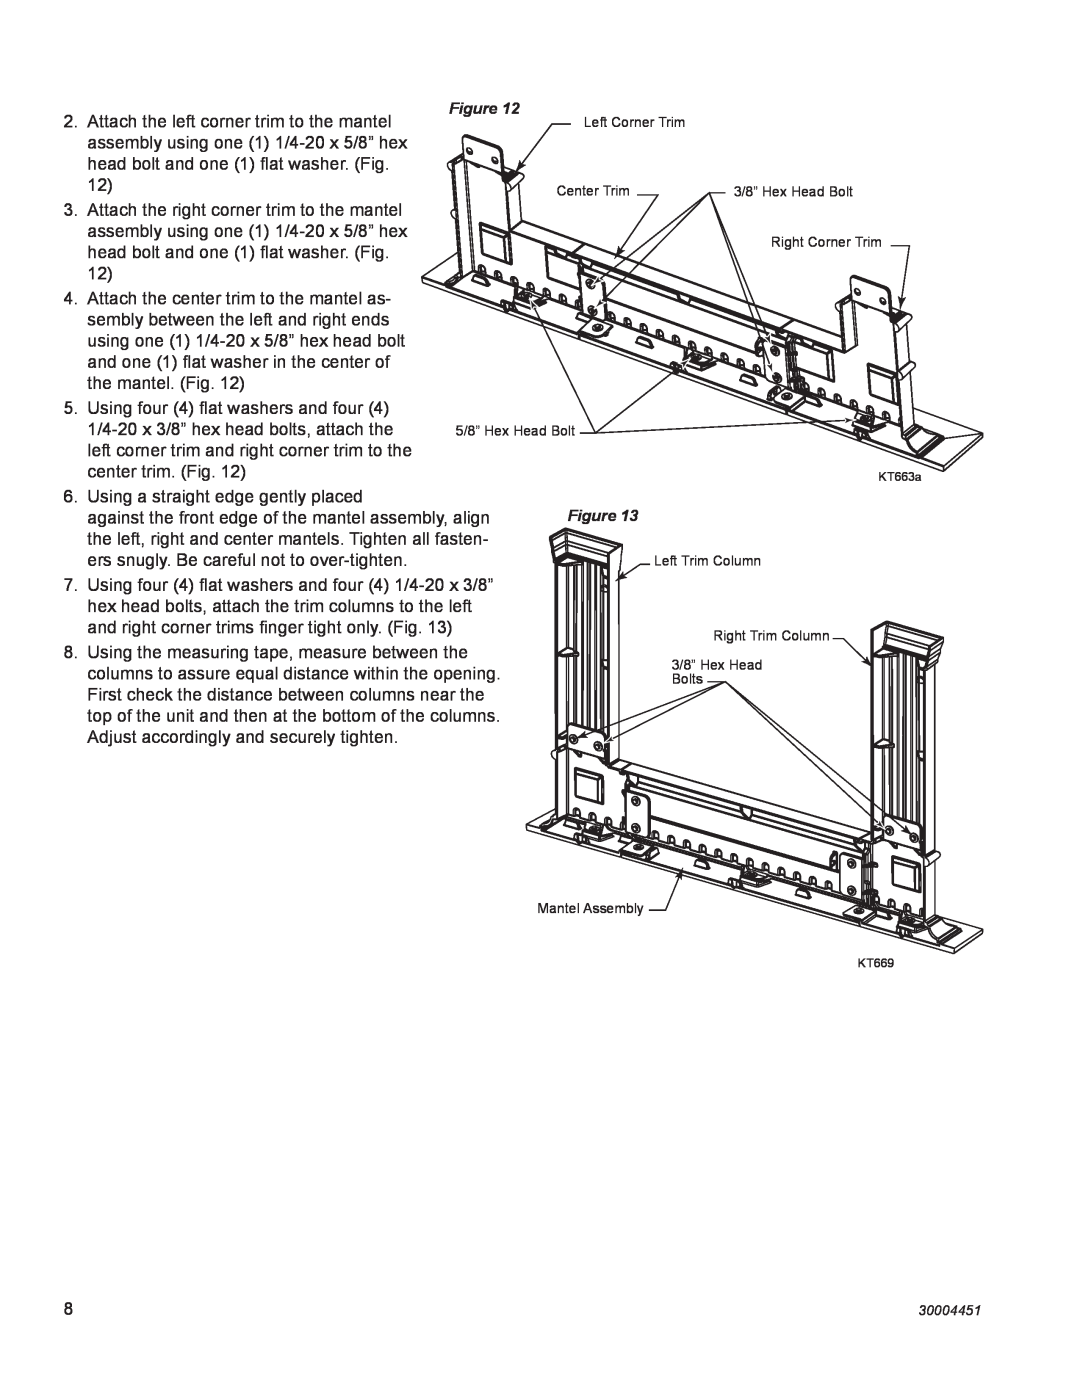
Figure 12
Left Corner Trim
Center Trim | 3/8” Hex Head Bolt |
Right Corner Trim
5/8” Hex Head Bolt
KT663a
6.Using a straight edge gently placed
against the front edge of the mantel assembly, align the left, right and center mantels. Tighten all fasten- ers snugly. Be careful not to
7.Using four (4) flat washers and four (4)
8.Using the measuring tape, measure between the columns to assure equal distance within the opening. First check the distance between columns near the top of the unit and then at the bottom of the columns. Adjust accordingly and securely tighten.
Figure 13
Left Trim Column
Right Trim Column
3/8” Hex Head
Bolts
Mantel Assembly ![]()
KT669
8 | 30004451 |