![]()
![]() ADJPILOT
ADJPILOT![]()
![]()
![]()
H
I
ST172
Fig. 17 Remove the valve cover plate.
![]()
![]() ADJPILOT
ADJPILOT![]()
![]()
![]()
ON
O H
I
OFF
ST173
Fig. 18 Flexible gas line connection.
Pilot | On/Off |
|
|
|
Control |
|
|
| |
Adjustment | Knob |
|
|
|
Screw |
|
| Regulator | |
|
|
| ||
PILOT ADJ |
|
|
|
|
TPTH |
| ON | L | O H |
|
|
| I | |
TP | PILOT |
|
|
|
|
|
|
| |
| OFF |
|
|
|
TH |
|
|
|
|
Pressure Tap | Piezo |
|
| |
|
| Ignitor |
| HV100 |
Fig. 19 The gas control valve includes a captured screw- type pressure test point. A pressure test point upstream from the control valve is not required.
Vermont Castings Radiance
Install the Logs
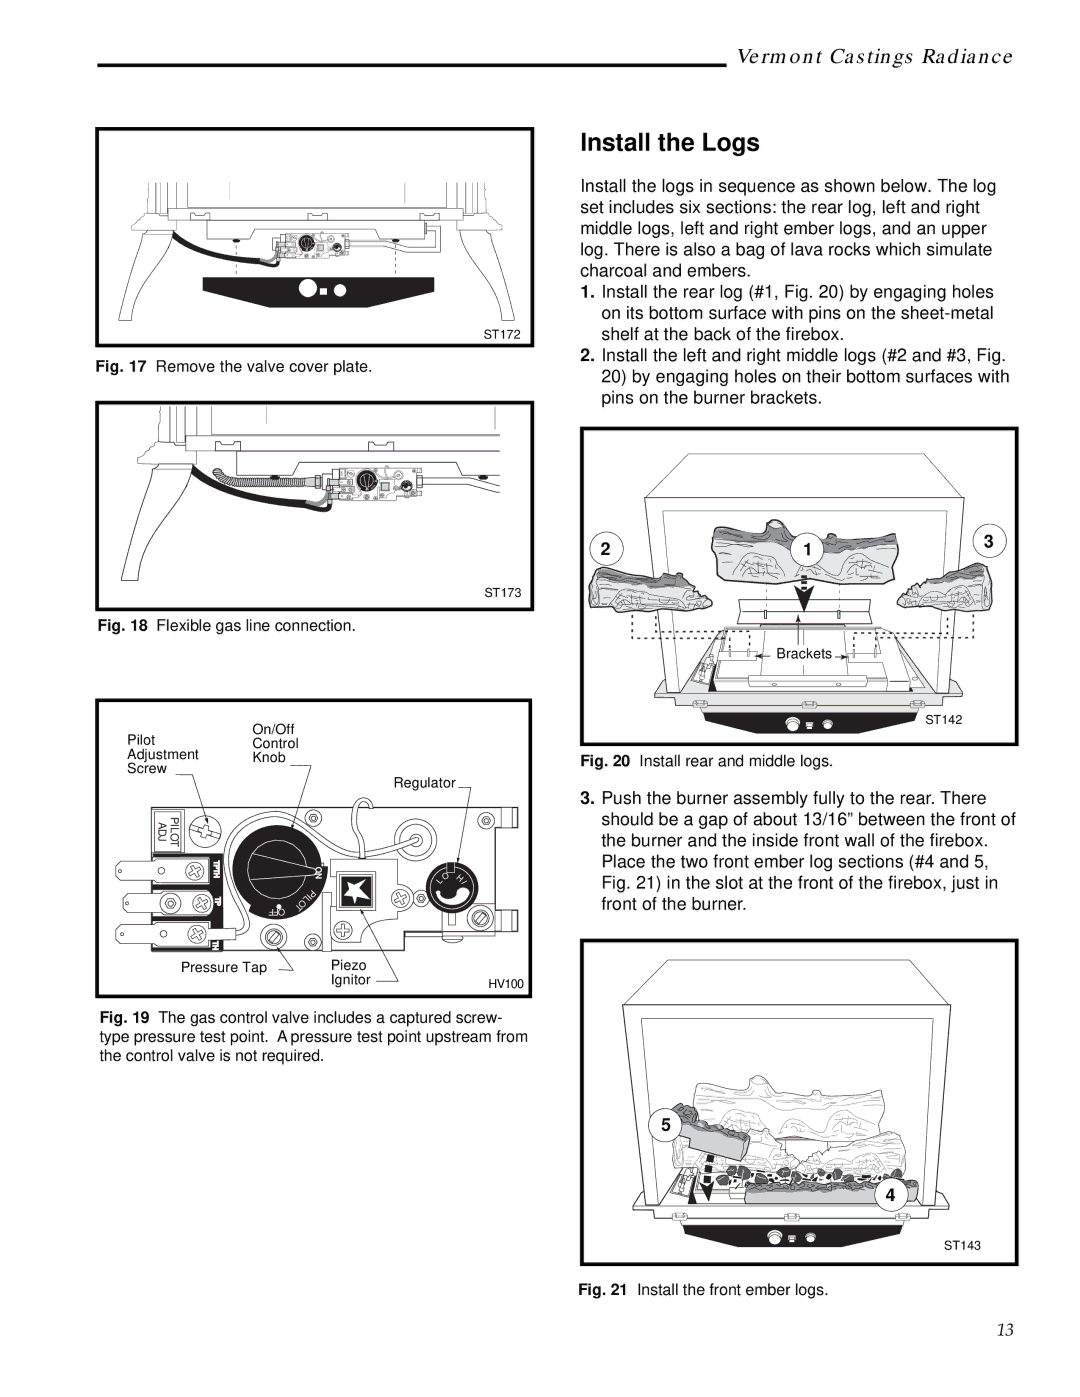
Install the logs in sequence as shown below. The log set includes six sections: the rear log, left and right middle logs, left and right ember logs, and an upper log. There is also a bag of lava rocks which simulate charcoal and embers.
1.Install the rear log (#1, Fig. 20) by engaging holes on its bottom surface with pins on the
2.Install the left and right middle logs (#2 and #3, Fig. 20) by engaging holes on their bottom surfaces with pins on the burner brackets.
2 | 1 | 3 |
| ||
| Brackets |
|
|
| ST142 |
Fig. 20 | Install rear and middle logs. |
|
3.Push the burner assembly fully to the rear. There should be a gap of about 13/16” between the front of the burner and the inside front wall of the firebox. Place the two front ember log sections (#4 and 5, Fig. 21) in the slot at the front of the firebox, just in front of the burner.
| 5 |
| 4 |
| ST143 |
Fig. 21 | Install the front ember logs. |
| 13 |