PRESSURE REGULATOR INSTALLATION
STEP 1
UNLOCK
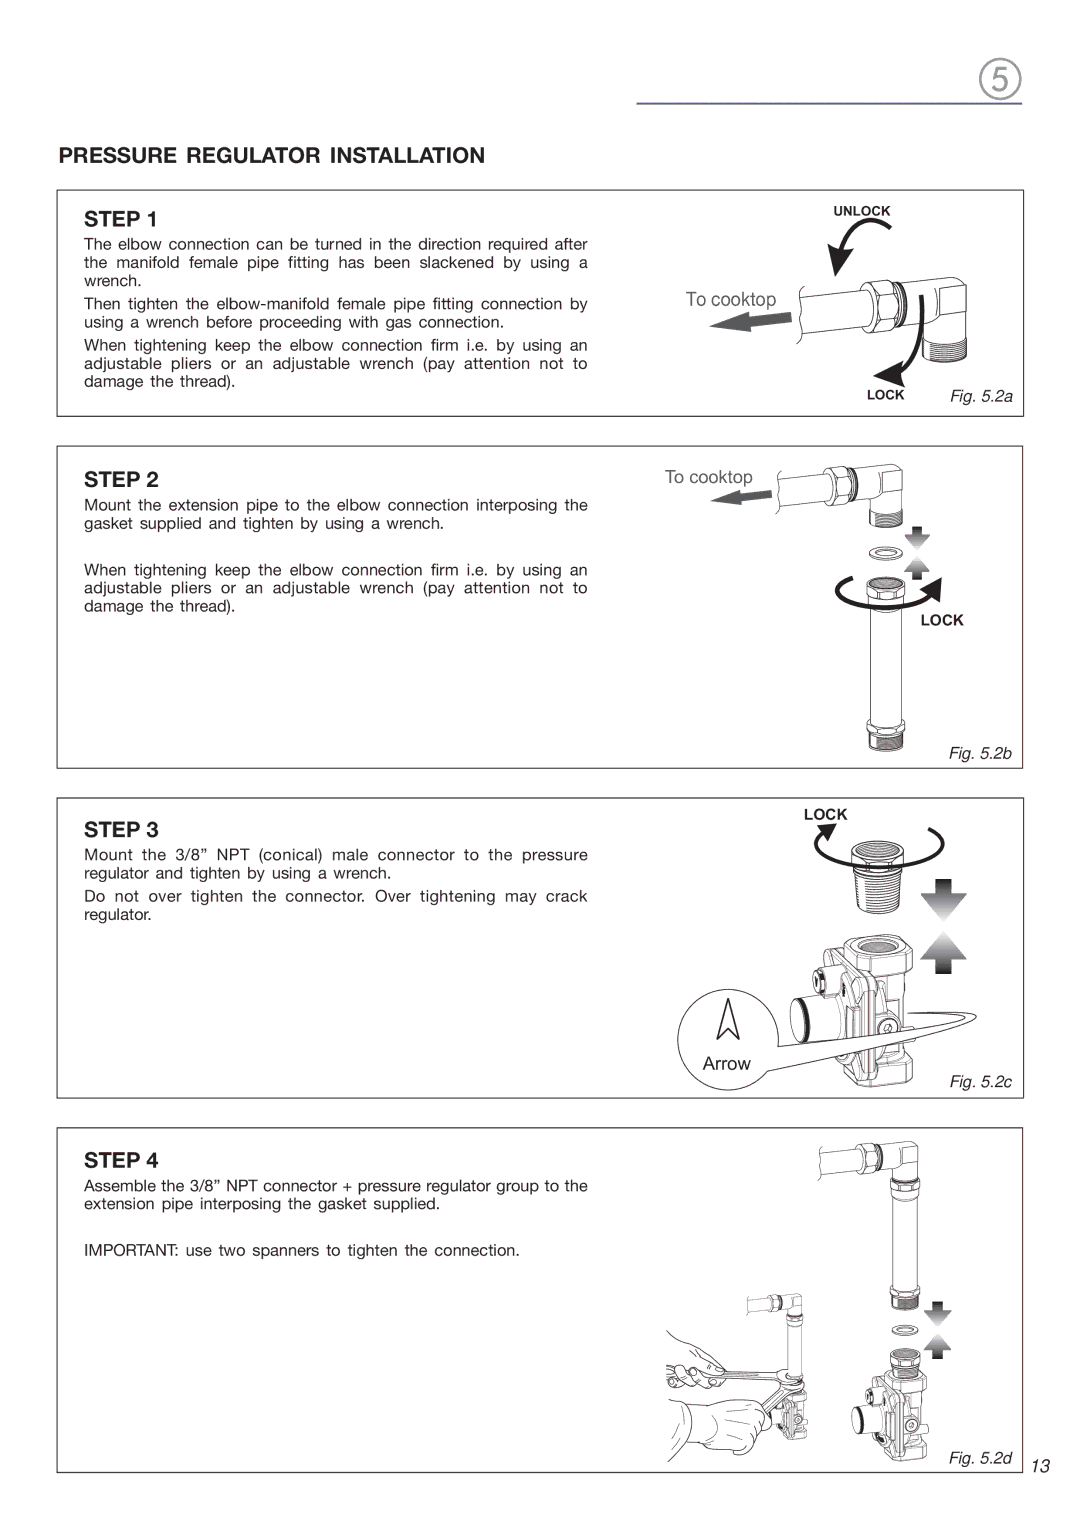
The elbow connection can be turned in the direction required after the manifold female pipe fitting has been slackened by using a wrench.
Then tighten the
When tightening keep the elbow connection firm i.e. by using an adjustable pliers or an adjustable wrench (pay attention not to damage the thread).
To cooktop
LOCK | Fig. 5.2a |
STEP 2
Mount the extension pipe to the elbow connection interposing the gasket supplied and tighten by using a wrench.
When tightening keep the elbow connection firm i.e. by using an adjustable pliers or an adjustable wrench (pay attention not to damage the thread).
To cooktop
LOCK
Fig. 5.2b
LOCK
STEP 3
Mount the 3/8” NPT (conical) male connector to the pressure regulator and tighten by using a wrench.
Do not over tighten the connector. Over tightening may crack regulator.
Arrow
Fig. 5.2c
STEP 4
Assemble the 3/8” NPT connector + pressure regulator group to the extension pipe interposing the gasket supplied.
IMPORTANT: use two spanners to tighten the connection.
