AUTO Menu (continued)
Item |
| Description |
|
| |
MESSAGE | Select the TURN ON or the TURN OFF using the S/T buttons.: | |
| TURN ON | TURN OFF |
| When the TURN ON is selected, the following message function | |
| works. |
|
| The message of the “AUTO IN PROGRESS” for the auto | |
| adjustment. |
|
| The message of the “NO INPUT IS DETECTED” | |
| The message of the “SYNC IS OUT OF RANGE” | |
| The message of the “Searching…” | |
| The message of the “Detecting…” | |
| The indication of the input signal by input change. | |
| The indication of the aspect ratio by changing the aspect ratio. | |
| The indication of “FOCUS” by adjusting the focus. | |
|
| |
RESET | Select the EXECUTE using the S button to reset the SCREEN menu | |
| items.: | CANCEL |
| EXECUTE | |
| The items of the SCREEN menu are collectively returned to the initial | |
| setting. |
|
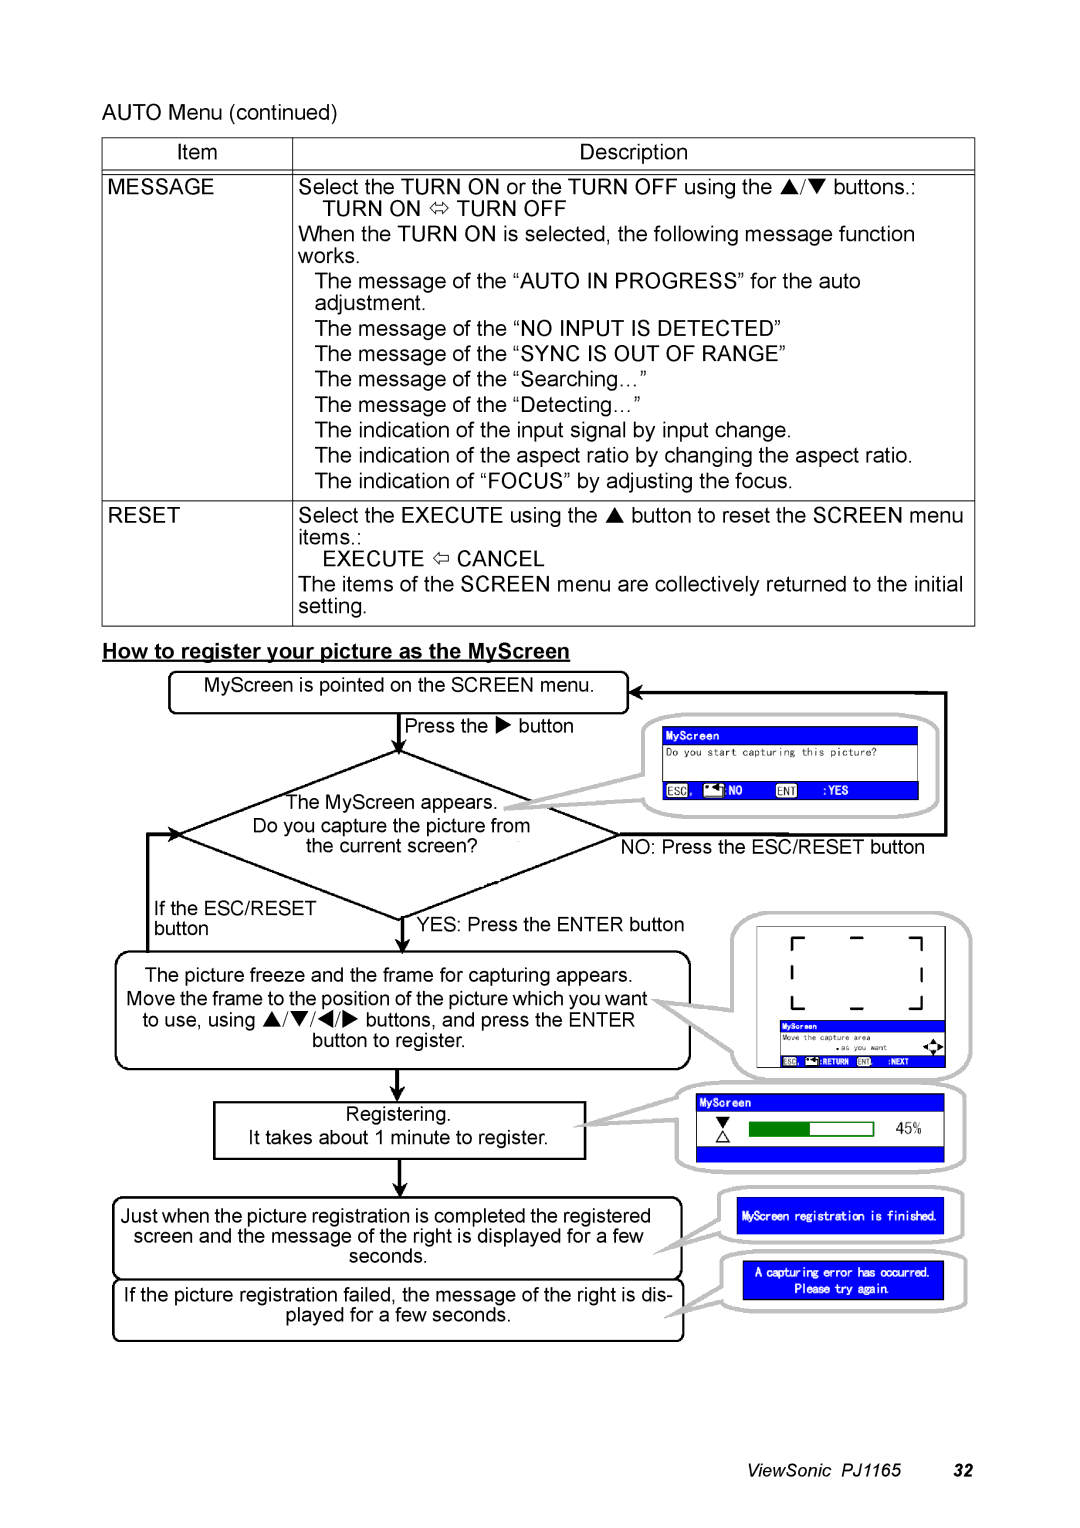
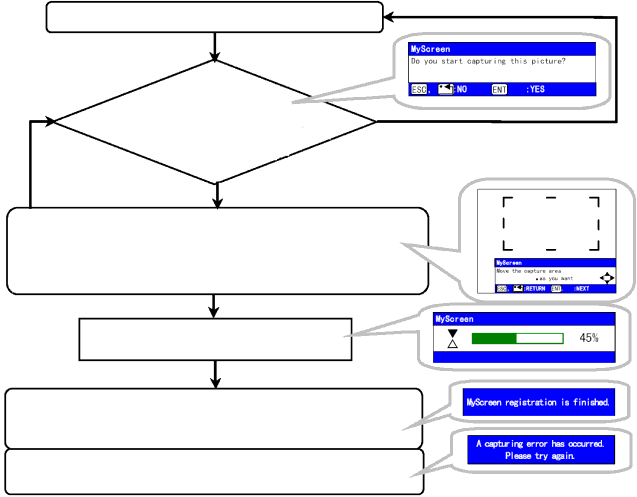
How to register your picture as the MyScreen | ||
MyScreen is pointed on the SCREEN menu.
Press the X button
| The MyScreen appears. |
|
| Do you capture the picture from | NO: Press the ESC/RESET button |
| the current screen? | |
If the ESC/RESET |
| |
button | YES: Press the ENTER button | |
The picture freeze and the frame for capturing appears. Move the frame to the position of the picture which you want to use, using S/T/W/X buttons, and press the ENTER button to register.
Registering.
It takes about 1 minute to register.
Just when the picture registration is completed the registered screen and the message of the right is displayed for a few seconds.
If the picture registration failed, the message of the right is dis-
played for a few seconds.
ViewSonic PJ1165 | 32 |