ADJUSTING PICTURE
For TV
Accessing Picture Adjustment Mode
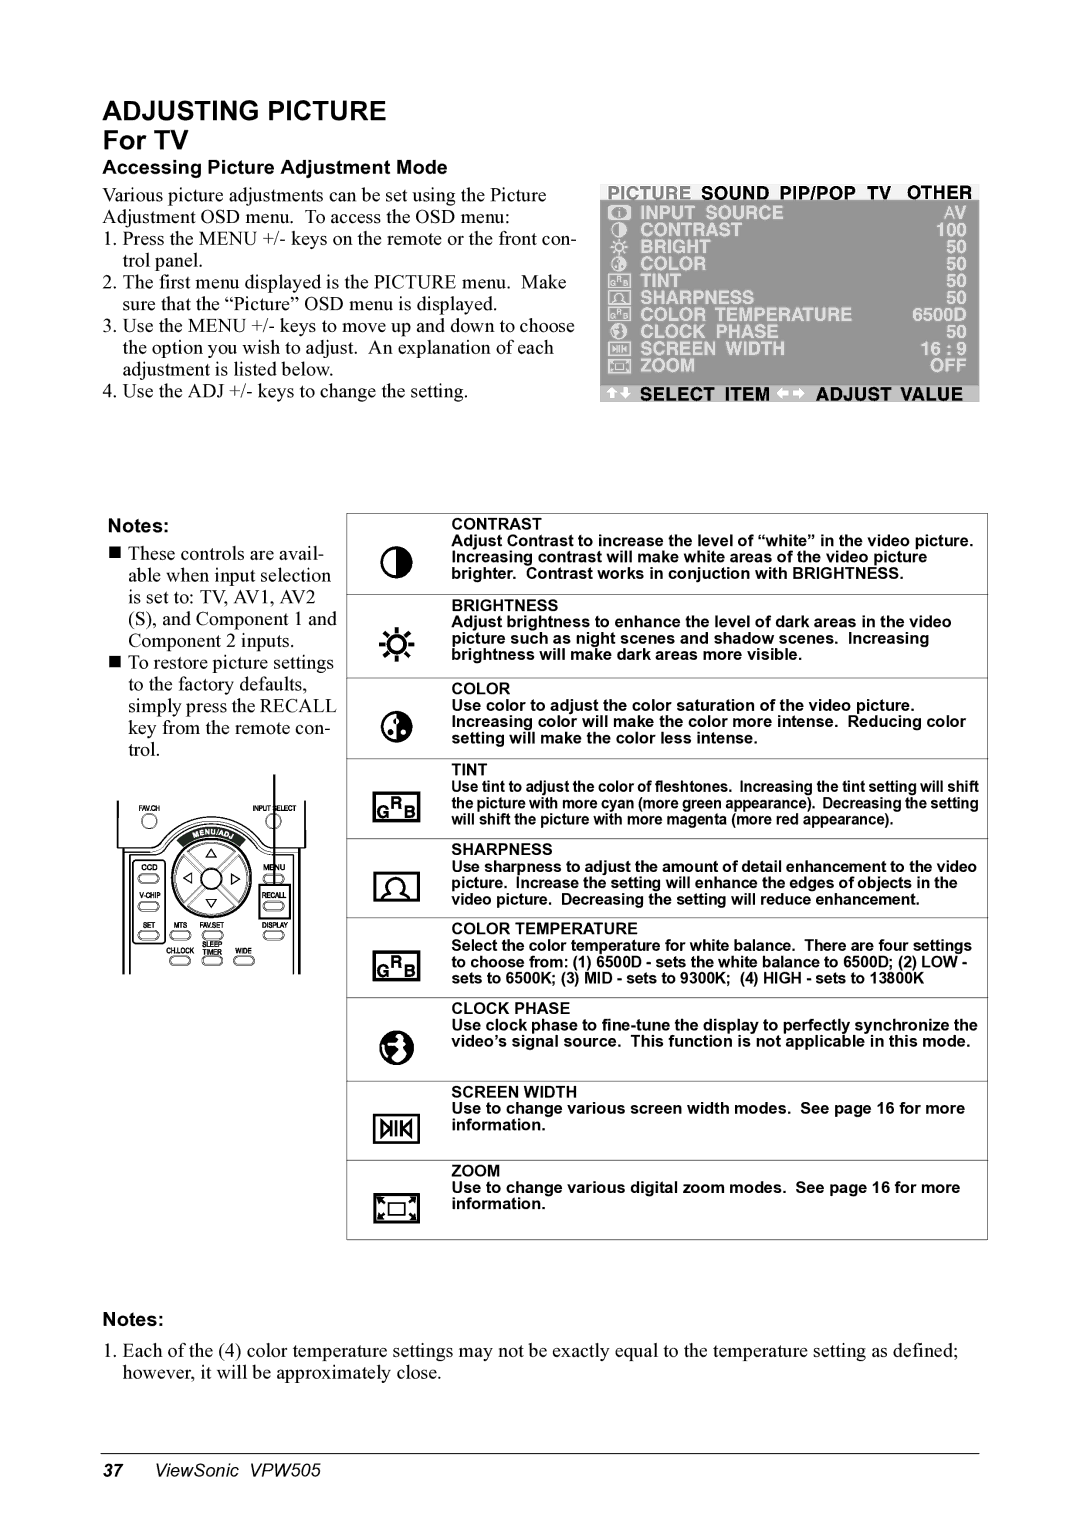
Various picture adjustments can be set using the Picture Adjustment OSD menu. To access the OSD menu:
1.Press the MENU +/- keys on the remote or the front con- trol panel.
2.The first menu displayed is the PICTURE menu. Make sure that the “Picture” OSD menu is displayed.
3.Use the MENU +/- keys to move up and down to choose the option you wish to adjust. An explanation of each adjustment is listed below.
4.Use the ADJ +/- keys to change the setting.
Notes:
These controls are avail- able when input selection is set to: TV, AV1, AV2 (S), and Component 1 and Component 2 inputs.
To restore picture settings to the factory defaults, simply press the RECALL key from the remote con- trol.
CONTRAST
Adjust Contrast to increase the level of “white” in the video picture. Increasing contrast will make white areas of the video picture brighter. Contrast works in conjuction with BRIGHTNESS.
BRIGHTNESS
Adjust brightness to enhance the level of dark areas in the video picture such as night scenes and shadow scenes. Increasing brightness will make dark areas more visible.
COLOR
Use color to adjust the color saturation of the video picture. Increasing color will make the color more intense. Reducing color setting will make the color less intense.
TINT
Use tint to adjust the color of fleshtones. Increasing the tint setting will shift the picture with more cyan (more green appearance). Decreasing the setting will shift the picture with more magenta (more red appearance).
SHARPNESS
Use sharpness to adjust the amount of detail enhancement to the video picture. Increase the setting will enhance the edges of objects in the video picture. Decreasing the setting will reduce enhancement.
COLOR TEMPERATURE
Select the color temperature for white balance. There are four settings to choose from: (1) 6500D - sets the white balance to 6500D; (2) LOW - sets to 6500K; (3) MID - sets to 9300K; (4) HIGH - sets to 13800K
CLOCK PHASE
Use clock phase to
SCREEN WIDTH
Use to change various screen width modes. See page 16 for more information.
ZOOM
Use to change various digital zoom modes. See page 16 for more information.
Notes:
1.Each of the (4) color temperature settings may not be exactly equal to the temperature setting as defined; however, it will be approximately close.
37ViewSonic VPW505
