Getting Started
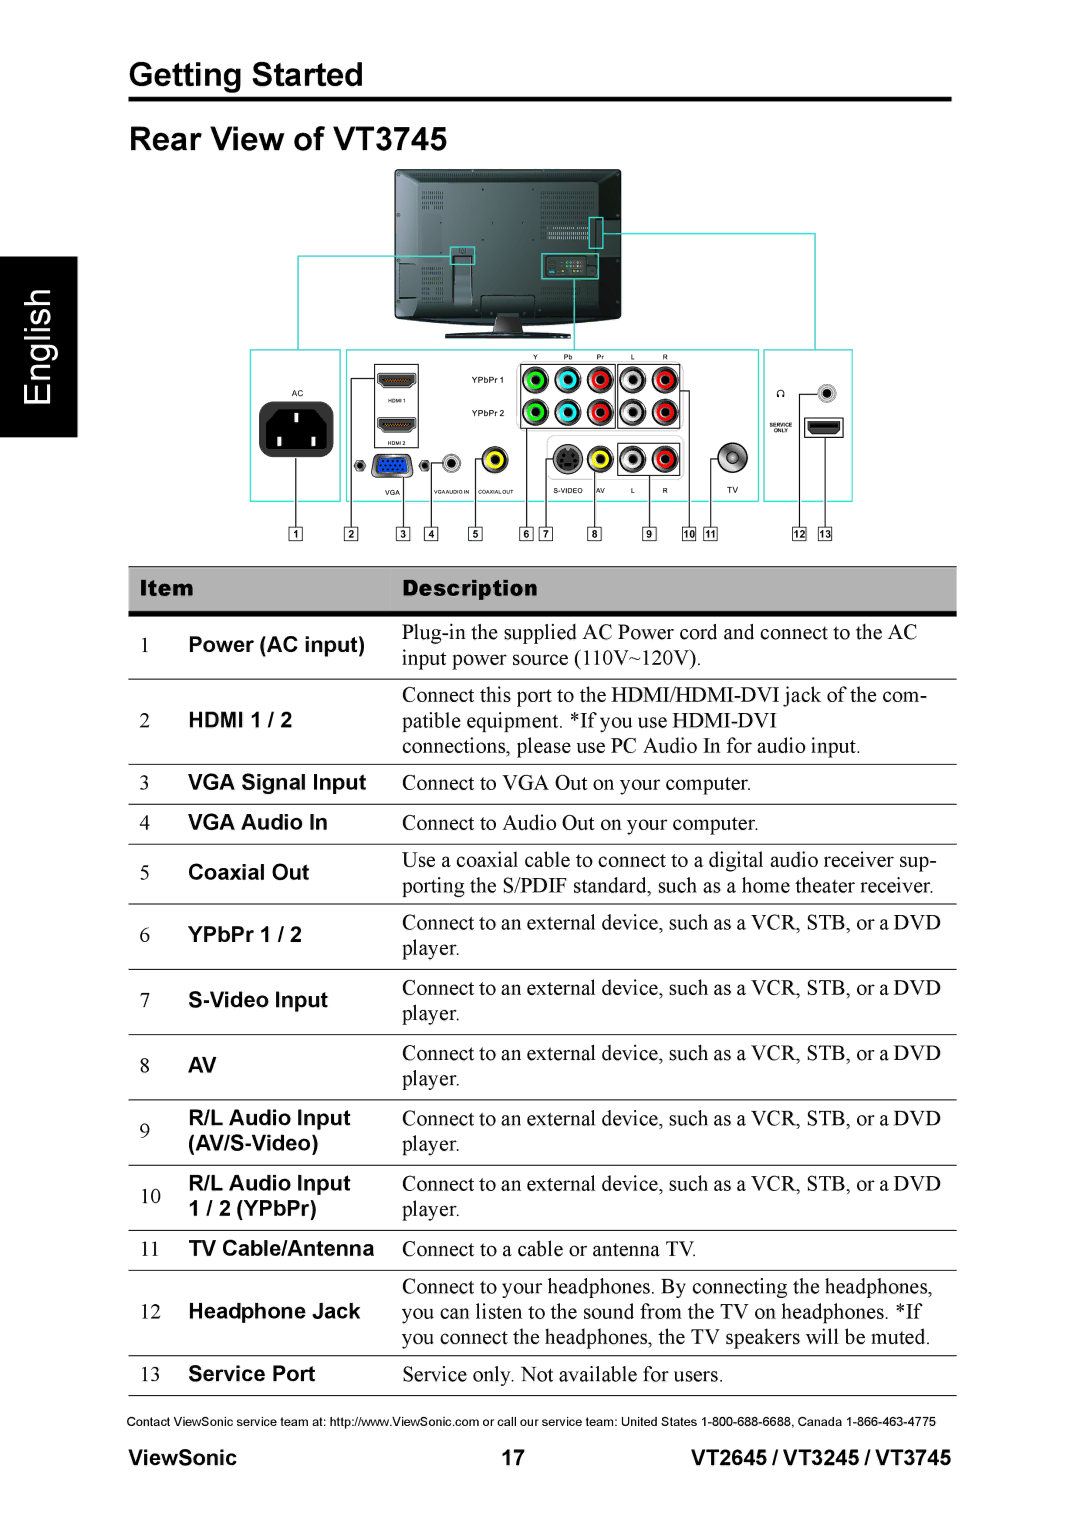
Rear View of VT3745
English
AC
1
2 | 3 | 4 | 5 | 6 | 7 | 8 | 9 | 10 | 11 |
SERVICE
ONLY
12![]()
![]() 13
13
Item | Description | ||
|
|
| |
1 | Power (AC input) | ||
input power source (110V~120V). | |||
|
| ||
|
|
| |
| HDMI 1 / 2 | Connect this port to the | |
2 | patible equipment. *If you use | ||
|
| connections, please use PC Audio In for audio input. | |
|
|
| |
3 | VGA Signal Input | Connect to VGA Out on your computer. | |
|
|
| |
4 | VGA Audio In | Connect to Audio Out on your computer. | |
|
|
| |
5 | Coaxial Out | Use a coaxial cable to connect to a digital audio receiver sup- | |
porting the S/PDIF standard, such as a home theater receiver. | |||
|
| ||
|
|
| |
6 | YPbPr 1 / 2 | Connect to an external device, such as a VCR, STB, or a DVD | |
player. | |||
|
| ||
|
|
| |
7 |
| Connect to an external device, such as a VCR, STB, or a DVD | |
player. | |||
|
| ||
|
|
| |
8 | AV | Connect to an external device, such as a VCR, STB, or a DVD | |
player. | |||
|
| ||
|
|
| |
9 | R/L Audio Input | Connect to an external device, such as a VCR, STB, or a DVD | |
player. | |||
| |||
|
|
| |
10 | R/L Audio Input | Connect to an external device, such as a VCR, STB, or a DVD | |
1 / 2 (YPbPr) | player. | ||
| |||
|
|
| |
11 | TV Cable/Antenna | Connect to a cable or antenna TV. | |
|
|
| |
|
| Connect to your headphones. By connecting the headphones, | |
12Headphone Jack you can listen to the sound from the TV on headphones. *If you connect the headphones, the TV speakers will be muted.
13 Service Port | Service only. Not available for users. |
|
|
Contact ViewSonic service team at: http://www.ViewSonic.com or call our service team: United States
ViewSonic | 17 | VT2645 / VT3245 / VT3745 |