
550.2, 650.2 specifications
The Viper 650.2 and 550.2 are advanced security systems designed to enhance vehicle protection with a focus on reliability and user convenience. These systems stand out in the automotive security market, offering cutting-edge features that make them ideal for a wide range of vehicles.One of the main features of the Viper 650.2 and 550.2 is their powerful alarm system. Both models come equipped with a dual-stage shock sensor, which can detect any impact or forced entry attempts with precision. This means that the system can distinguish between minor bumps and serious threats, reducing the likelihood of false alarms and ensuring that the vehicle owner is alerted only in genuine situations.
In addition to their alarm capabilities, the Viper 650.2 and 550.2 come with a remote start functionality. This feature allows users to start their vehicles from a considerable distance, enhancing convenience, especially in extreme weather conditions. With the ability to preheat or pre-cool the interior before entering the car, users can enjoy a comfortable driving experience right from the moment they step inside.
Both models offer a two-way communication system, providing feedback to the user through a handheld remote. The remote features an LCD screen that displays important information such as the vehicle's status, alarm notifications, and the range of the remote's connection. This ensures that users are always informed about the security state of their vehicle.
Another significant technology included in the Viper 650.2 and 550.2 is the SmartStart feature, which enables users to control their vehicle remotely using a smartphone application. With SmartStart, users can lock or unlock their car, adjust the climate control settings, and even track their vehicle's location in real time. This integration of smartphone technology provides users with an added layer of convenience and security.
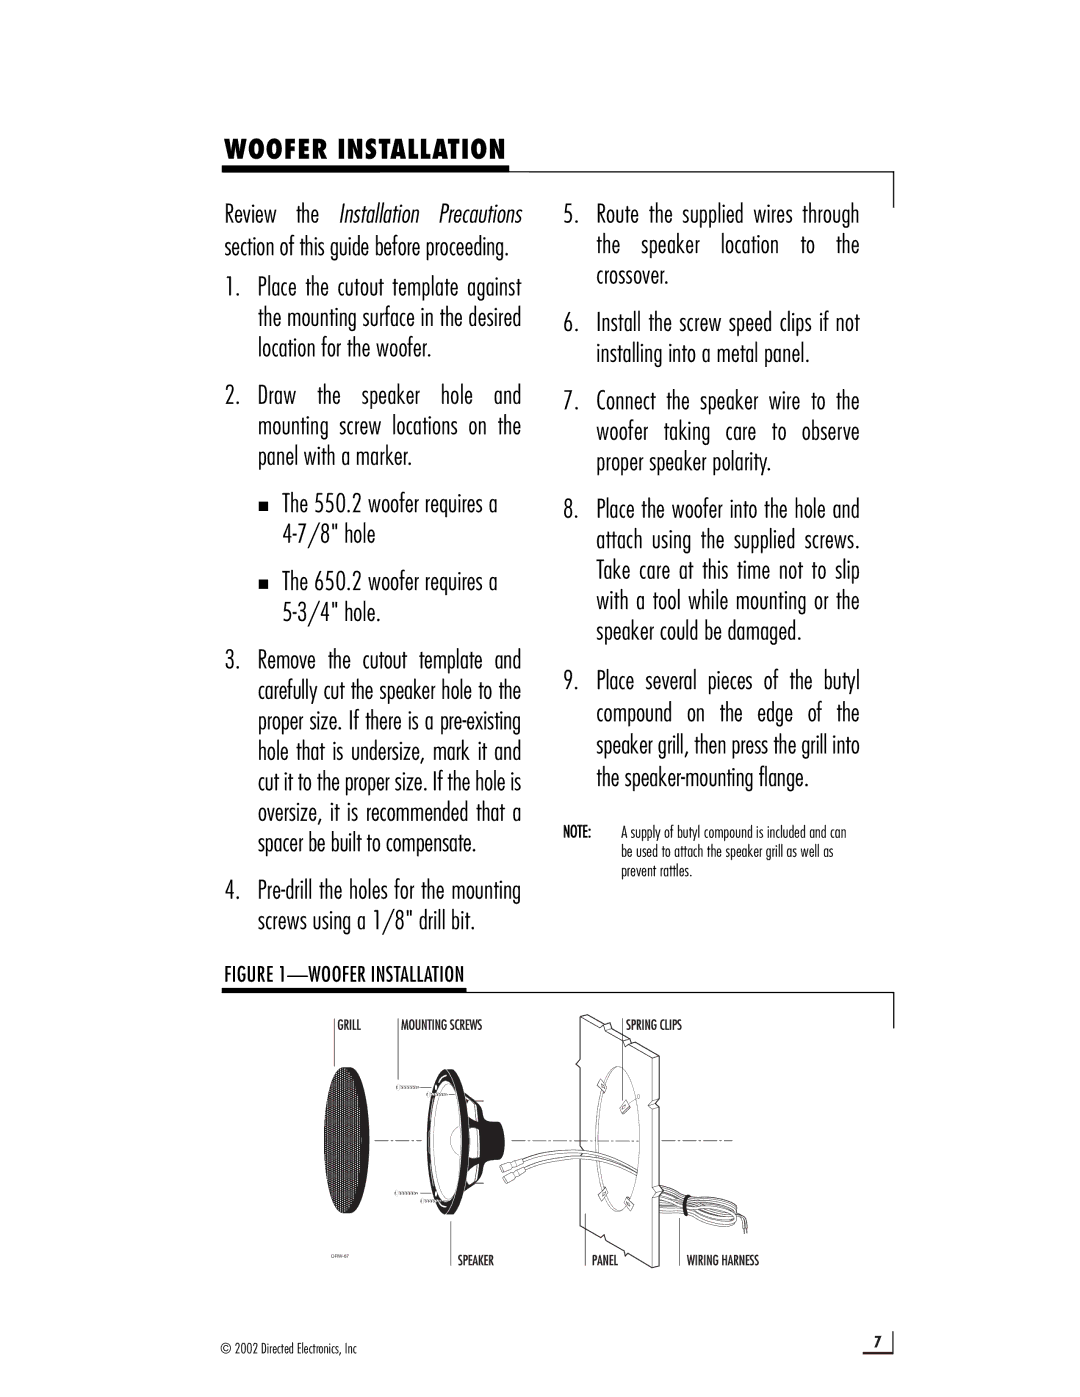
The Viper 650.2 and 550.2 also prioritize user-friendly installation, with kits that include everything necessary for a straightforward setup. The systems are designed to be compatible with a variety of vehicle makes and models, ensuring that a wide audience can access their advanced technology.
In summary, the Viper 650.2 and 550.2 are state-of-the-art vehicle security systems that offer robust alarm features, remote start capabilities, two-way communication, and smartphone integration through SmartStart. Their emphasis on user convenience and advanced protection makes them a top choice for vehicle owners looking to safeguard their investments effectively.