User Controls
Adjust the Computer Image
1.Press the Menu button on the Remote Control or Panel Control to open the OSD.
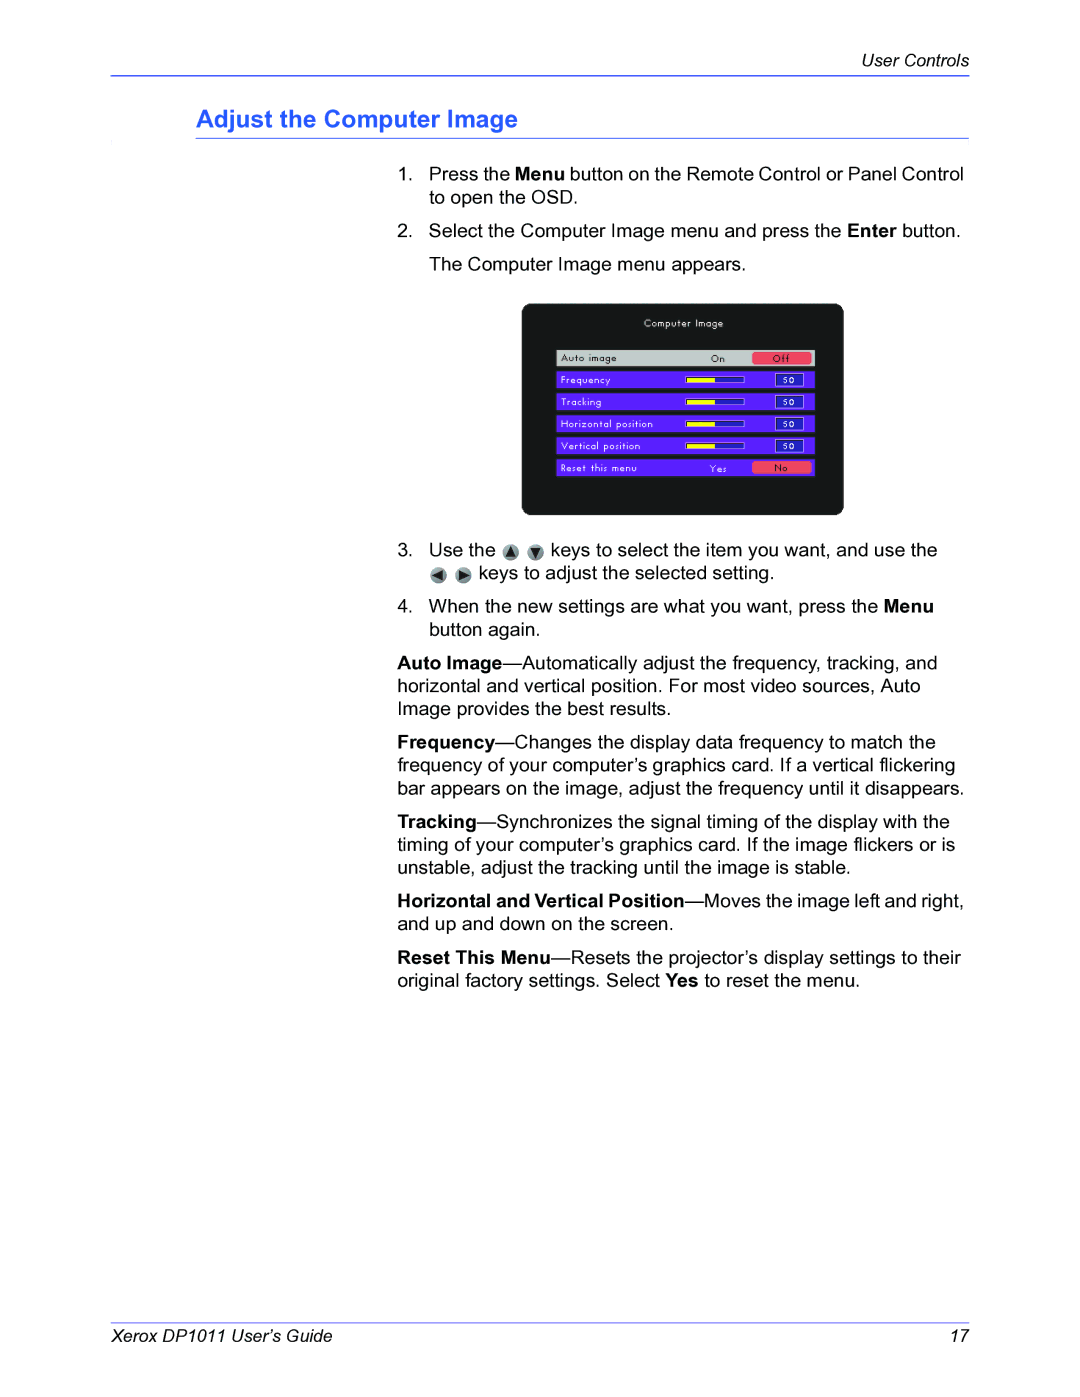
2.Select the Computer Image menu and press the Enter button. The Computer Image menu appears.
3.Use the 
 keys to select the item you want, and use the

 keys to adjust the selected setting.
4.When the new settings are what you want, press the Menu button again.
Auto Image—Automatically adjust the frequency, tracking, and horizontal and vertical position. For most video sources, Auto Image provides the best results.
Frequency—Changes the display data frequency to match the frequency of your computer’s graphics card. If a vertical flickering bar appears on the image, adjust the frequency until it disappears.
Tracking—Synchronizes the signal timing of the display with the timing of your computer’s graphics card. If the image flickers or is unstable, adjust the tracking until the image is stable.
Horizontal and Vertical Position—Moves the image left and right, and up and down on the screen.
Reset This Menu—Resets the projector’s display settings to their original factory settings. Select Yes to reset the menu.
Xerox DP1011 User’s Guide | 17 |