VIVOTEK
Installation
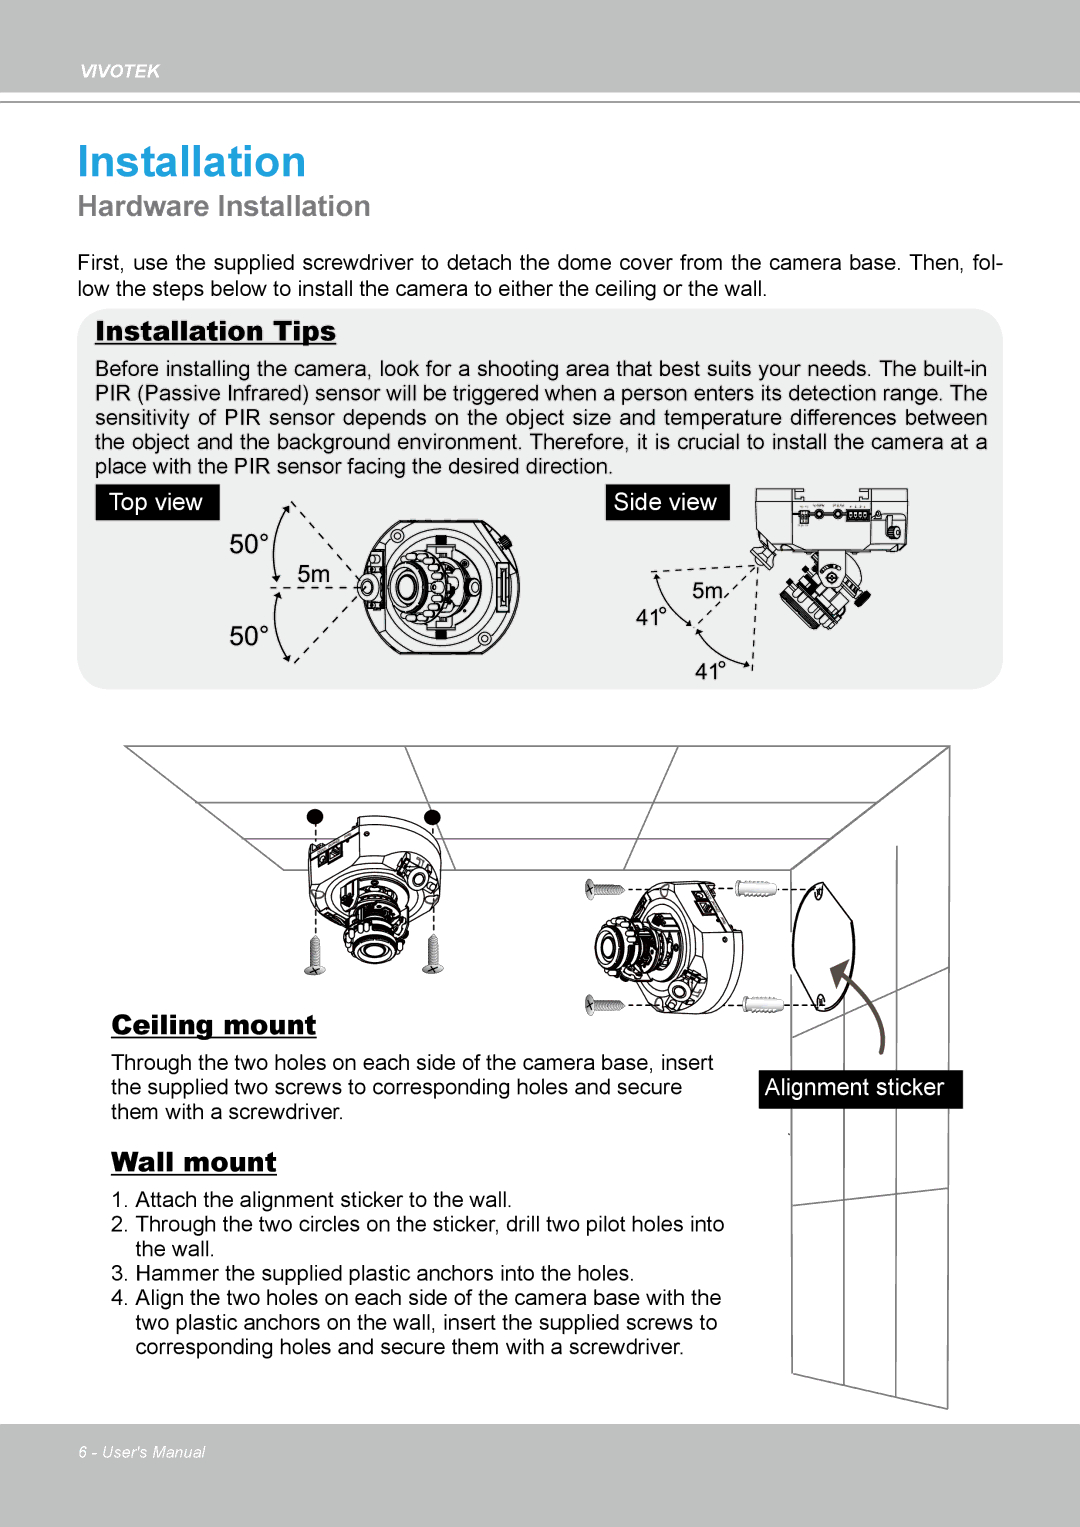
Hardware Installation
First, use the supplied screwdriver to detach the dome cover from the camera base� Then, fol-
low the steps below to install the camera to either the ceiling or the wall�
Installation Tips
Before installing the camera, look for a shooting area that best suits your needs� The
Top view
Side view
PAL Ext | In Audio | Out AV | 4 | 3 | 2 | 1 |
2 1 |
|
|
|
|
|
|
ON |
|
|
|
|
|
|
NTSC .Int |
|
|
|
|
|
|
Ceiling mount
Through the two holes on each side of the camera base, insert
the supplied two screws to corresponding holes and secure Alignment sticker them with a screwdriver�
Wall mount
1� Attach the alignment sticker to the wall�
2� Through the two circles on the sticker, drill two pilot holes into the wall�
3� Hammer the supplied plastic anchors into the holes�
4� Align the two holes on each side of the camera base with the two plastic anchors on the wall, insert the supplied screws to corresponding holes and secure them with a screwdriver�
6 - User's Manual