VIVOTEK
Ceiling or Wall Mount
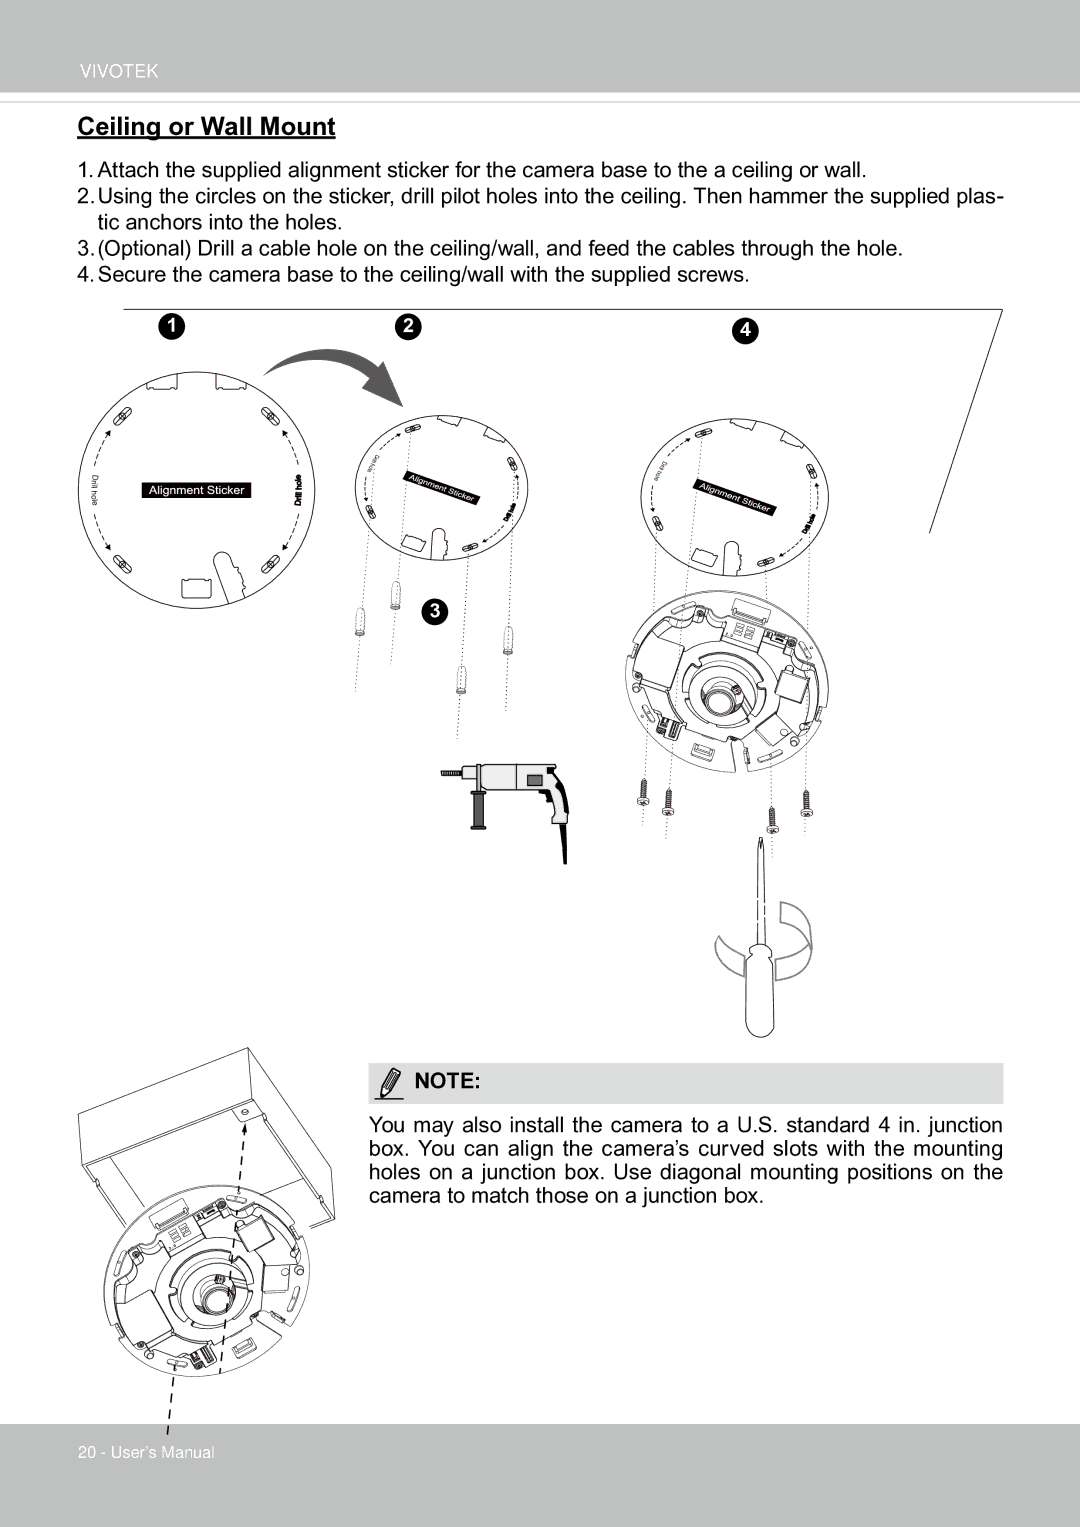
1.Attach the supplied alignment sticker for the camera base to the a ceiling or wall.
2.Using the circles on the sticker, drill pilot holes into the ceiling. Then hammer the supplied plas- tic anchors into the holes.
3.(Optional) Drill a cable hole on the ceiling/wall, and feed the cables through the hole.
4.Secure the camera base to the ceiling/wall with the supplied screws.
D r il l
h o l e
1 |
|
| 2 | 4 | |||
|
|
|
|
|
|
|
|
|
|
|
|
|
|
|
|
|
| ir | D |
|
|
|
|
|
|
|
|
|
|
|
|
|
|
|
|
| |
|
| ll |
|
|
|
|
| D |
|
|
| h |
|
|
|
|
| ir |
|
| |
| o |
|
|
|
|
|
|
|
| |
| l |
|
|
|
|
| ll |
|
|
|
| e |
|
|
|
| h |
|
|
|
|
e |
|
|
|
|
| o |
|
|
|
|
|
|
|
|
| l |
|
|
|
| |
l |
|
|
|
|
| e |
|
|
|
|
o |
|
|
|
|
|
|
|
|
|
|
h |
|
|
|
|
|
|
|
|
|
|
l |
|
|
|
|
|
|
|
|
|
|
i |
|
|
|
|
|
|
|
|
|
|
r |
|
|
|
|
|
|
|
|
|
|
D |
|
|
|
| le |
|
|
|
|
|
|
|
|
|
| o |
|
|
|
|
|
|
|
|
|
| h |
|
|
|
|
|
|
|
|
| ll |
|
|
|
|
| le |
|
|
| D | ri |
|
|
|
|
| |
|
|
|
|
|
|
|
|
| o | |
|
|
|
|
|
|
|
|
|
| h |
|
|
|
|
|
|
|
|
| ll |
|
|
|
|
|
|
|
|
| D | ri |
|
3
NOTE:
You may also install the camera to a U.S. standard 4 in. junction box. You can align the camera’s curved slots with the mounting holes on a junction box. Use diagonal mounting positions on the camera to match those on a junction box.
20 - User's Manual