VIVOTEK - A Leading Provider of Multimedia Communication Solutions
4.Install the “Installation Wizard 2“ to assign IP address to the Network Camera. For more information, please refer to Software installation on page 11 for details.
5.Access to the Network Camera from the Internet. For more information, please refer to Accessing the Network Camera on page 12 for details.
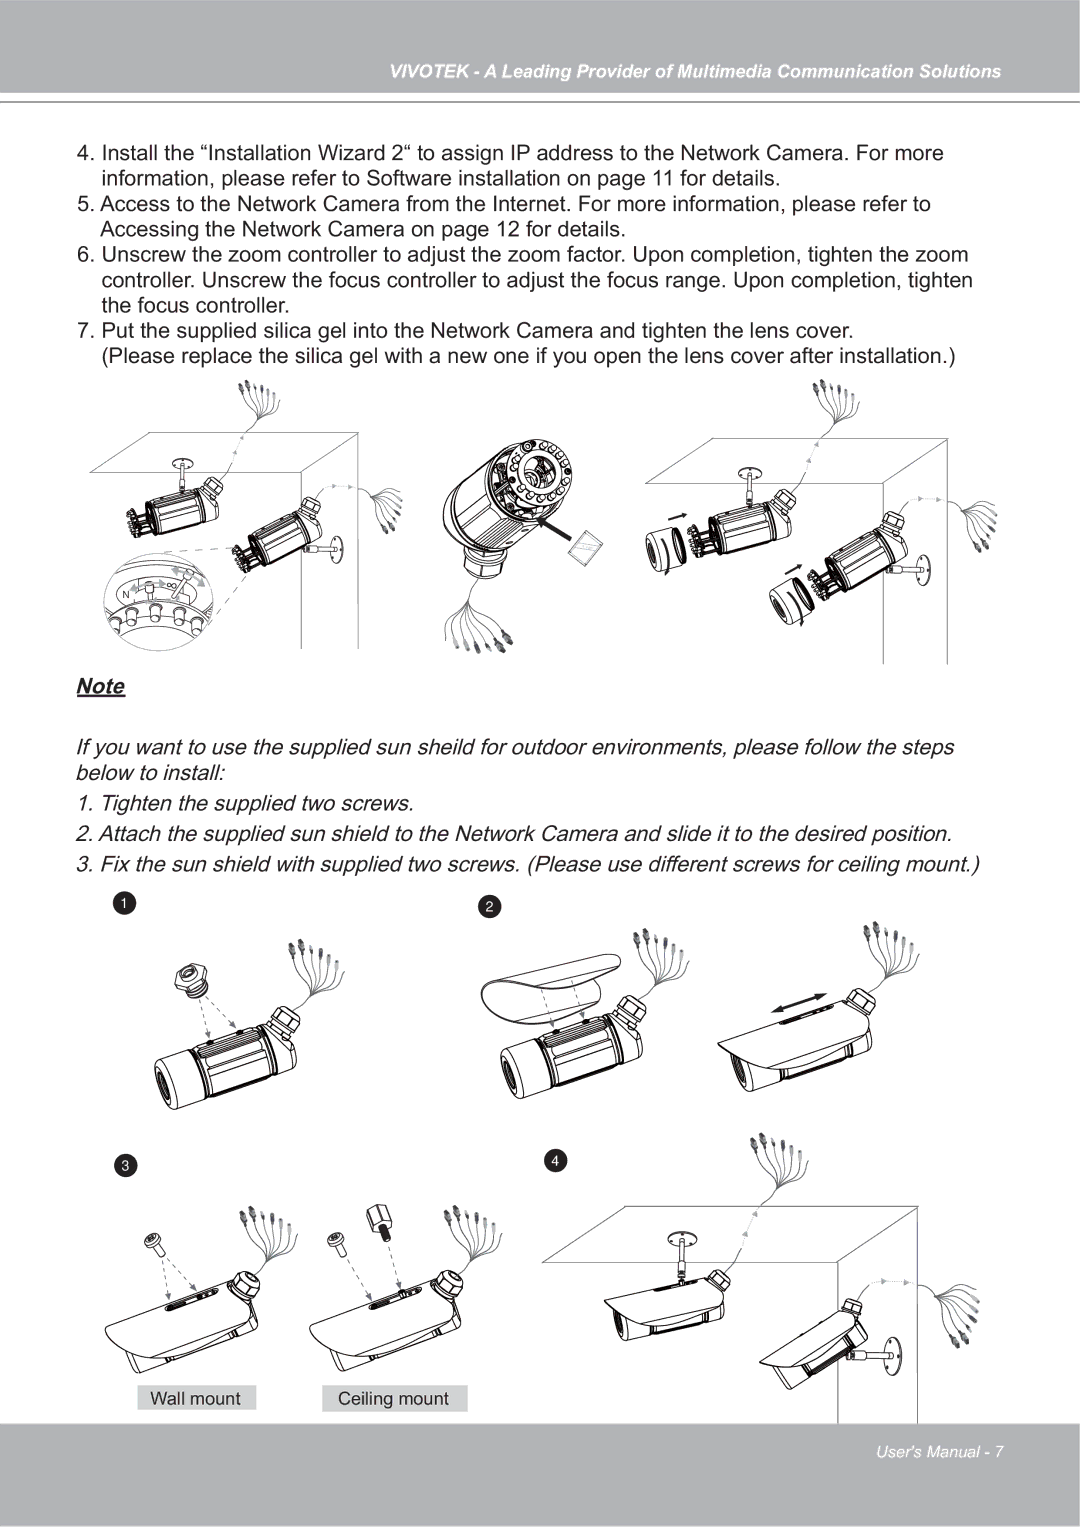
6.Unscrew the zoom controller to adjust the zoom factor. Upon completion, tighten the zoom controller. Unscrew the focus controller to adjust the focus range. Upon completion, tighten the focus controller.
7.Put the supplied silica gel into the Network Camera and tighten the lens cover.
(Please replace the silica gel with a new one if you open the lens cover after installation.)
N
N
![]()
![]() ∞
∞![]()
![]() ∞
∞
ili a gel
Note
If you want to use the supplied sun sheild for outdoor environments, please follow the steps below to install:
1.Tighten the supplied two screws.
2.Attach the supplied sun shield to the Network Camera and slide it to the desired position.
3.Fix the sun shield with supplied two screws. (Please use different screws for ceiling mount.)
1 | 2 |
3 | 4 |
|
|
|
|
| |
|
|
|
|
|
|
|
|
|
|
|
|
Wall mount |
| Ceiling mount |
|
|
|
User's Manual - 7
