DOOR CATCH ROLLER ADJUSTMENT
NOTE: For units with serial number starting with 48 made before 8/13/07 and serial number starting with 54 made before 8/27/07.
![]() Disconnect the electrical power to the machine and follow lockout / tagout procedures.
Disconnect the electrical power to the machine and follow lockout / tagout procedures.
1.Remove the top front cover as outlined under Cover and Panels in Removal and Replacement of Parts.
2.Inspect the door strike to make sure it is straight, and replace if bent.
3.Inspect the door catch assembly, and replace if it is damaged.
4.Check for proper door alignment.
A. Doors should be centered in the cavity opening and parallel to top and bottom of oven as outlined under Door Adjustment.
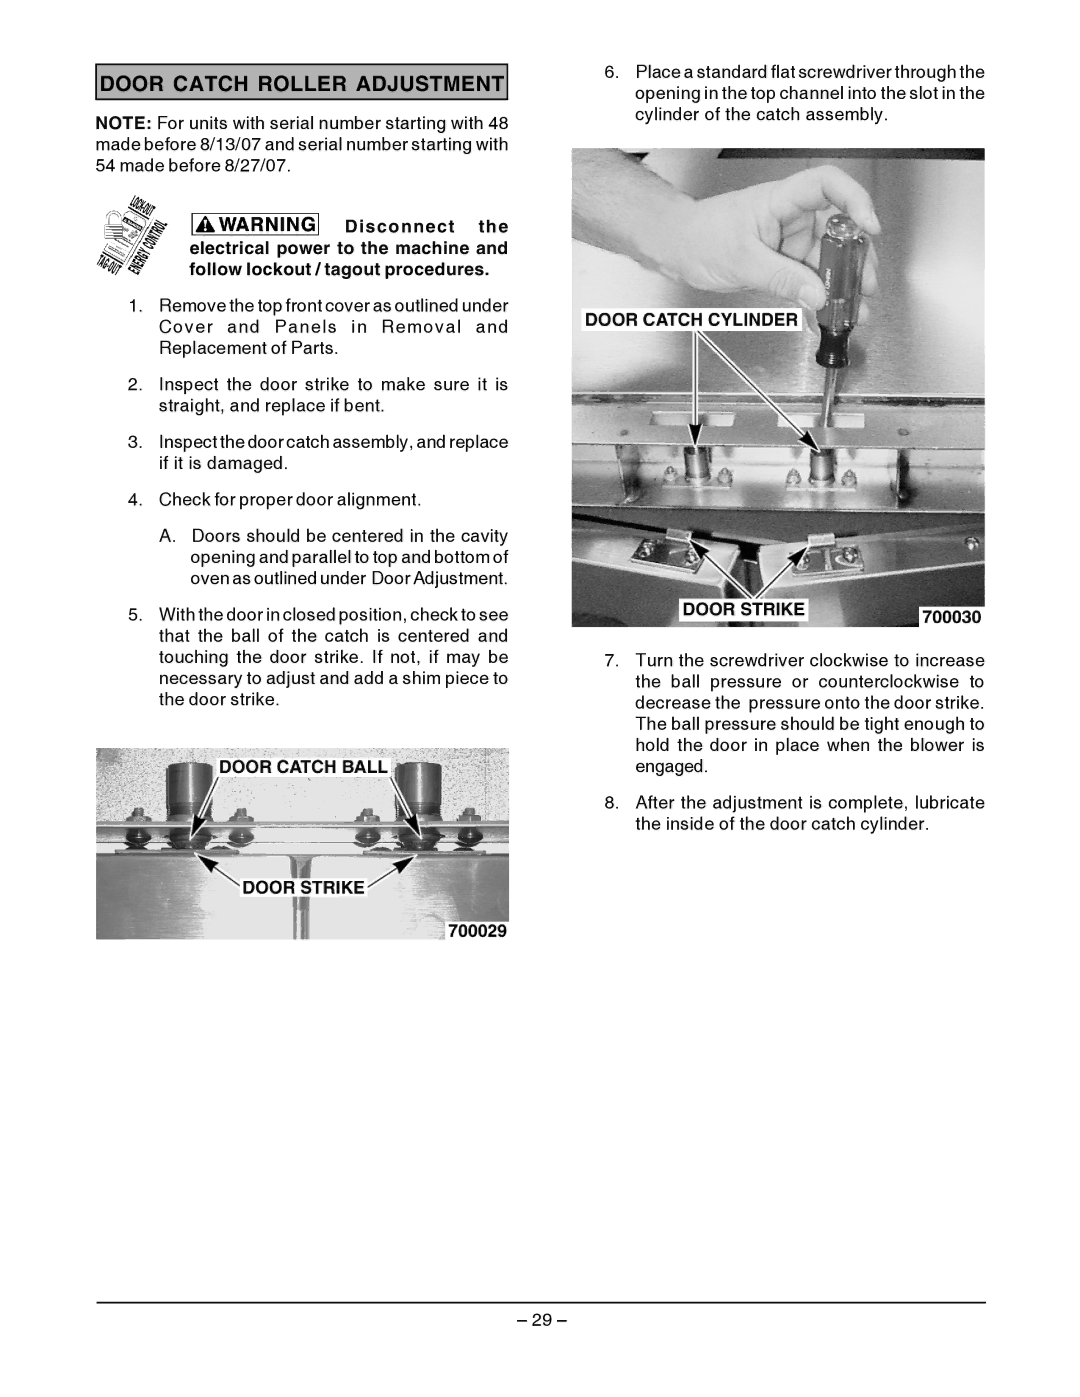
5.With the door in closed position, check to see that the ball of the catch is centered and touching the door strike. If not, if may be necessary to adjust and add a shim piece to the door strike.
6.Place a standard flat screwdriver through the opening in the top channel into the slot in the cylinder of the catch assembly.
7.Turn the screwdriver clockwise to increase the ball pressure or counterclockwise to decrease the pressure onto the door strike. The ball pressure should be tight enough to hold the door in place when the blower is engaged.
8.After the adjustment is complete, lubricate the inside of the door catch cylinder.
– 29 –
