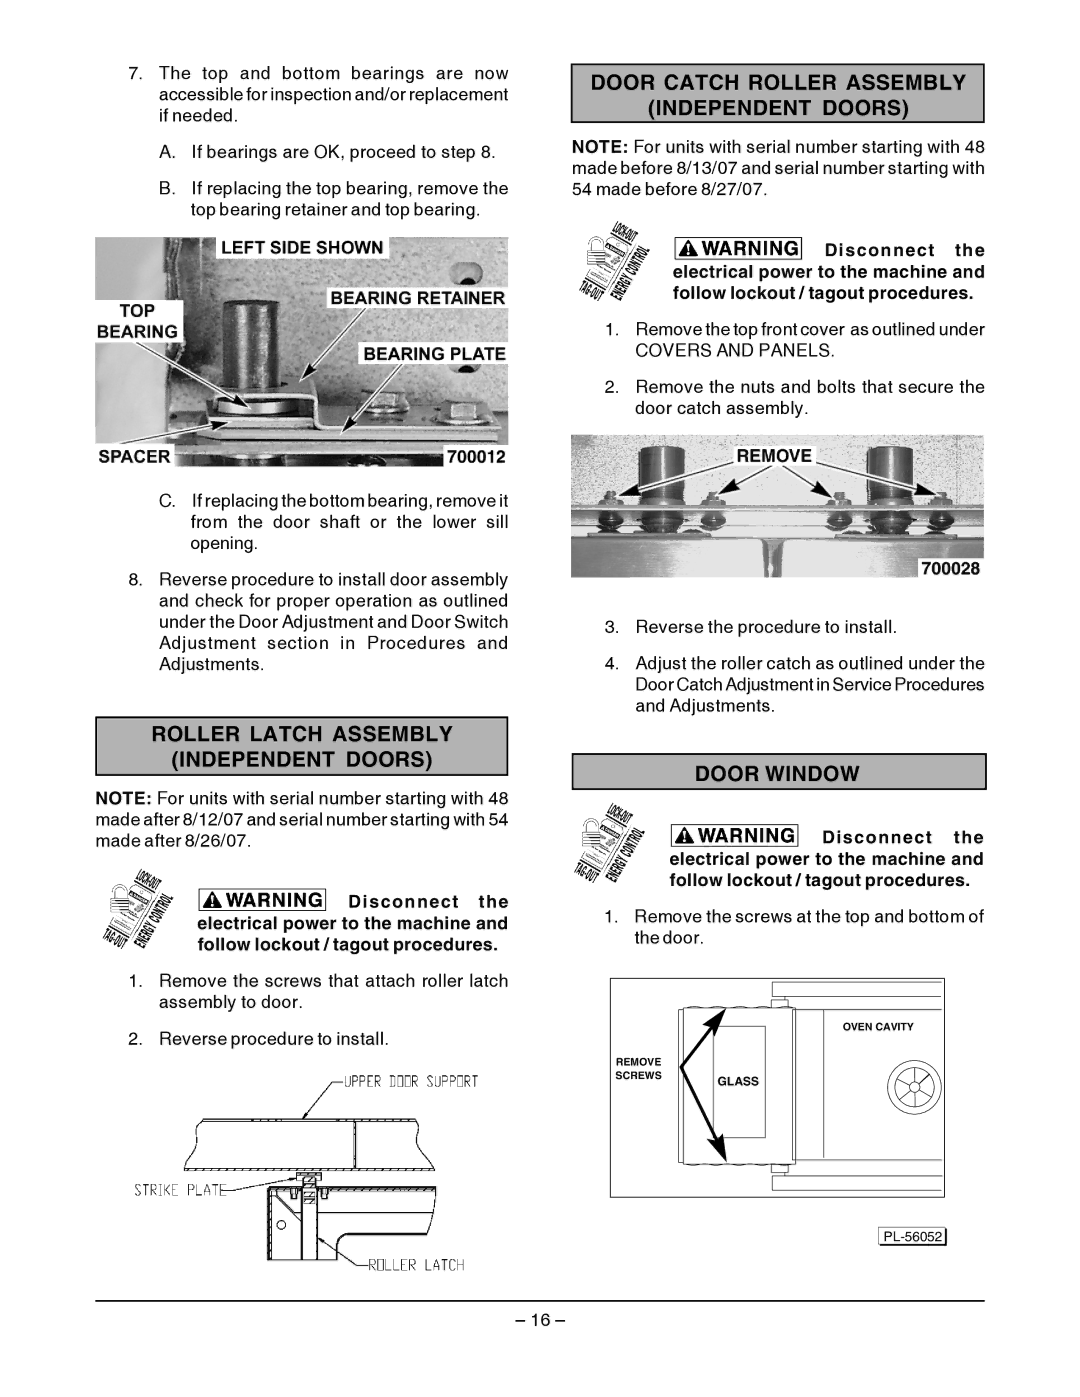
7.The top and bottom bearings are now accessible for inspection and/or replacement if needed.
A.If bearings are OK, proceed to step 8.
B.If replacing the top bearing, remove the top bearing retainer and top bearing.
C.If replacing the bottom bearing, remove it from the door shaft or the lower sill opening.
8.Reverse procedure to install door assembly and check for proper operation as outlined under the Door Adjustment and Door Switch Adjustment section in Procedures and Adjustments.
ROLLER LATCH ASSEMBLY
(INDEPENDENT DOORS)
NOTE: For units with serial number starting with 48 made after 8/12/07 and serial number starting with 54 made after 8/26/07.
![]() Disconnect the electrical power to the machine and follow lockout / tagout procedures.
Disconnect the electrical power to the machine and follow lockout / tagout procedures.
1.Remove the screws that attach roller latch assembly to door.
2.Reverse procedure to install.
DOOR CATCH ROLLER ASSEMBLY
(INDEPENDENT DOORS)
NOTE: For units with serial number starting with 48 made before 8/13/07 and serial number starting with 54 made before 8/27/07.
![]() Disconnect the electrical power to the machine and follow lockout / tagout procedures.
Disconnect the electrical power to the machine and follow lockout / tagout procedures.
1.Remove the top front cover as outlined under
COVERS AND PANELS.
2.Remove the nuts and bolts that secure the door catch assembly.
3.Reverse the procedure to install.
4.Adjust the roller catch as outlined under the Door Catch Adjustment in Service Procedures and Adjustments.
DOOR WINDOW
![]() Disconnect the electrical power to the machine and follow lockout / tagout procedures.
Disconnect the electrical power to the machine and follow lockout / tagout procedures.
1.Remove the screws at the top and bottom of the door.
| OVEN CAVITY |
REMOVE |
|
SCREWS | GLASS |
| |
|
– 16 –
