Annual Maintenance
After a period of nonuse we recommend that you perform the following maintenance procedures for your safety.
mWARNING: Check hose before each use of barbecue for nicks, cracking, abrasions or cuts. If the hose is found to be damaged in any way, do not use the barbecue. Replace the manifold assembly, which includes the gas hose. Contact your dealer for the necessary parts.
■Inspect the burners for correct flame pattern. Clean if necessary, following the procedures outlined in the "General Maintenance" section of this manual.
■Check all gas fittings for leaks.
mDANGER
Do not use an open flame to check for gas leaks. Be sure there are no sparks or open flames in the area while you check for leaks. This will result in a fire or explosion which can cause serious bodily injury or death, and damage to property.
mWARNING: You should check for gas leaks every time you disconnect and reconnect a gas fitting.
You will need: a soap and water solution and a rag or brush to apply it.
To perform leak checks: Make sure all burners are in the OFF position. Turn on gas supply.
mWARNING: Do not ignite burners while leak checking.
Check for leaks by wetting the connections with the soap and water solution and watching for bubbles. If bubbles form or if a bubble grows there is a leak.
Note - Since some leak test solutions, including soap and water, may be slightly corrosive, all connections should be rinsed with water after checking for leaks.
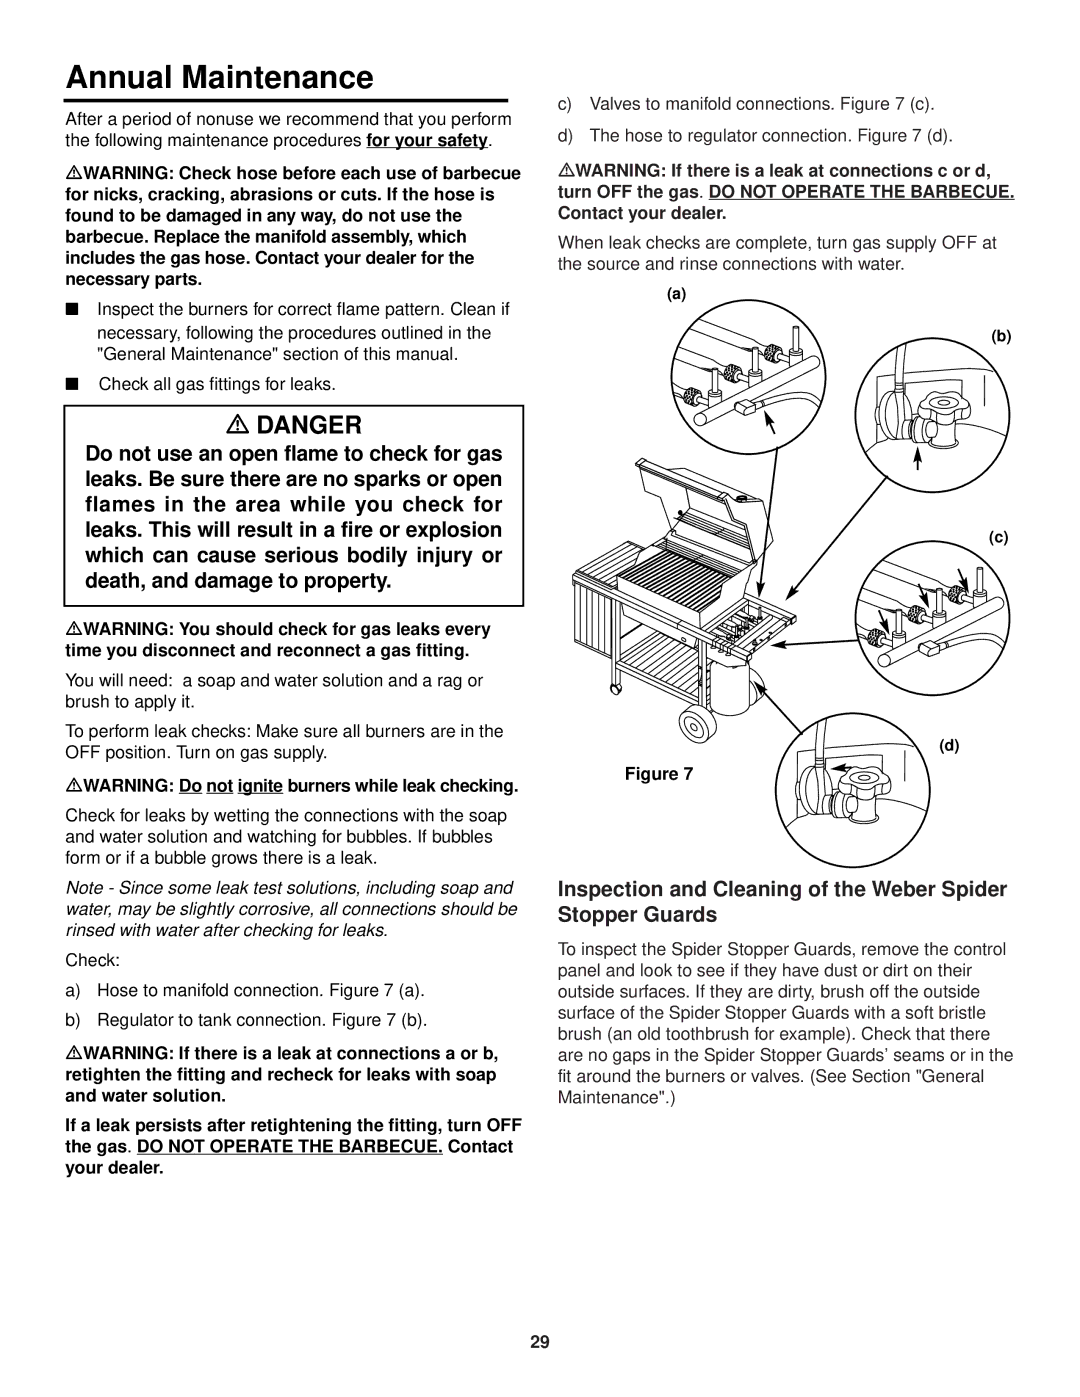
Check:
a)Hose to manifold connection. Figure 7 (a).
b)Regulator to tank connection. Figure 7 (b).
mWARNING: If there is a leak at connections a or b, retighten the fitting and recheck for leaks with soap and water solution.
If a leak persists after retightening the fitting, turn OFF the gas. DO NOT OPERATE THE BARBECUE. Contact your dealer.
c)Valves to manifold connections. Figure 7 (c).
d)The hose to regulator connection. Figure 7 (d).
mWARNING: If there is a leak at connections c or d, turn OFF the gas. DO NOT OPERATE THE BARBECUE.
Contact your dealer.
When leak checks are complete, turn gas supply OFF at the source and rinse connections with water.
(a)
(b)
(c)
(d)
Figure 7
Inspection and Cleaning of the Weber Spider Stopper Guards
To inspect the Spider Stopper Guards, remove the control panel and look to see if they have dust or dirt on their outside surfaces. If they are dirty, brush off the outside surface of the Spider Stopper Guards with a soft bristle brush (an old toothbrush for example). Check that there are no gaps in the Spider Stopper Guards’ seams or in the fit around the burners or valves. (See Section "General Maintenance".)
29