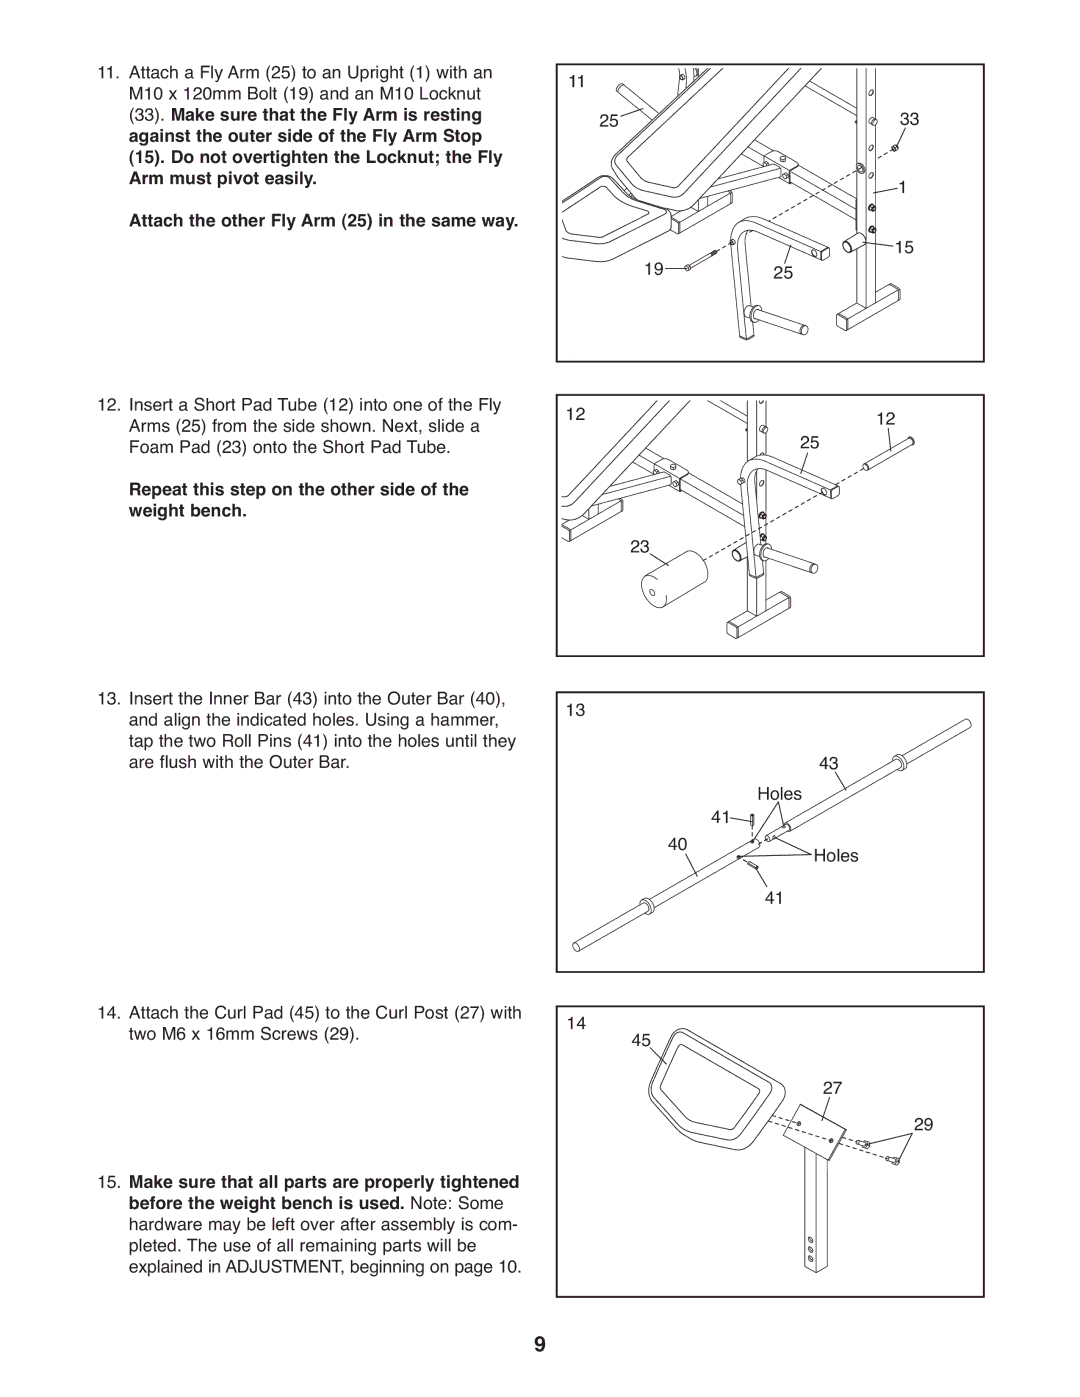
11. Attach a Fly Arm (25) to an Upright (1) with an | 11 |
|
|
|
M10 x 120mm Bolt (19) and an M10 Locknut |
|
|
| |
(33). Make sure that the Fly Arm is resting | 25 |
|
| 33 |
against the outer side of the Fly Arm Stop |
|
| ||
(15). Do not overtighten the Locknut; the Fly |
|
|
| 1 |
Arm must pivot easily. |
|
|
| |
Attach the other Fly Arm (25) in the same way. | 19 | 25 |
| 15 |
|
| |||
|
|
| ||
12. Insert a Short Pad Tube (12) into one of the Fly | 12 |
|
| 12 |
Arms (25) from the side shown. Next, slide a |
| 25 | ||
Foam Pad (23) onto the Short Pad Tube. |
|
|
| |
Repeat this step on the other side of the |
|
|
|
|
weight bench. | 23 |
|
|
|
|
|
|
|
13.Insert the Inner Bar (43) into the Outer Bar (40), and align the indicated holes. Using a hammer, tap the two Roll Pins (41) into the holes until they are flush with the Outer Bar.
14.Attach the Curl Pad (45) to the Curl Post (27) with two M6 x 16mm Screws (29).
15.Make sure that all parts are properly tightened before the weight bench is used. Note: Some hardware may be left over after assembly is com- pleted. The use of all remaining parts will be explained in ADJUSTMENT, beginning on page 10.
13 |
|
|
| 43 |
| 40 | 41 | Holes | |
|
| Holes | ||
|
| 41 | ||
|
|
|
| |
14 | 45 |
|
|
|
|
|
| 27 | |
|
|
|
| |
|
|
|
| 29 |
9