CABLE ASSEMBLY
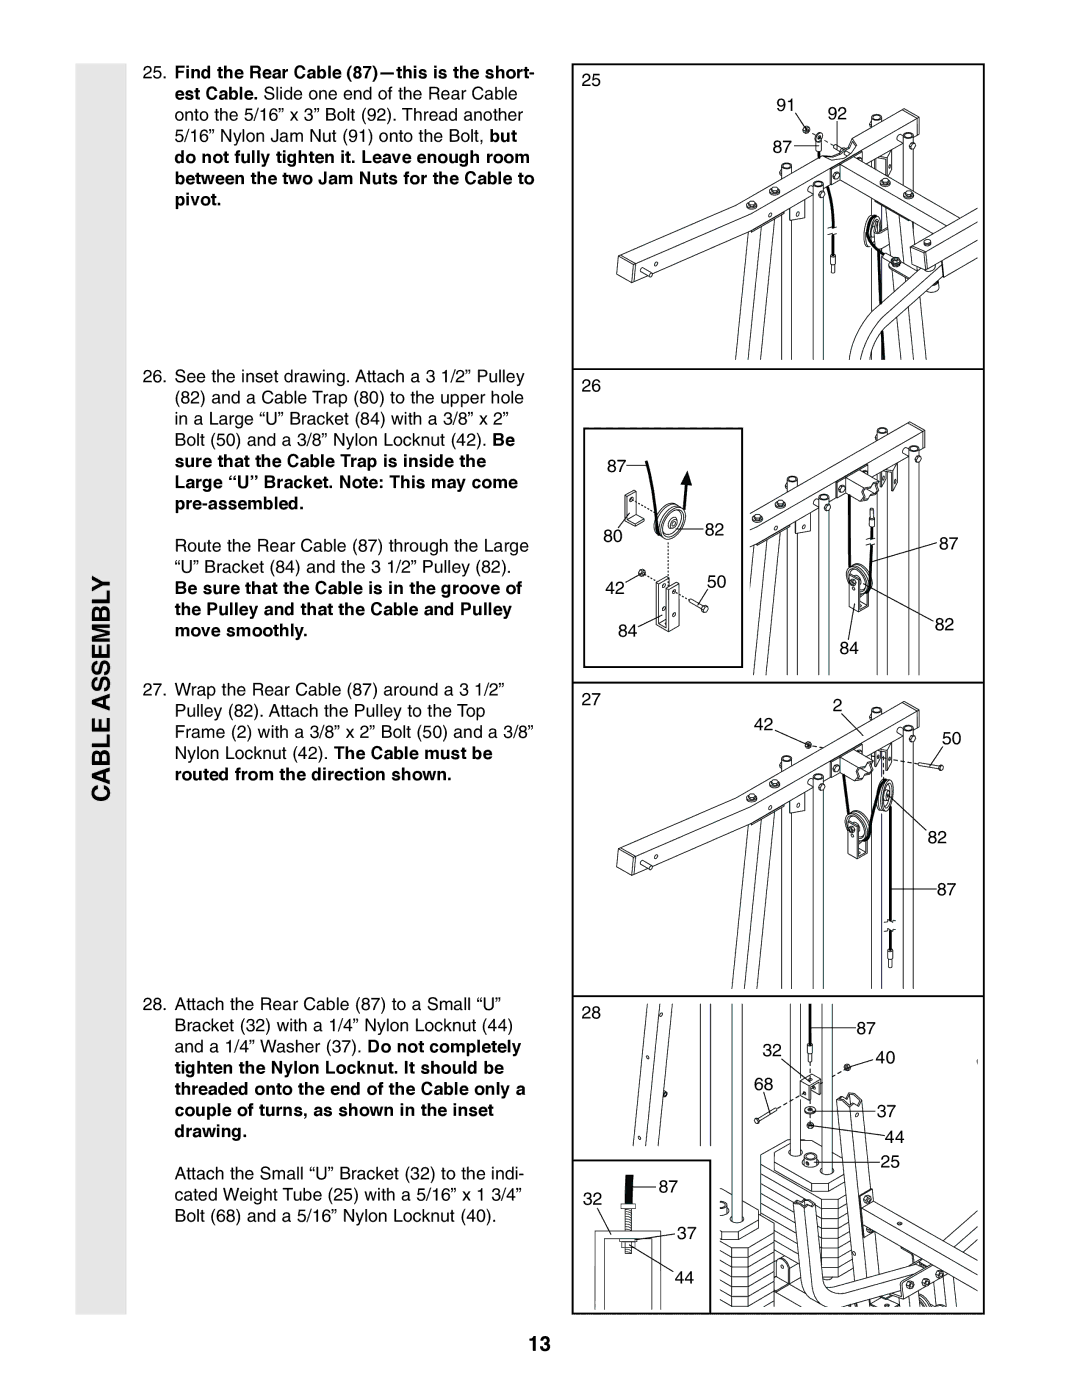
25.Find the Rear Cable
26.See the inset drawing. Attach a 3 1/2” Pulley (82) and a Cable Trap (80) to the upper hole in a Large “U” Bracket (84) with a 3/8” x 2” Bolt (50) and a 3/8” Nylon Locknut (42). Be sure that the Cable Trap is inside the Large “U” Bracket. Note: This may come
Route the Rear Cable (87) through the Large “U” Bracket (84) and the 3 1/2” Pulley (82).
Be sure that the Cable is in the groove of the Pulley and that the Cable and Pulley move smoothly.
27.Wrap the Rear Cable (87) around a 3 1/2” Pulley (82). Attach the Pulley to the Top Frame (2) with a 3/8” x 2” Bolt (50) and a 3/8” Nylon Locknut (42). The Cable must be routed from the direction shown.
28.Attach the Rear Cable (87) to a Small “U” Bracket (32) with a 1/4” Nylon Locknut (44) and a 1/4” Washer (37). Do not completely tighten the Nylon Locknut. It should be threaded onto the end of the Cable only a couple of turns, as shown in the inset drawing.
Attach the Small “U” Bracket (32) to the indi- cated Weight Tube (25) with a 5/16” x 1 3/4” Bolt (68) and a 5/16” Nylon Locknut (40).
13
25 |
|
|
|
|
| 91 | 92 |
|
|
| |
|
| 87 |
|
26 |
|
|
|
| 87 |
|
|
| 80 | 82 | 87 |
|
| ||
|
|
| |
| 42 | 50 |
|
|
|
| |
| 84 |
| 82 |
|
| 84 | |
|
|
| |
27 |
|
| 2 |
|
| 42 | |
|
| 50 | |
|
|
| |
|
|
| 82 |
|
|
| 87 |
28 |
|
| 87 |
|
|
| |
|
| 32 | 40 |
|
|
| |
|
| 68 |
|
|
|
| 37 |
|
|
| 44 |
|
|
| 25 |
32 |
| 87 |
|
|
|
| |
|
| 37 |
|
|
| 44 |
|