CABLE ASSEMBLY
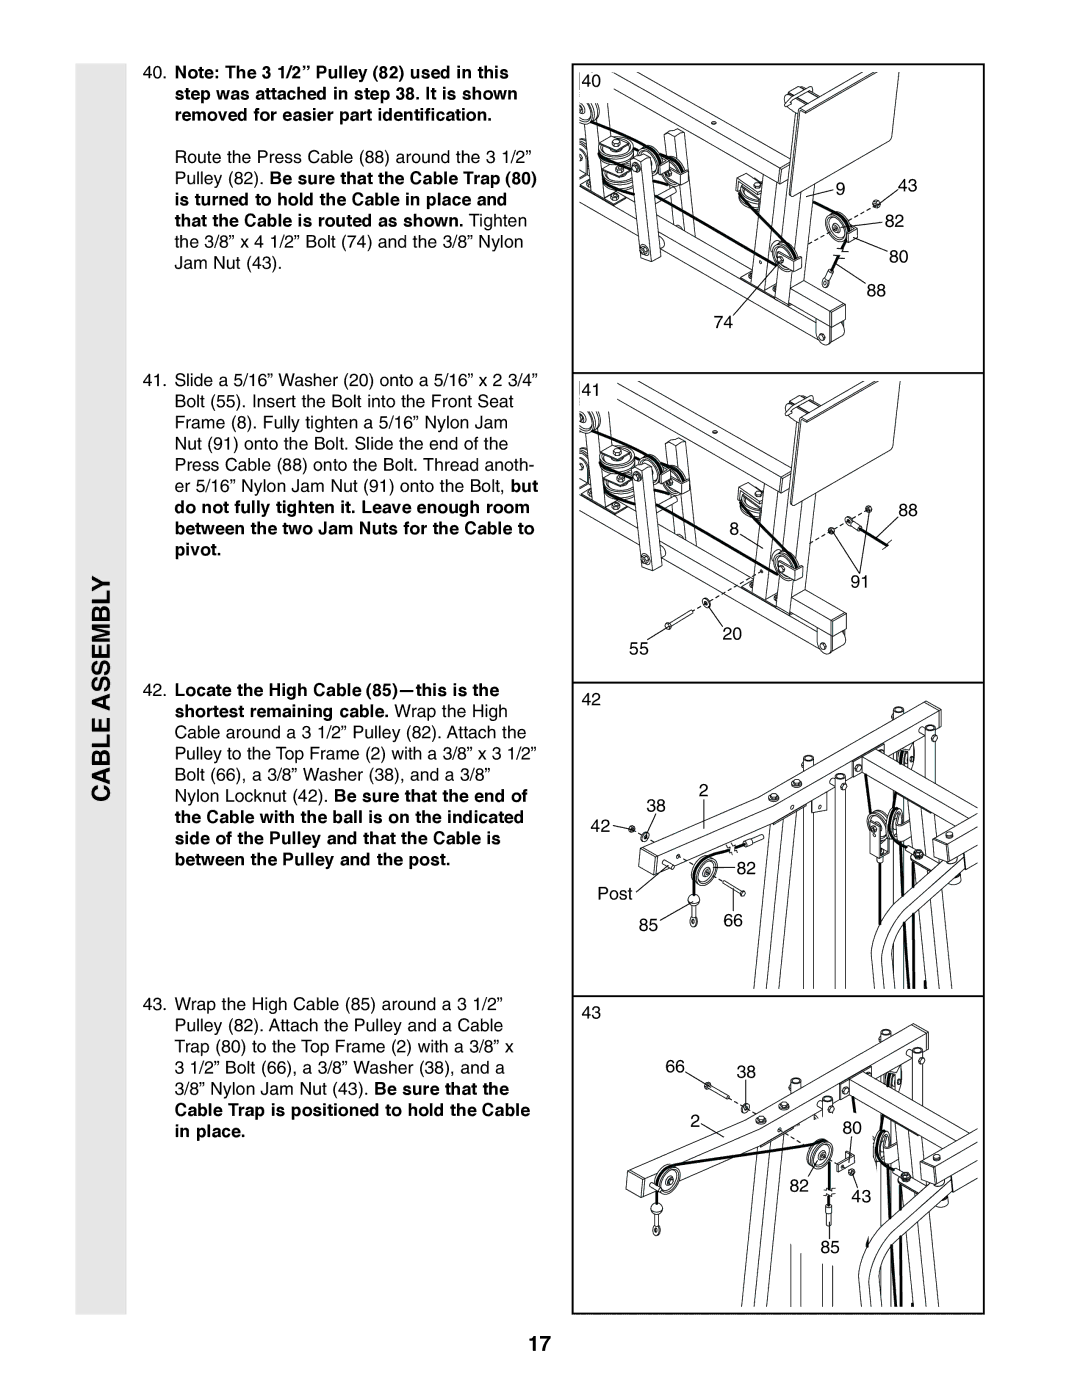
40.Note: The 3 1/2” Pulley (82) used in this step was attached in step 38. It is shown removed for easier part identification.
Route the Press Cable (88) around the 3 1/2” Pulley (82). Be sure that the Cable Trap (80) is turned to hold the Cable in place and that the Cable is routed as shown. Tighten the 3/8” x 4 1/2” Bolt (74) and the 3/8” Nylon Jam Nut (43).
41.Slide a 5/16” Washer (20) onto a 5/16” x 2 3/4” Bolt (55). Insert the Bolt into the Front Seat Frame (8). Fully tighten a 5/16” Nylon Jam Nut (91) onto the Bolt. Slide the end of the Press Cable (88) onto the Bolt. Thread anoth- er 5/16” Nylon Jam Nut (91) onto the Bolt, but do not fully tighten it. Leave enough room between the two Jam Nuts for the Cable to pivot.
42.Locate the High Cable
43.Wrap the High Cable (85) around a 3 1/2” Pulley (82). Attach the Pulley and a Cable Trap (80) to the Top Frame (2) with a 3/8” x 3 1/2” Bolt (66), a 3/8” Washer (38), and a 3/8” Nylon Jam Nut (43). Be sure that the
Cable Trap is positioned to hold the Cable in place.
17
40 |
|
|
|
|
| 9 | 43 |
|
|
| 82 |
|
|
| 80 |
|
|
| 88 |
|
| 74 |
|
41 |
|
|
|
|
| 8 | 88 |
|
|
| |
|
|
| 91 |
55 |
| 20 |
|
|
|
| |
42 |
|
|
|
38 | 2 |
|
|
|
|
| |
42 |
|
|
|
|
| 82 |
|
Post |
|
|
|
85 |
| 66 |
|
43 |
|
|
|
66 |
| 38 |
|
|
|
| |
| 2 | 80 | |
|
| ||
|
| 82 | 43 |
|
|
| |
|
| 85 |
|