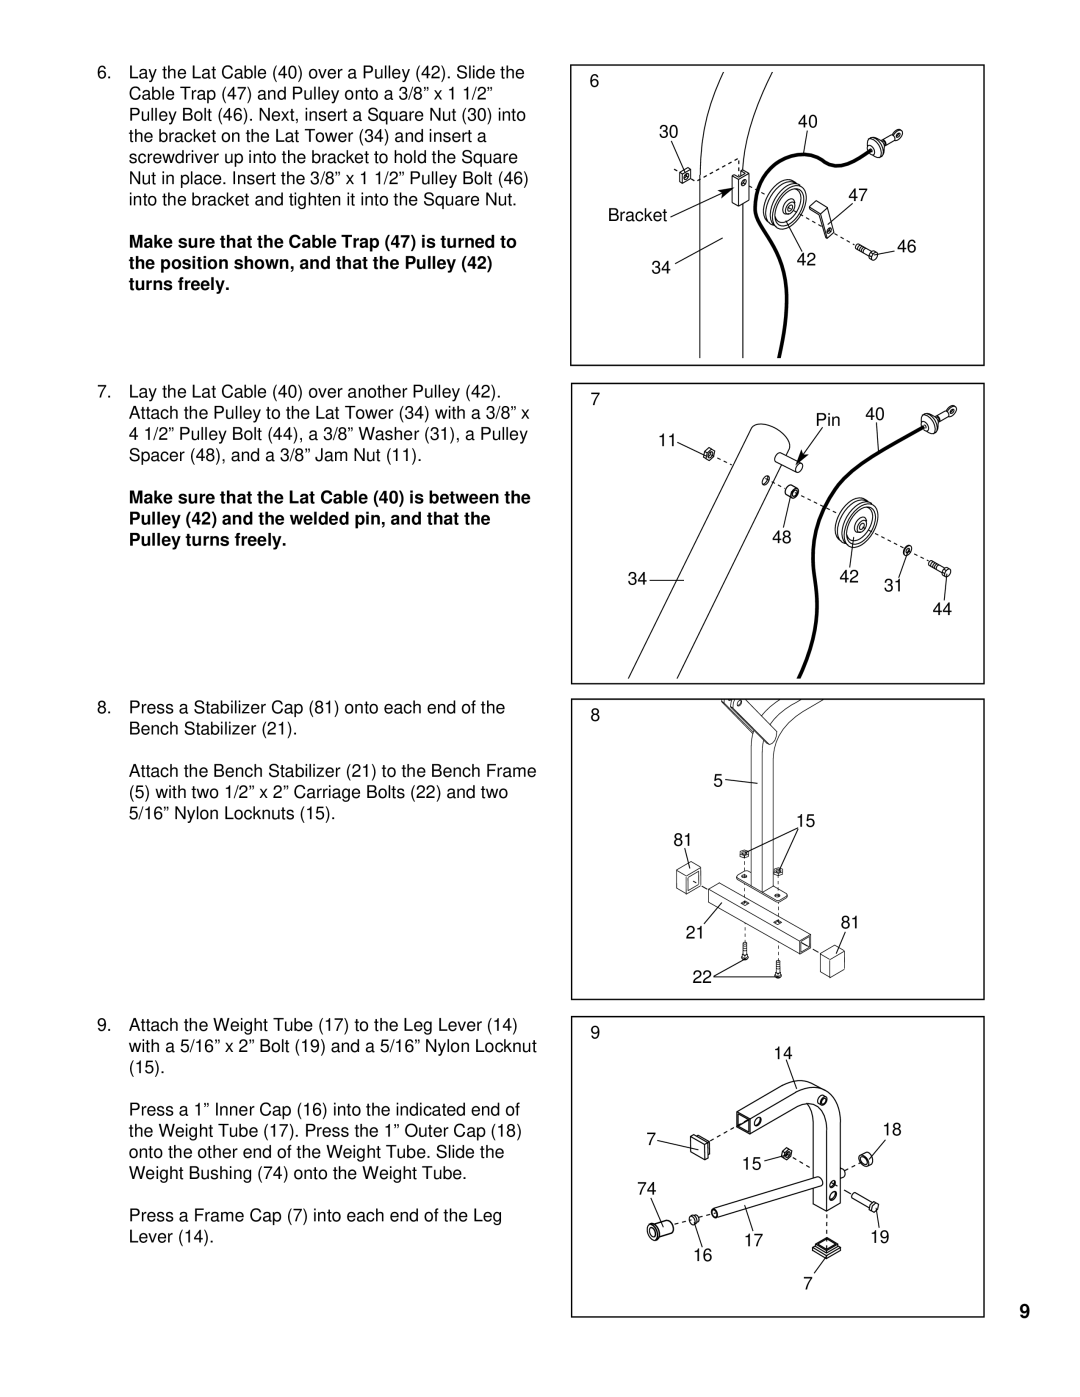
6. Lay the Lat Cable (40) over a Pulley (42). Slide the |
Cable Trap (47) and Pulley onto a 3/8” x 1 1/2” |
Pulley Bolt (46). Next, insert a Square Nut (30) into |
the bracket on the Lat Tower (34) and insert a |
screwdriver up into the bracket to hold the Square |
Nut in place. Insert the 3/8” x 1 1/2” Pulley Bolt (46) |
into the bracket and tighten it into the Square Nut. |
6
3040
47
Make sure that the Cable Trap (47) is turned to |
the position shown, and that the Pulley (42) |
turns freely. |
Bracket
3442
46
7.Lay the Lat Cable (40) over another Pulley (42). Attach the Pulley to the Lat Tower (34) with a 3/8” x 4 1/2” Pulley Bolt (44), a 3/8” Washer (31), a Pulley Spacer (48), and a 3/8” Jam Nut (11).
Make sure that the Lat Cable (40) is between the Pulley (42) and the welded pin, and that the Pulley turns freely.
7
Pin 40
11
| 48 |
|
34 | 42 | 31 |
|
|
44
8.Press a Stabilizer Cap (81) onto each end of the Bench Stabilizer (21).
Attach the Bench Stabilizer (21) to the Bench Frame
(5) with two 1/2” x 2” Carriage Bolts (22) and two 5/16” Nylon Locknuts (15).
8
5
15
81
21
81
9.Attach the Weight Tube (17) to the Leg Lever (14) with a 5/16” x 2” Bolt (19) and a 5/16” Nylon Locknut (15).
Press a 1” Inner Cap (16) into the indicated end of the Weight Tube (17). Press the 1” Outer Cap (18) onto the other end of the Weight Tube. Slide the Weight Bushing (74) onto the Weight Tube.
Press a Frame Cap (7) into each end of the Leg Lever (14).
22
9
| 14 |
7 | 18 |
|
15
74
17 ![]() 19
19
16![]()
7
9