ASSEMBLY
Assembly requires two people. Set the treadmill in a cleared area and remove all packing materials. Do not dispose of the packing materials until assembly is completed. Assembly requires the included allen wrench
and your own phillips screwdriver 
 .
.
Note: The underside of the treadmill walking belt is coated with
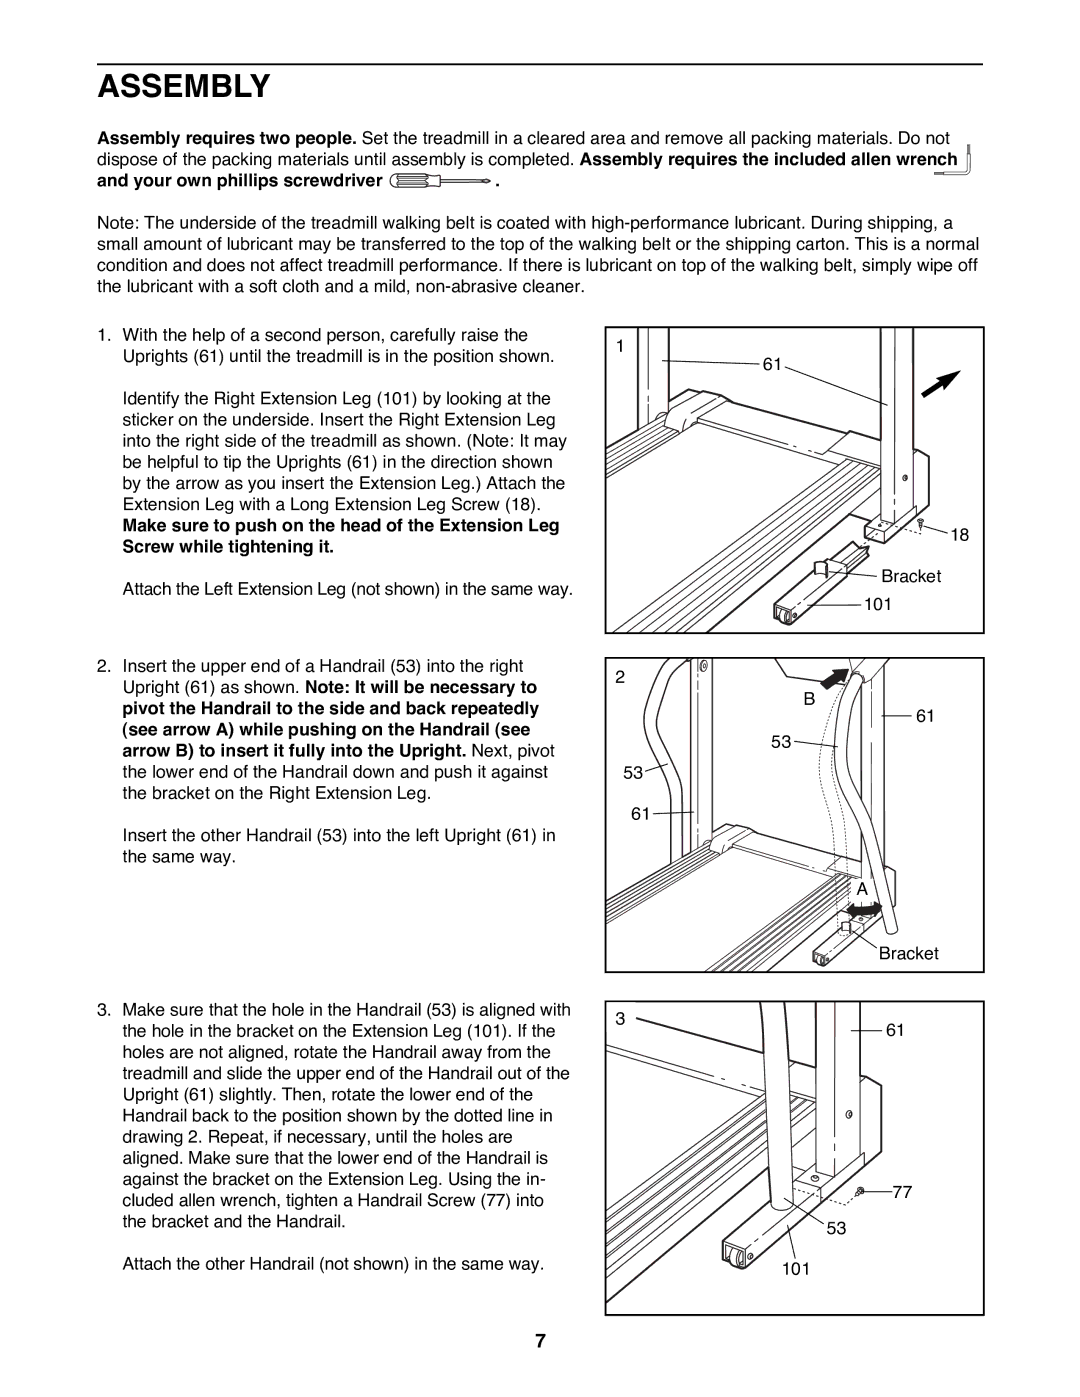
1.With the help of a second person, carefully raise the Uprights (61) until the treadmill is in the position shown.
Identify the Right Extension Leg (101) by looking at the sticker on the underside. Insert the Right Extension Leg into the right side of the treadmill as shown. (Note: It may be helpful to tip the Uprights (61) in the direction shown by the arrow as you insert the Extension Leg.) Attach the Extension Leg with a Long Extension Leg Screw (18).
Make sure to push on the head of the Extension Leg Screw while tightening it.
Attach the Left Extension Leg (not shown) in the same way.
2.Insert the upper end of a Handrail (53) into the right Upright (61) as shown. Note: It will be necessary to pivot the Handrail to the side and back repeatedly (see arrow A) while pushing on the Handrail (see arrow B) to insert it fully into the Upright. Next, pivot the lower end of the Handrail down and push it against the bracket on the Right Extension Leg.
Insert the other Handrail (53) into the left Upright (61) in the same way.
3.Make sure that the hole in the Handrail (53) is aligned with the hole in the bracket on the Extension Leg (101). If the holes are not aligned, rotate the Handrail away from the treadmill and slide the upper end of the Handrail out of the Upright (61) slightly. Then, rotate the lower end of the Handrail back to the position shown by the dotted line in drawing 2. Repeat, if necessary, until the holes are aligned. Make sure that the lower end of the Handrail is against the bracket on the Extension Leg. Using the in- cluded allen wrench, tighten a Handrail Screw (77) into the bracket and the Handrail.
Attach the other Handrail (not shown) in the same way.
1 | 61 |
| |
| 18 |
| Bracket |
| 101 |
2 |
|
| B |
| 61 |
| 53 |
53 |
|
61 |
|
| A |
| Bracket |
3 | 61 |
| |
| 77 |
| 53 |
| 101 |
7