Removing the water line and door hinges
Things you need to know:
Two persons are needed to re- move and replace the doors.
Read all directions carefully be- fore you begin.
Tools required:
l
doors without damaging
electrical wiring in the
4. Reattach the refrigerator door. Lift refrigerator door onto bot-
Disconnecttom hinge pin. While holding the door in the closed position,
reinstall the top hinge.
l 2 adjustable wrenches (or 13 mm [%“Iand 11 mm [%G”]
l Phillips screwdriver
lKnife
Remove all door shelves and compartments before removing the doors.
1.Open the doors and remove the base grille at the bottom of the refrigerator. Disconnect the union in the water line hose by removing the nut at the left. Pull the tube out of the clamp. Remove the rubber “0” rings and nut from the freezer door water line and remove the pro- tective spring. (See figure 1.)
Water line
Remove this nut
FIGURE 1
WATER TUBING BEHIND EASE GRILLE
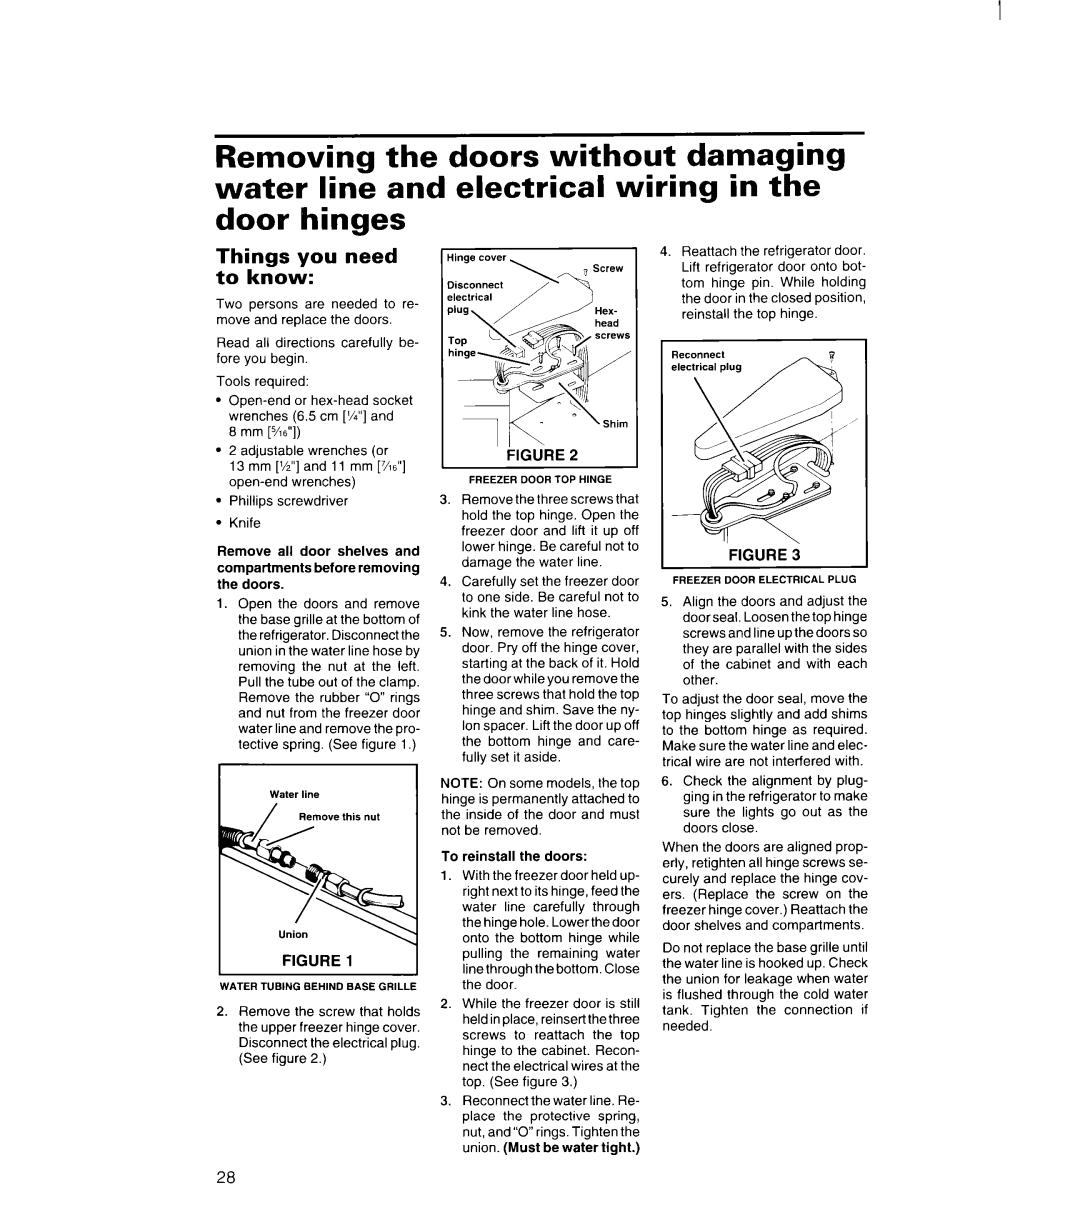
2.Remove the screw that holds the upper freezer hinge cover. Disconnect the electrical plug. (See figure 2.)
kiGURE 2
FREEZER DOOR TOP HINGE
3.Remove the three screws that hold the top hinge. Open the freezer door and lift it up off lower hinge. Be careful not to damage the water line.
4.Carefully set the freezer door to one side. Be careful not to kink the water line hose.
5.Now, remove the refrigerator door. Pry off the hinge cover, starting at the back of it. Hold the door while you remove the three screws that hold the top hinge and shim. Save the ny- lon spacer. Lift the door up off the bottom hinge and care- fully set it aside.
NOTE: On some models, the top hinge is permanently attached to the inside of the door and must not be removed.
To reinstall the doors:
1.With the freezer door held up- right next to its hinge, feed the water line carefully through the hinge hole. Lowerthedoor onto the bottom hinge while pulling the remaining water line through the bottom. Close the door.
2.While the freezer door is still held in place, reinsert the three screws to reattach the top hinge to the cabinet. Recon- nect the electrical wires at the top. (See figure 3.)
3.Reconnect the water line. Re- place the protective spring, nut, and”0” rings. Tighten the union. (Must be water tight.)
FIGURE 3
FREEZER DOOR ELECTRICAL PLUG
5.Align the doors and adjust the door seal. Loosen the top hinge screws and line up the doors so they are parallel with the sides of the cabinet and with each other.
To adjust the door seal, move the top hinges slightly and add shims to the bottom hinge as required. Make sure the water line and elec- trical wire are not interfered with.
6.Check the alignment by plug- ging in the refrigerator to make sure the lights go out as the doors close.
When the doors are aligned prop- erly, retighten all hinge screws se- curely and replace the hinge cov- ers. (Replace the screw on the freezer hinge cover.) Reattach the door shelves and compartments.
Do not replace the base grille until the water line is hooked up. Check the union for leakage when water is flushed through the cold water tank. Tighten the connection if needed.
28