
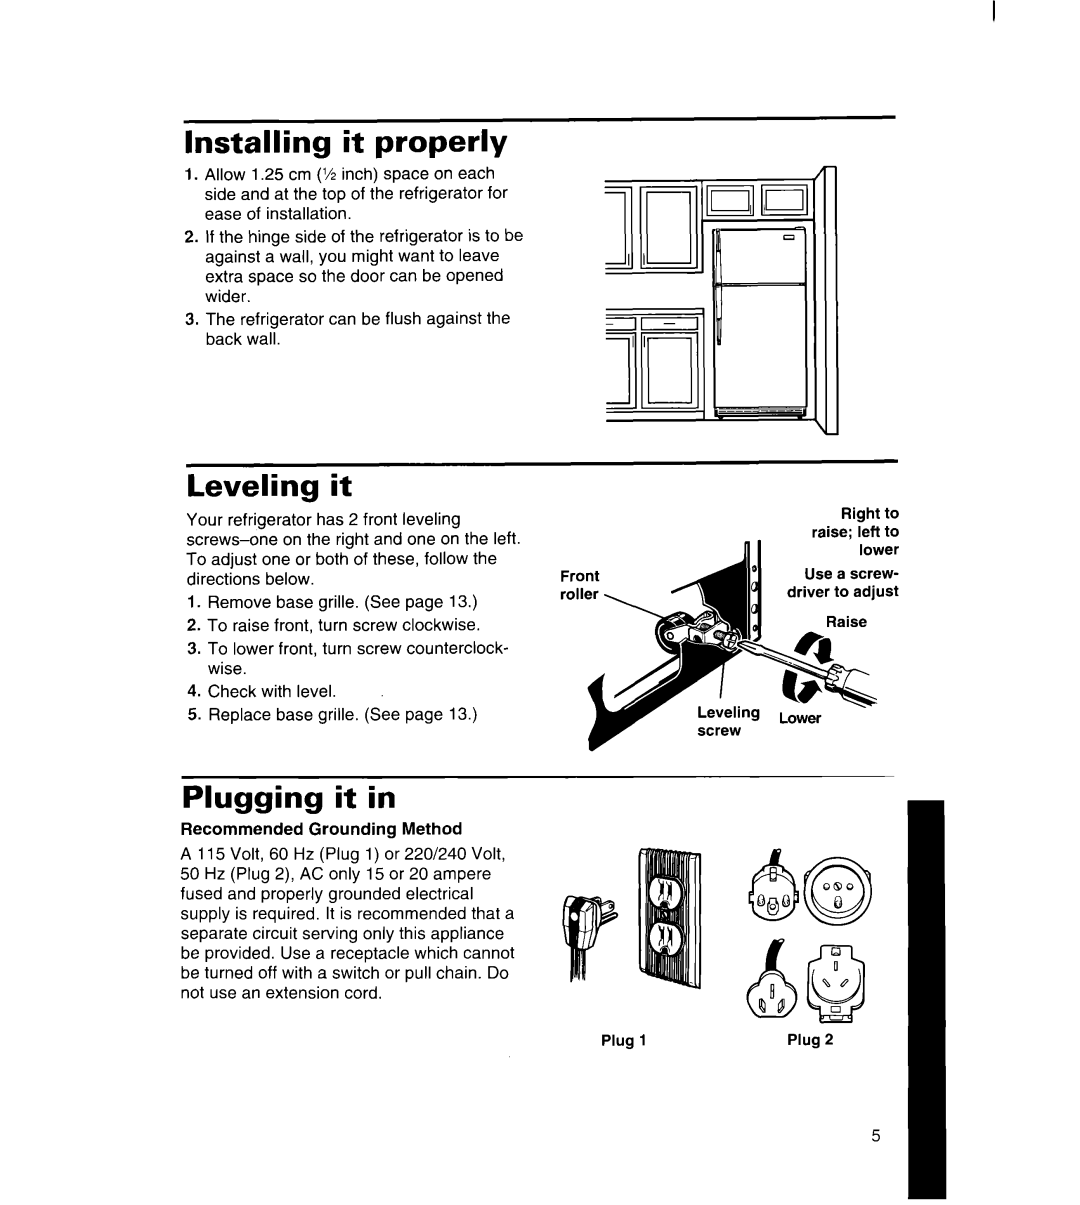
3ET16NK, 8ET17NK specifications
The Whirlpool 8ET17NK and 3ET16NK refrigerators are remarkable appliances that combine style, efficiency, and innovative technology, making them standout choices for modern kitchens. These models exemplify Whirlpool's commitment to quality and customer satisfaction, bringing a host of features that cater to varied user needs.One of the main features of the Whirlpool 8ET17NK is its spacious interior, designed to maximize storage while maintaining a compact footprint. With adjustable shelves, you can customize the arrangement to accommodate large items like party trays or tall bottles with ease. The Clear Humidity-Controlled Crisper draws attention as a functional addition, designed to help keep fruits and vegetables fresh for longer, reducing spoilage and waste.
The 3ET16NK model also boasts a spacious design, perfect for families or individuals who prioritize an organized and accessible refrigeration space. It features the SpillGuard shelves, which provide an easy-to-clean surface and prevent liquids from spilling over to lower shelves, thus simplifying cleanup.
Energy efficiency is another hallmark of both models, which meet or exceed ENERGY STAR standards. This attention to energy-saving technology not only reduces the carbon footprint but also helps homeowners lower their utility bills. The models typically feature LED interior lighting, which brightens the compartment and is more energy-efficient than traditional incandescent bulbs.
Both the 8ET17NK and 3ET16NK come equipped with the Adaptive Defrost system, which senses frost buildup and runs the defrost cycle only when necessary. This technology ensures optimal temperature management and minimizes energy consumption, making them smart choices for any energy-conscious consumer.
In terms of functionality, these models offer features like a dedicated ice maker, which ensures a steady supply of ice for your beverages. Additionally, with built-in adjustable door bins, these refrigerators allow users to store larger items in the door compartments, further enhancing organization.
The sleek design of both models, available in various finishes, makes them suitable for a range of kitchen aesthetics. The durability of the materials used in their construction ensures longevity, while their intuitive design facilitates ease of use.
In summary, the Whirlpool 8ET17NK and 3ET16NK refrigerators stand out due to their exceptional features, energy efficiency, and user-friendly design. Combining practicality with innovative technology, they represent a smart investment for anyone looking to enhance their kitchen experience.