Door Alignment
A refrigerator that is not level from
The doors are designed to be slightly different heights when the refrigerator is empty, in order to account for the weight of food that will be placed on the doors. If the doors are still not aligned after checking the leveling and loading the refrigerator with food, follow the steps below to adjust the door alignment.
1.Locate the alignment screw on the bottom hinge of the refrigerator door. See Graphic 9.
2.Use a ⁵⁄₁₆" wrench to turn the screw. To raise the refrigerator door, turn the screw to the right. To lower the door, turn the screw to the left.
3.Check that the doors are even at the top and bottom. If necessary, continue to turn the alignment screw until the doors are aligned.
4.Replace the base grille.
NOTE: Be sure to refasten the Tech Sheet behind the base grille.
Handle Installation and Removal
PARTS INCLUDED: Door handles (2), ¹⁄₈" hex key, spare setscrew(s)
To Install the Handles:
NOTE: The handle mounting setscrews are preinstalled in the handle.
1.Remove the handles, which are packed inside the refrigerator.
NOTE: To avoid scratching the finish, place the handles on a towel or other soft surface.
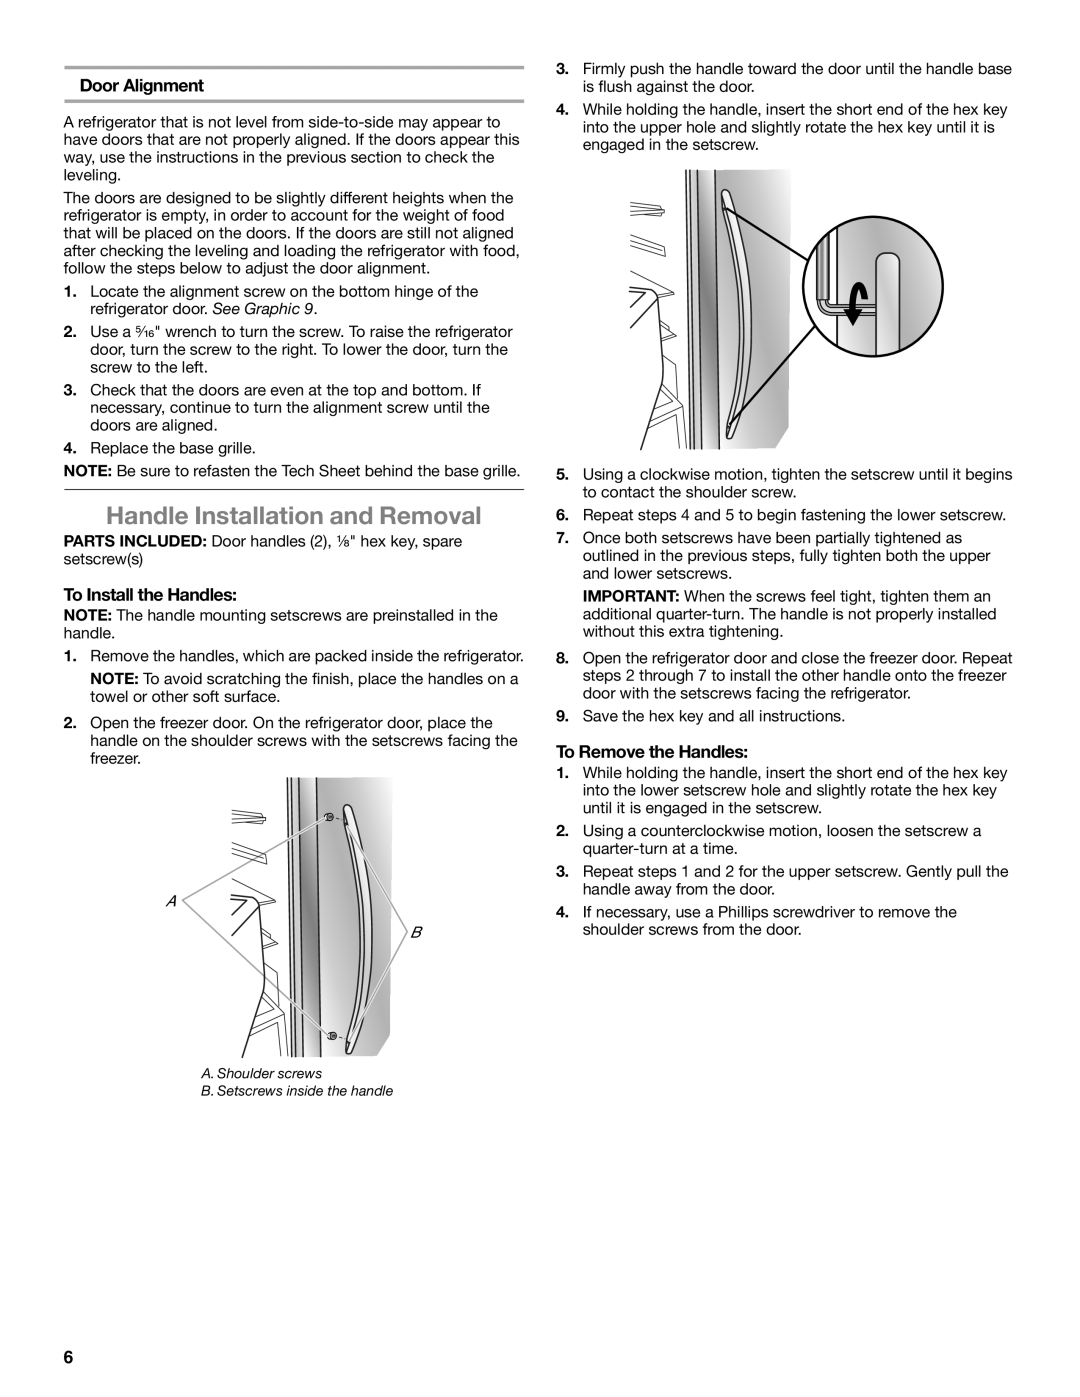
2.Open the freezer door. On the refrigerator door, place the handle on the shoulder screws with the setscrews facing the freezer.
A
B
A. Shoulder screws
B. Setscrews inside the handle
3.Firmly push the handle toward the door until the handle base is flush against the door.
4.While holding the handle, insert the short end of the hex key into the upper hole and slightly rotate the hex key until it is engaged in the setscrew.
5.Using a clockwise motion, tighten the setscrew until it begins to contact the shoulder screw.
6.Repeat steps 4 and 5 to begin fastening the lower setscrew.
7.Once both setscrews have been partially tightened as outlined in the previous steps, fully tighten both the upper and lower setscrews.
IMPORTANT: When the screws feel tight, tighten them an additional
8.Open the refrigerator door and close the freezer door. Repeat steps 2 through 7 to install the other handle onto the freezer door with the setscrews facing the refrigerator.
9.Save the hex key and all instructions.
To Remove the Handles:
1.While holding the handle, insert the short end of the hex key into the lower setscrew hole and slightly rotate the hex key until it is engaged in the setscrew.
2.Using a counterclockwise motion, loosen the setscrew a
3.Repeat steps 1 and 2 for the upper setscrew. Gently pull the handle away from the door.
4.If necessary, use a Phillips screwdriver to remove the shoulder screws from the door.
6