COOKTOP CONTROLS

To avoid damage to the cooktop controls, do not use steel wool, abrasive cleansers or oven cleaner.

To avoid damage, do not soak knobs.

When removing or replacing knobs, make sure knobs are in the Off position.

Do not remove seals under knobs, if present.

Cleaning Method:

Warm, soapy water:

Pull knobs straight away from control panel to remove.

CONTROL PANEL

To avoid damage to the control panel, do not use abrasive cleaners, steel-wool pads, gritty washcloths or abrasive paper towels.

To avoid turning the controls on while cleaning, you may activate the Control Lock feature (on some models). See “Control Lock” section.

Cleaning Method:

Glass cleaner and soft cloth or sponge:

Apply glass cleaner to soft cloth or sponge, not directly on panel.

All-Purpose Appliance Cleaner Part Number 31682 (not included):

See “Assistance or Service” section to order.

OVEN DOOR EXTERIOR

Cleaning Method:

Glass cleaner and paper towels or nonabrasive plastic scrubbing pad: Apply glass cleaner to soft cloth or sponge, not directly on panel.

All-Purpose Appliance Cleaner Part Number 31682 (not included):

See “Assistance or Service” section to order.

OVEN CAVITY

Do not use oven cleaners.

Food spills should be cleaned when oven cools. At high temperatures, foods react with porcelain and staining, etching, pitting or faint white spots can result.

Cleaning Method:

Self-Cleaning cycle: See “Self-Cleaning Cycle” first.

OVEN RACKS

Cleaning Method:

Self-Cleaning cycle:

See “Self-Cleaning Cycle” first. Remove racks, or they will discolor and become harder to slide. If this happens, a light coating of vegetable oil applied to the rack guides will help them slide.

Steel-wool pad

STORAGE DRAWER (on some models)

Make sure drawer is cool and empty before cleaning.

For more information, see “Storage Drawer” section.

Cleaning Method:

Mild detergent

Drawer Liner (on some models)

Remove all stored items from drawer and lift out drawer liner.

Clean with mild detergent

All-Purpose Appliance Cleaner Part Number 31682 (not included):

See “Assistance or Service” section to order.

OvenLight

The oven light is a standard 40-watt appliance bulb. Before replacing, make sure the oven and cooktop are cool and the control knobs are in the off position.

To Replace:

1.Unplug range or disconnect power.

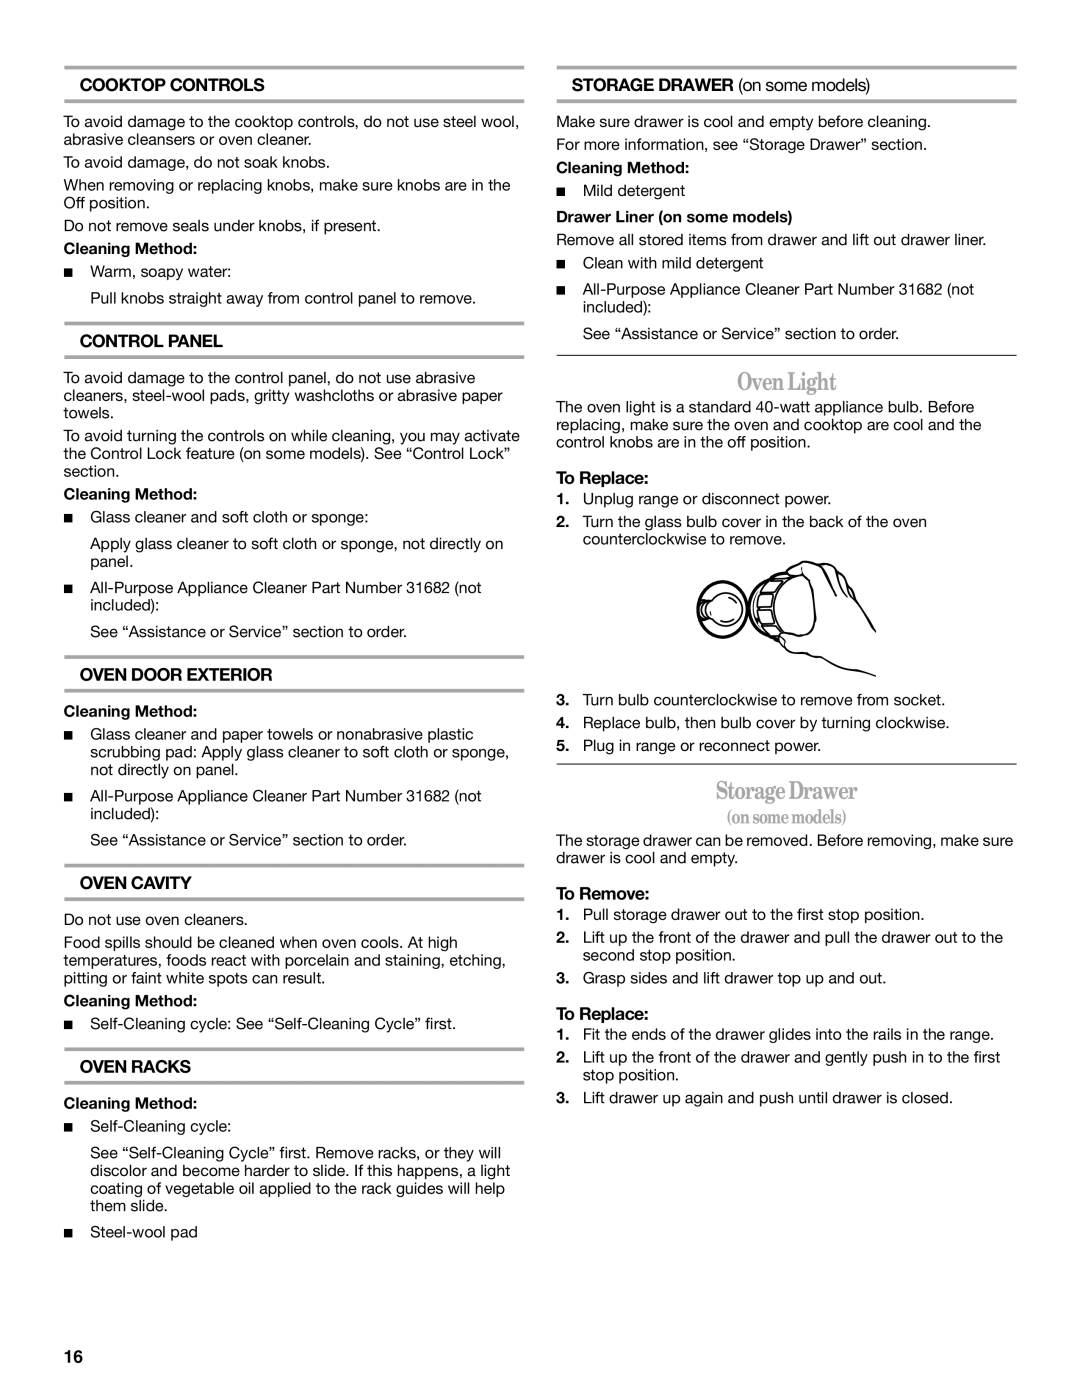
2.Turn the glass bulb cover in the back of the oven counterclockwise to remove.

3.Turn bulb counterclockwise to remove from socket.

4.Replace bulb, then bulb cover by turning clockwise.

5.Plug in range or reconnect power.

StorageDrawer

(onsomemodels)

The storage drawer can be removed. Before removing, make sure drawer is cool and empty.

To Remove:

1.Pull storage drawer out to the first stop position.

2.Lift up the front of the drawer and pull the drawer out to the second stop position.

3.Grasp sides and lift drawer top up and out.

To Replace:

1.Fit the ends of the drawer glides into the rails in the range.

2.Lift up the front of the drawer and gently push in to the first stop position.

3.Lift drawer up again and push until drawer is closed.

16

Page 16
Image 16
Whirlpool GY399LXUS, GY399LXUQ, GY399LXUB, GY397LXUQ, GY397LXUB manual OvenLight, StorageDrawer

GY397LXUB, GY397LXUQ, GY399LXUB, GY399LXUS, GY399LXUQ specifications

Whirlpool's GY399LXUQ, GY399LXUS, GY399LXUB, GY397LXUQ, and GY397LXUB models represent a sophisticated blend of design, technology, and functionality in the realm of kitchen appliances. These ranges are engineered to accommodate the needs of both casual cooks and culinary enthusiasts, providing a versatile cooking experience that combines ease of use with high-performance features.

One of the standout features of these models is the innovative Precise Clean Technology. This self-cleaning option is designed for efficiency, using high temperatures to eliminate stubborn grease and grime, allowing users to maintain a pristine oven with minimal effort. The intuitive design streamlines the cleaning process, making it easy to keep your kitchen looking immaculate.

Another key characteristic is the addition of the SpeedHeat Burner, which offers rapid boiling capabilities, perfect for quick meals. This burner, coupled with the powerful 18,000 BTUs output, delivers high heat when it's needed most, ensuring that whether you are searing meat or boiling pasta, you achieve optimal results in record time.

Additionally, the models feature a unique TimeSavor Convection Cooking system, which circulates hot air throughout the oven for even cooking and baking. This ensures that dishes are evenly browned and cooked to perfection, whether you're baking cookies or roasting a chicken. Moreover, this technology significantly reduces cooking time, making it easier for users to prepare meals efficiently.

The GY399LXUQ, GY399LXUS, GY399LXUB, GY397LXUQ, and GY397LXUB also come equipped with a convenient touch control panel. This user-friendly interface allows for precise temperature adjustments and cooking times, enhancing the overall cooking experience. The sleek design not only complements modern kitchens but also ensures that navigating settings is intuitive.

Safety features such as the Control Lock and the oven door cool-to-the-touch feature enhance usability and safety, particularly in homes with children.

In terms of versatility, these ranges feature multiple cooking modes, including bake, broil, and preheat features, catering to a wide array of culinary techniques.

In summary, the Whirlpool GY399LXUQ, GY399LXUS, GY399LXUB, GY397LXUQ, and GY397LXUB models offer a comprehensive suite of features that make cooking and baking an enjoyable and efficient process. Through advanced technologies and thoughtful design, these ranges elevate the standards of home cooking while ensuring user safety and satisfaction.