USING THE
USING THE
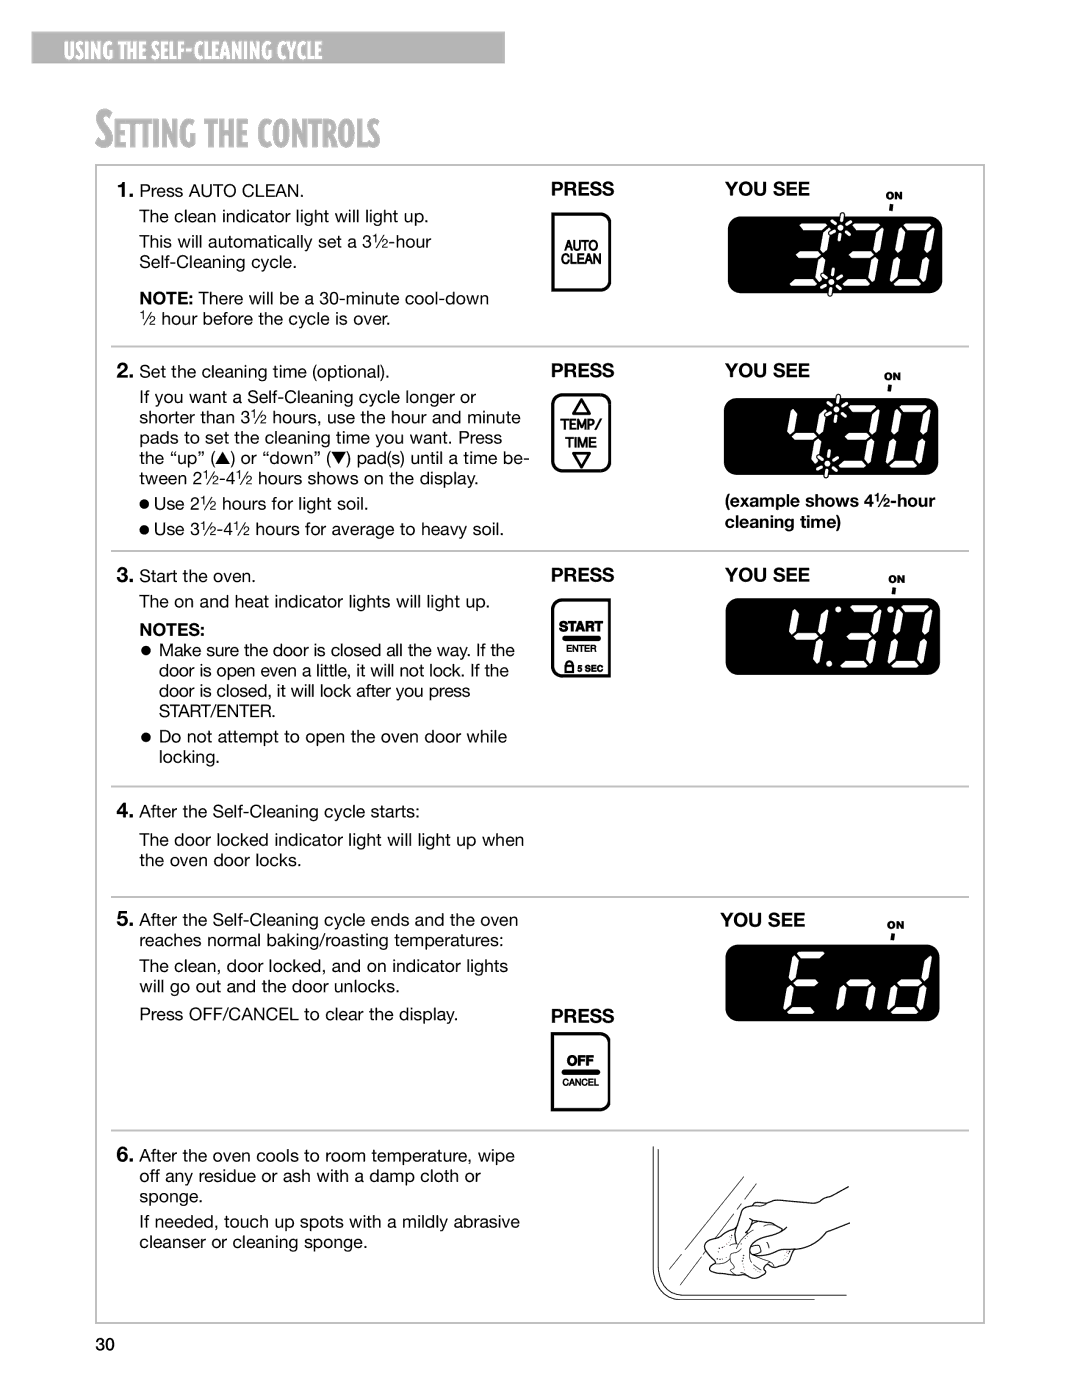
SETTING THE CONTROLS
1.Press AUTO CLEAN.
The clean indicator light will light up. This will automatically set a
NOTE: There will be a
PRESS | YOU SEE |
AUTO
CLEAN
ON
2.Set the cleaning time (optional).
If you want a
PRESS | YOU SEE |
TIME
ON
•Use 21⁄2 hours for light soil. | (example shows |
•Use | cleaning time) |
|
|
3.Start the oven.
The on and heat indicator lights will light up.
NOTES:
•Make sure the door is closed all the way. If the door is open even a little, it will not lock. If the door is closed, it will lock after you press
START/ENTER.
•Do not attempt to open the oven door while locking.
PRESS | YOU SEE |
START
ENTER
![]() 5 SEC
5 SEC
ON
4.After the
The door locked indicator light will light up when the oven door locks.
5. After the | YOU SEE |
reaches normal baking/roasting temperatures: |
|
The clean, door locked, and on indicator lights |
|
will go out and the door unlocks. |
|
Press OFF/CANCEL to clear the display. | PRESS |
ON
OFF
CANCEL
6.After the oven cools to room temperature, wipe off any residue or ash with a damp cloth or sponge.
If needed, touch up spots with a mildly abrasive cleanser or cleaning sponge.
30