2500 specifications
WhisperKool 2500 is a renowned cooling solution specifically designed for wine cellars and wine storage. Its advanced features and innovative technologies make it a top choice for wine enthusiasts and collectors who value optimal storage conditions. This cooling unit is engineered to maintain consistent temperatures while minimizing noise and energy consumption, making it an excellent addition to any wine preservation environment.One of the standout features of the WhisperKool 2500 is its ability to deliver a temperature range suitable for wine storage, typically between 50°F and 65°F. This range is critical for preserving the quality and flavor of wine, ensuring that it ages gracefully. The unit utilizes a powerful compressor system that allows for rapid cooling without compromising energy efficiency.
Another significant technology incorporated into the WhisperKool 2500 is its advanced air circulation system. It employs a high-velocity fan that promotes even temperature distribution throughout the wine cellar. This feature not only prevents hot spots but also ensures that all bottles are stored under consistent conditions. Additionally, the built-in dehumidification system helps reduce humidity levels, which is essential to prevent cork damage and mold growth.
The WhisperKool 2500 also includes a digital control panel, allowing users to monitor and adjust the temperature and humidity levels with ease. This user-friendly interface is equipped with an LCD display that provides real-time feedback, making it simple to maintain ideal storage conditions. Furthermore, the unit offers a range of customizable options, including the ability to set specific temperature and humidity thresholds.
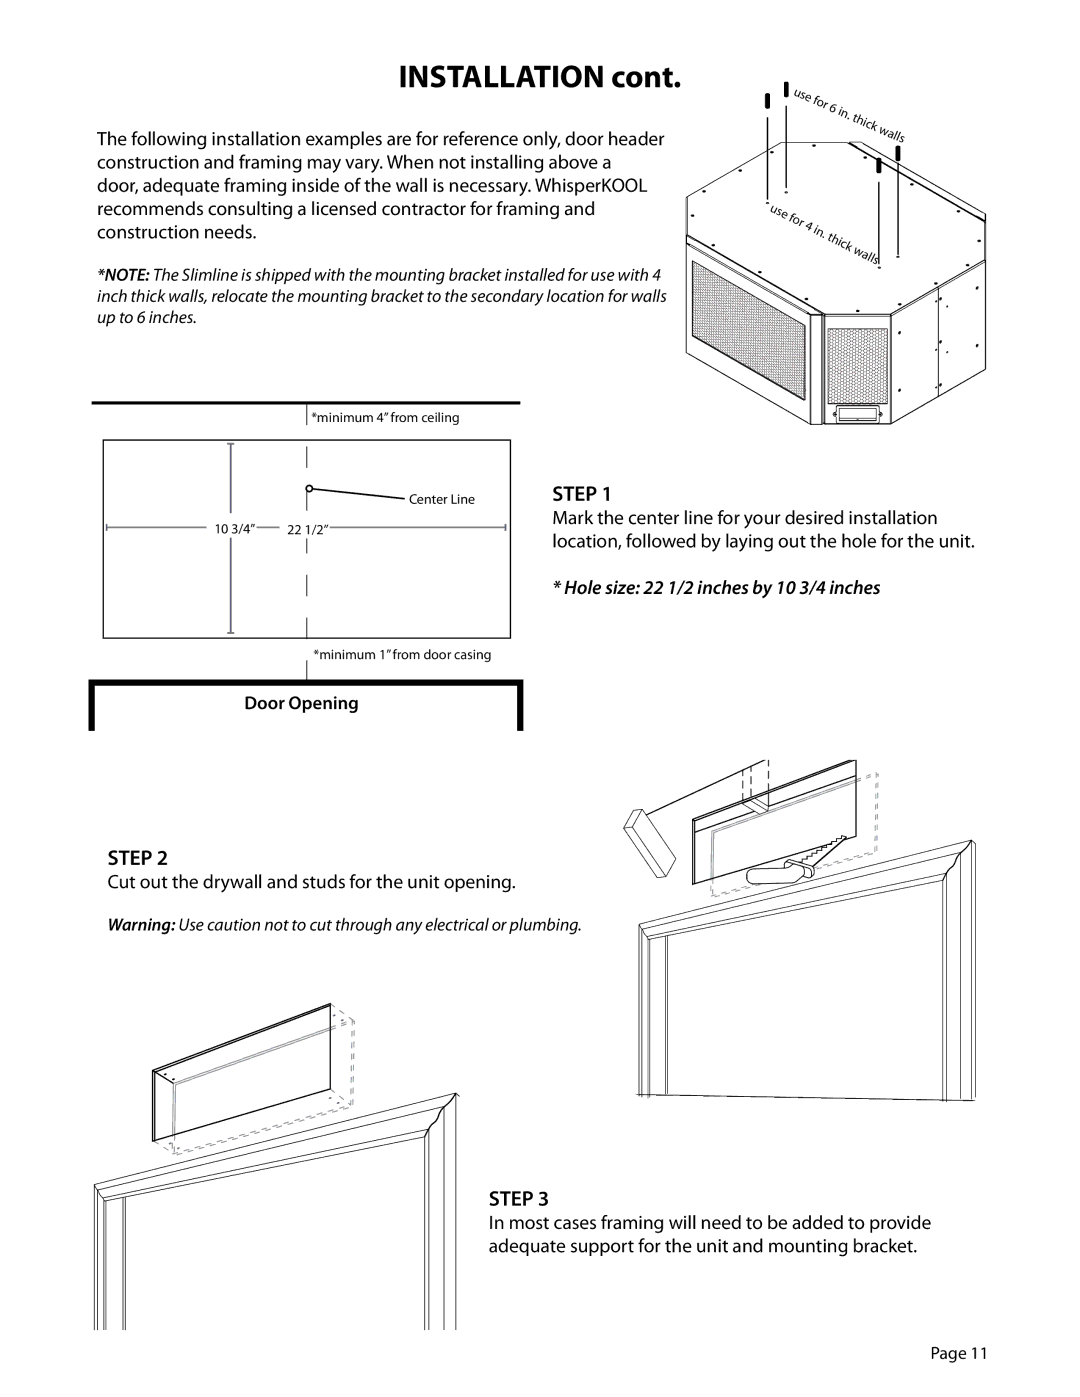
Installation of the WhisperKool 2500 is straightforward, with a compact design that fits seamlessly into wine cellars of various sizes. Its self-contained cooling system means that it can be installed in both through-the-wall and ducted configurations, providing flexibility for different wine storage setups. Quiet operation is another hallmark of this unit, producing minimal noise to ensure an undisturbed environment for both wines and homeowners.
In summary, the WhisperKool 2500 combines advanced cooling technologies with user-friendly features to provide an exceptional wine storage solution. With its ability to maintain precise temperature and humidity levels, efficient operation, and ease of installation, it stands out as a reliable choice for anyone serious about their wine collection. Whether you are a casual collector or a seasoned connoisseur, the WhisperKool 2500 is designed to safeguard and enhance the quality of your wines.