
PACR12 specifications
The WindChaser Products PACR12 is a remarkable advancement in portable air conditioning systems, designed to meet the needs of both residential and commercial applications. This innovative unit combines performance and efficiency, making it a popular choice among consumers looking for reliable cooling solutions.At the core of the PACR12 is its impressive cooling capacity, delivering 12,000 BTUs, which can effectively cool spaces up to 500 square feet. This makes it ideal for use in medium-sized rooms, including living rooms, offices, and even workshops. The powerful compressor ensures that the PACR12 operates efficiently, providing quick and consistent temperature control.
One of the standout features of the PACR12 is its energy efficiency. This unit is equipped with an Energy Efficiency Ratio (EER) that meets rigorous standards, allowing users to enjoy significant savings on energy bills. The PACR12 is also designed with an eco-friendly refrigerant, contributing to environmentally conscious cooling practices.
The PACR12 boasts a user-friendly interface, featuring a digital display and intuitive controls. This allows users to easily adjust temperature settings, fan speeds, and operational modes, including cooling, dehumidifying, and fan-only modes. The programmable timer adds convenience, enabling homeowners to schedule cooling cycles based on their preferences.
Another key characteristic of the PACR12 is its portability. Equipped with caster wheels and a lightweight design, this air conditioner can be easily moved from room to room. Its compact size also means it can fit snugly in tight spaces, without compromising on performance.
Additionally, the PACR12 comes with an advanced filtration system that helps improve indoor air quality. The washable and reusable filter captures dust, allergens, and other particles, ensuring that the air circulated is fresh and clean. This is particularly beneficial for allergy sufferers and contributes to a healthier indoor environment.
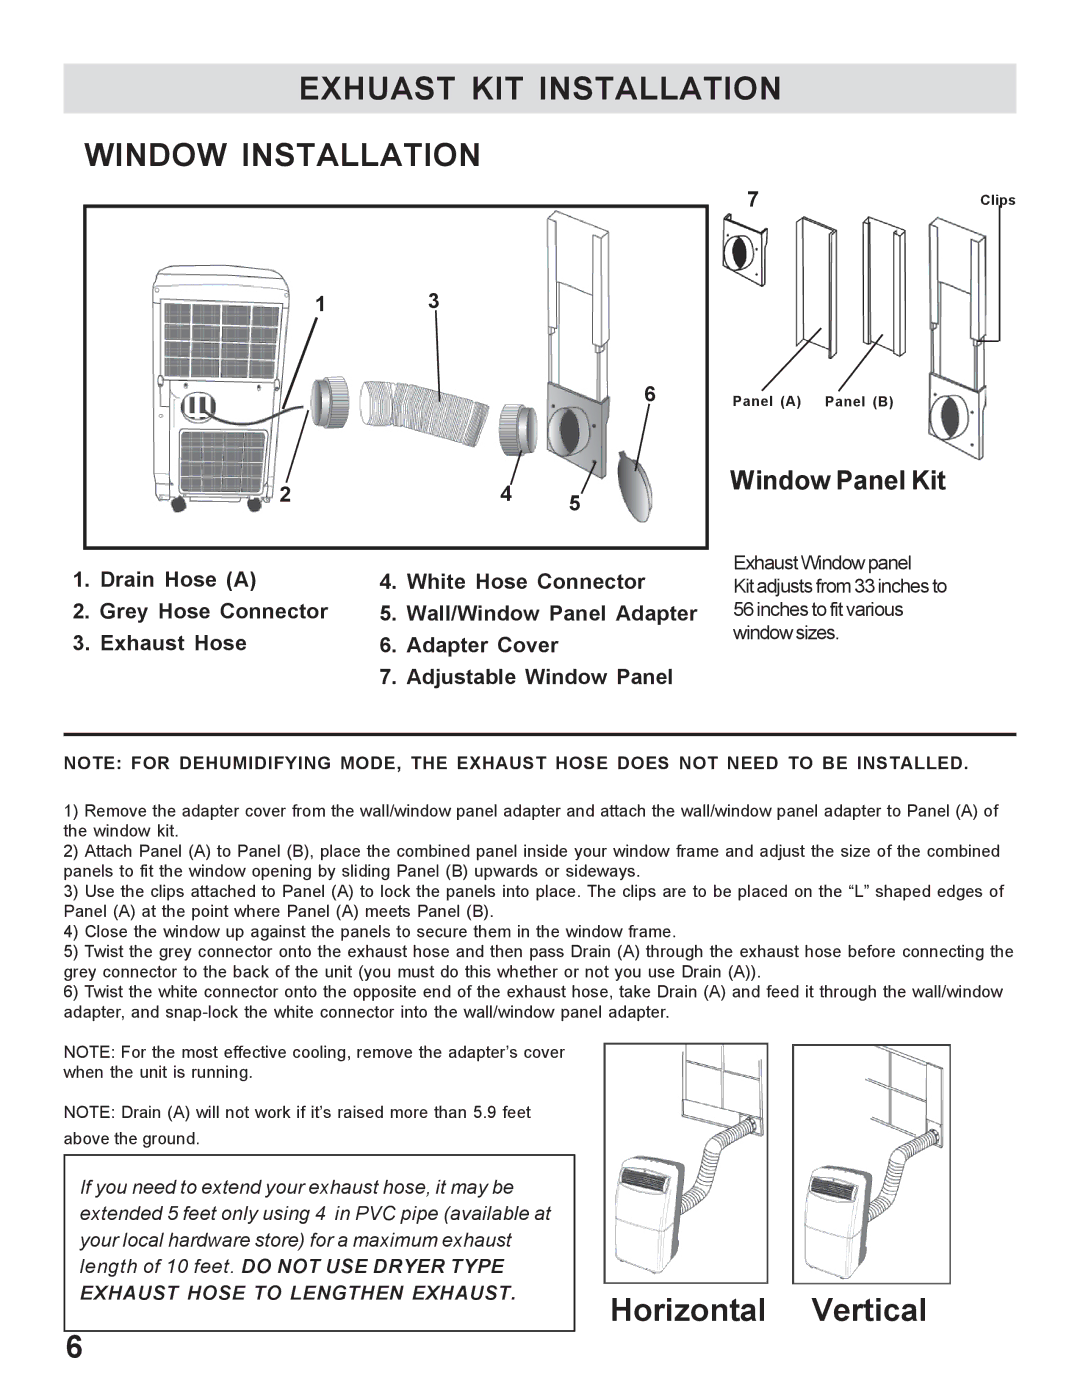
Installation of the PACR12 is straightforward, thanks to its included window installation kit. This kit is designed to accommodate various window sizes, making it easier for users to set up their cooling system without the need for professional assistance.
In summary, the WindChaser Products PACR12 is a powerful, efficient, and user-friendly portable air conditioner. Its combination of cooling capacity, energy efficiency, portability, and advanced features make it a standout choice for anyone seeking a reliable cooling solution for their space. Whether for personal use or in a professional setting, the PACR12 delivers impressive performance and quality.