Using the Router as a Jointer
1 | 2 | 3 | 2 |
|
| 5 |
|
| 6 |
| 4 |
|
|
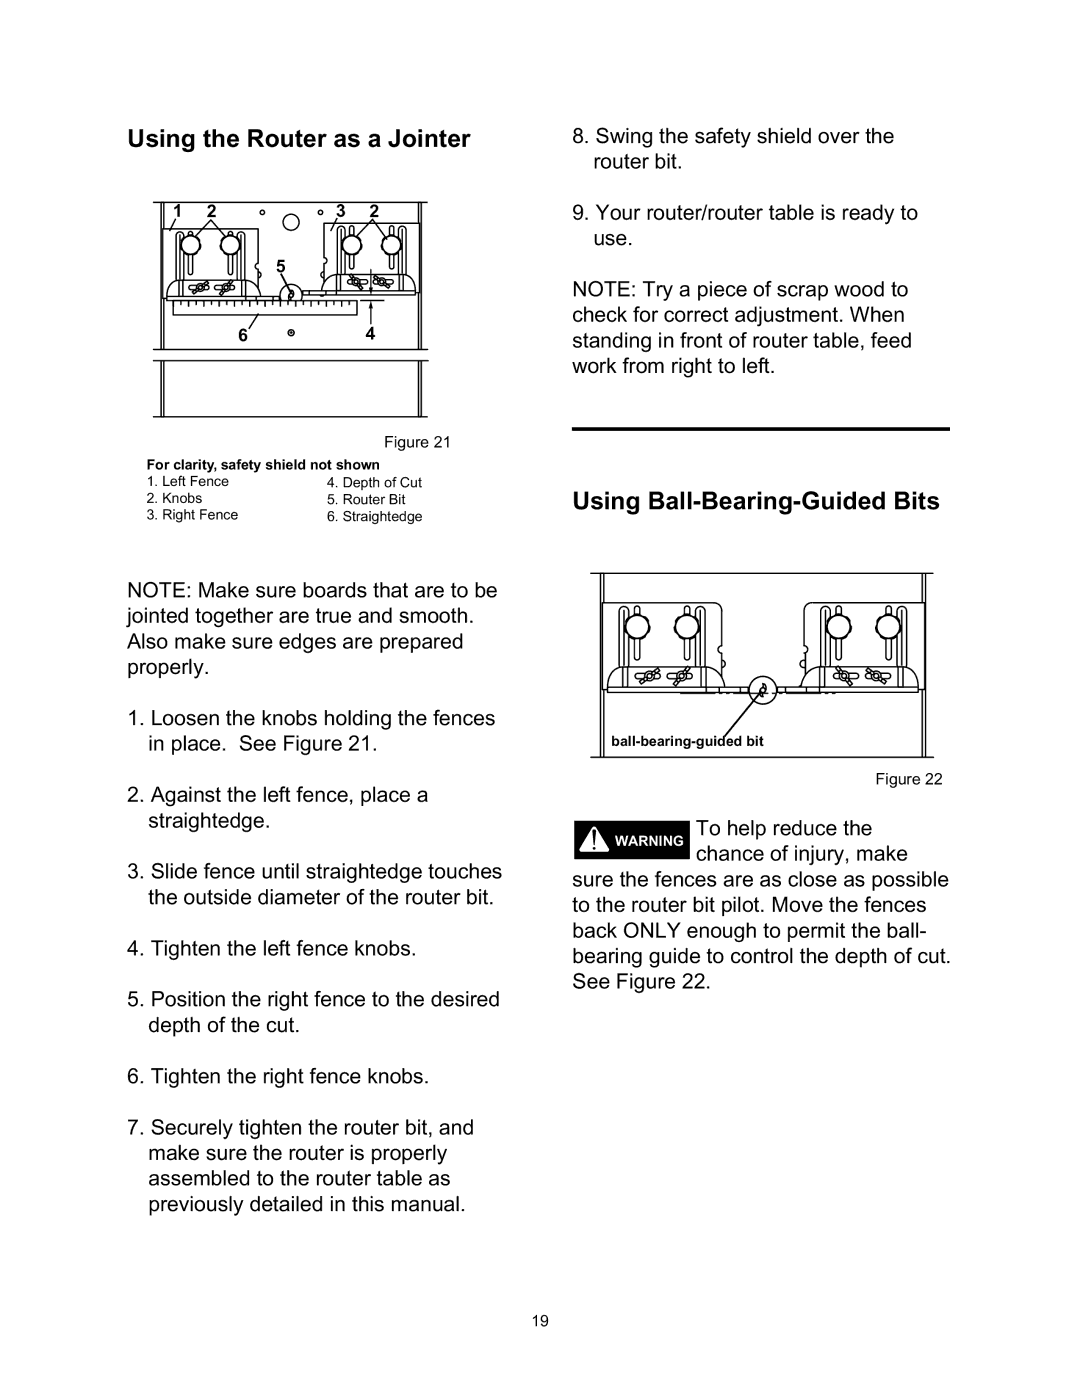
| Figure 21 |
For clarity, safety shield not shown | |||
1. | Left Fence | 4. | Depth of Cut |
2. | Knobs | 5. | Router Bit |
3. | Right Fence | 6. | Straightedge |
NOTE: Make sure boards that are to be jointed together are true and smooth. Also make sure edges are prepared properly.
1.Loosen the knobs holding the fences in place. See Figure 21.
2.Against the left fence, place a straightedge.
3.Slide fence until straightedge touches the outside diameter of the router bit.
4.Tighten the left fence knobs.
5.Position the right fence to the desired depth of the cut.
6.Tighten the right fence knobs.
7.Securely tighten the router bit, and make sure the router is properly assembled to the router table as previously detailed in this manual.
8.Swing the safety shield over the router bit.
9.Your router/router table is ready to use.
NOTE: Try a piece of scrap wood to check for correct adjustment. When standing in front of router table, feed work from right to left.
Using Ball-Bearing-Guided Bits
Figure 22
To help reduce the WARNING chance of injury, make
sure the fences are as close as possible to the router bit pilot. Move the fences back ONLY enough to permit the ball- bearing guide to control the depth of cut. See Figure 22.
19