OPERATION
Connecting a Vacuum
A hole is provided under the safety shield that will accept standard
Using the Fences
Feed workpiece WARNING against the router bit's
direction of rotation. Unplug router prior when changing the bit, modifying settings, or making any other adjustments.
Using the Router for Beading and Edge Cutting
1.Loosen the knobs that hold the fences in place. See Figure 19, below.
1 | 2 | 3 | 2 |
|
| 5 |
|
Figure 19
For clarity, safety shield not shown
1. | Left Fence | 4. | Router Bit Rotation |
2. | Knobs | 5. | Straightedge |
3. | Right Fence |
|
|
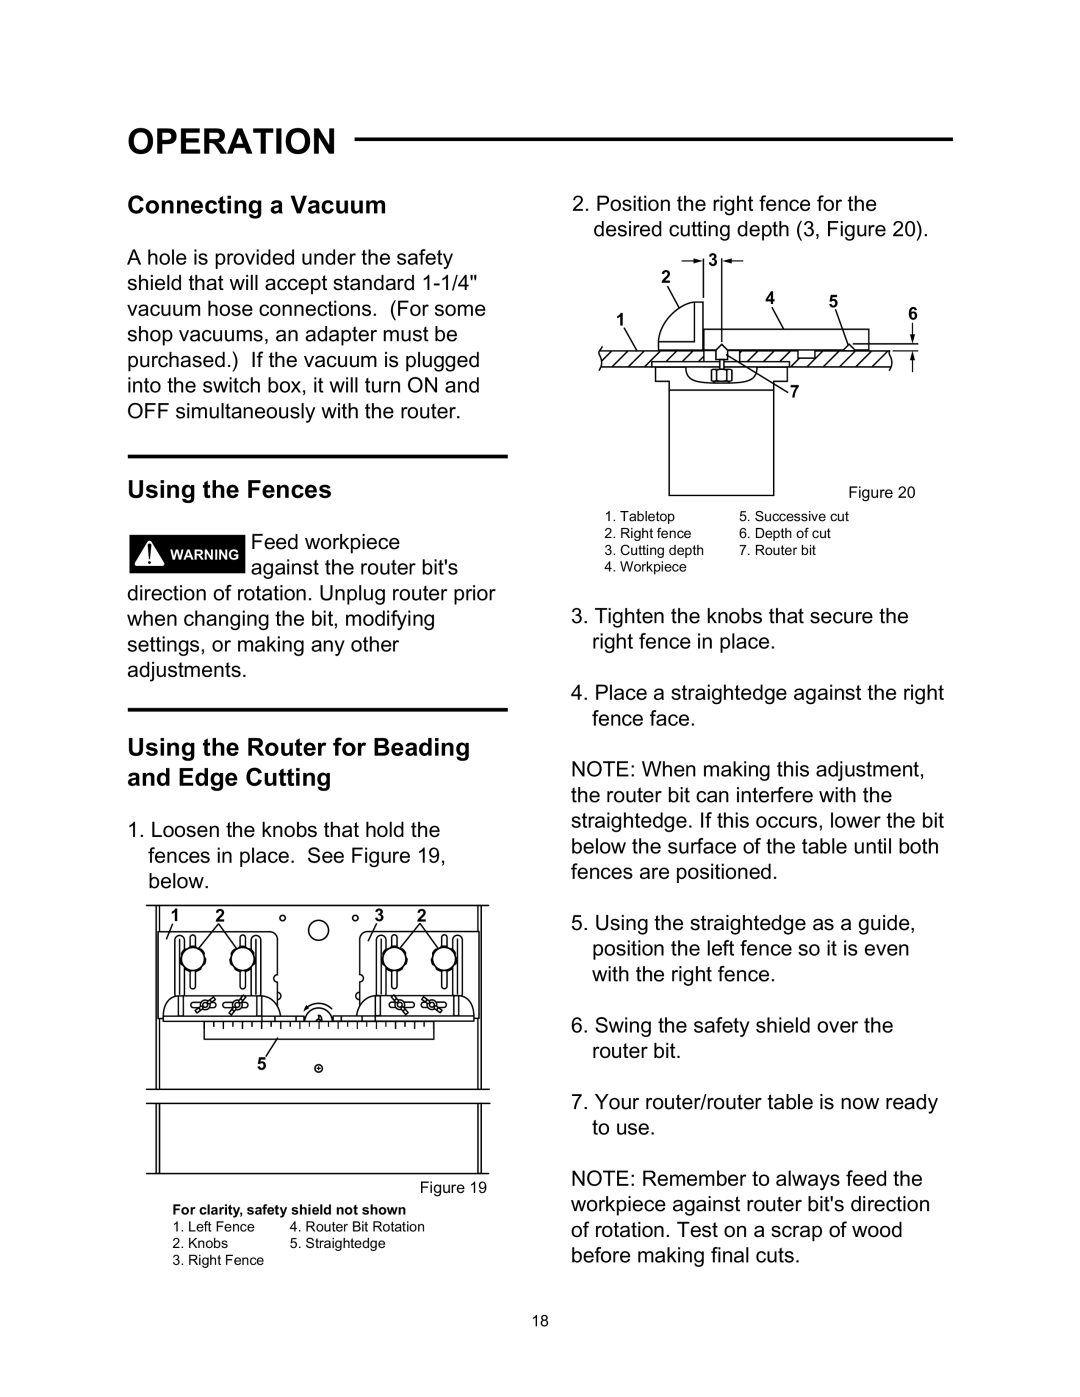
2.Position the right fence for the desired cutting depth (3, Figure 20).
3 |
|
|
2 |
|
|
4 | 5 | 6 |
1 |
| |
|
| |
| 7 |
|
Figure 20
1. | Tabletop | 5. | Successive cut |
2. | Right fence | 6. | Depth of cut |
3. | Cutting depth | 7. | Router bit |
4.Workpiece
3.Tighten the knobs that secure the right fence in place.
4.Place a straightedge against the right fence face.
NOTE: When making this adjustment, the router bit can interfere with the straightedge. If this occurs, lower the bit below the surface of the table until both fences are positioned.
5.Using the straightedge as a guide, position the left fence so it is even with the right fence.
6.Swing the safety shield over the router bit.
7.Your router/router table is now ready to use.
NOTE: Remember to always feed the workpiece against router bit's direction of rotation. Test on a scrap of wood before making final cuts.
18