| Upper Pillowblock |
| Bearings 50 Hours |
Disk Assembly | Idler Weldment |
Bearings 50 Hours | |
| Grease Fitting 50 Hours |
| Discharge Cap |
| Lower Pillowblock |
| Bearing 50 Hours |
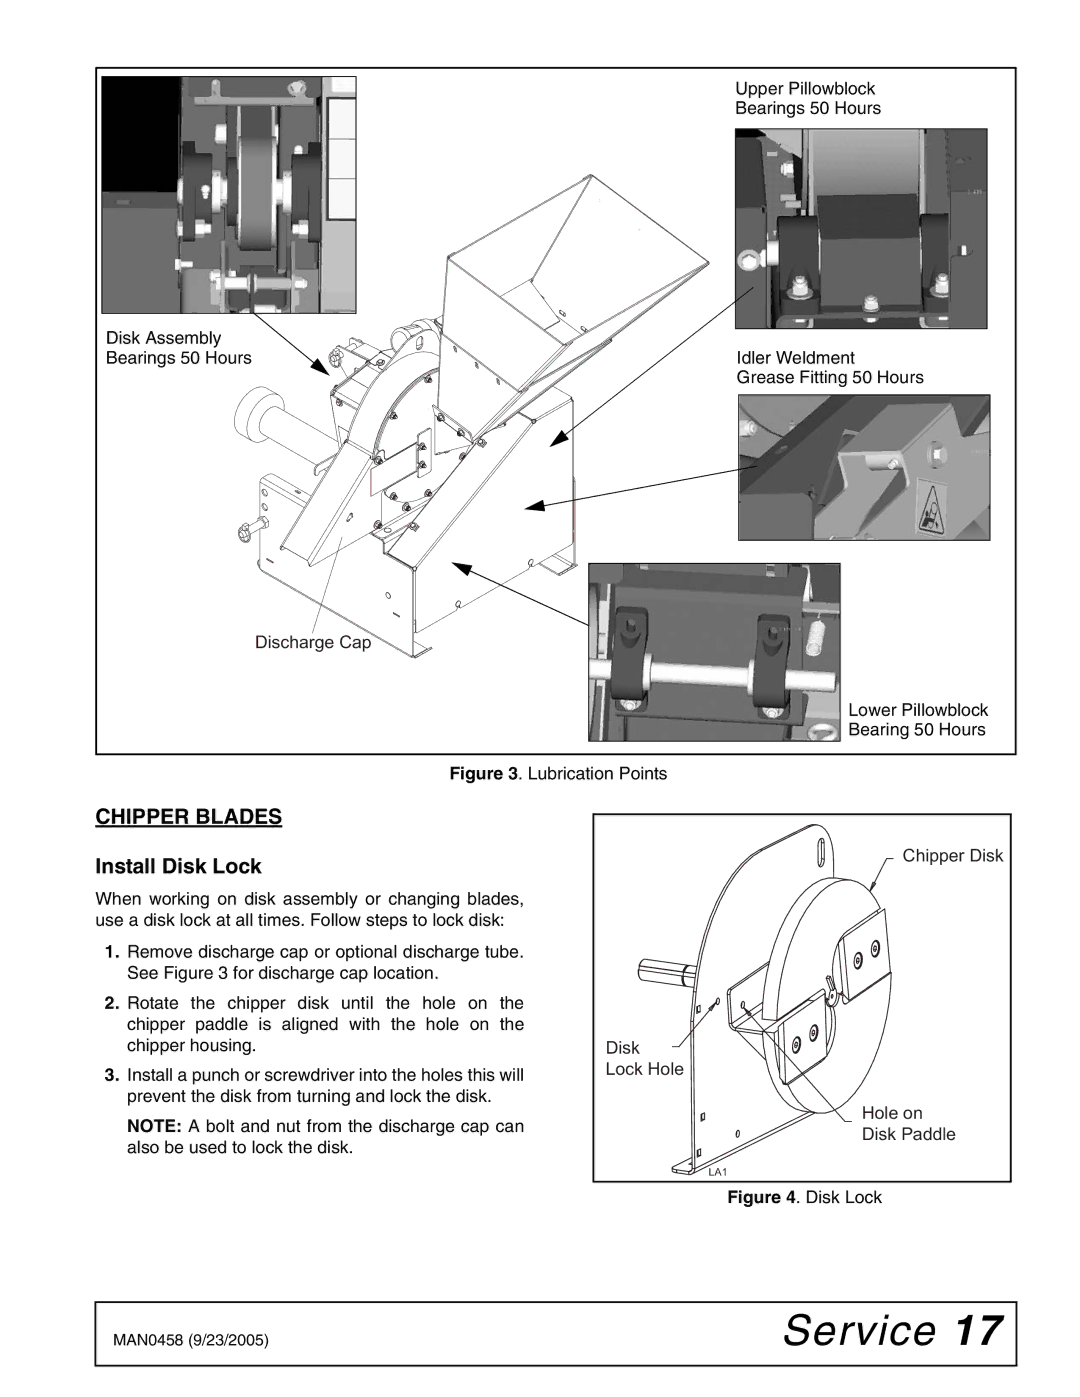
Figure 3. Lubrication Points
CHIPPER BLADES
Install Disk Lock
When working on disk assembly or changing blades, use a disk lock at all times. Follow steps to lock disk:
1.Remove discharge cap or optional discharge tube. See Figure 3 for discharge cap location.
2.Rotate the chipper disk until the hole on the chipper paddle is aligned with the hole on the chipper housing.
3.Install a punch or screwdriver into the holes this will prevent the disk from turning and lock the disk.
NOTE: A bolt and nut from the discharge cap can also be used to lock the disk.
Chipper Disk
Disk
Lock Hole
Hole on
Disk Paddle
LA1
Figure 4. Disk Lock
MAN0458 (9/23/2005) | Service 17 |
|
|
