Contents
Micro Mill
Page
Contents
Maintenance
Woodstock Technical Support
Specifications
Introduction
About Your New Micro Mill
Controls and Features
M1036 Controls and features
Safety
Standard Safety Instructions
Safety
Additional Safety Instructions for Micro Mills
Extension Cords
Electrical
110V Operation
Grounding
Unpacking
SET UP
Items Needed for Set Up
Bench Mounting Hardware Optional
Inventory
Box 1 Contents Figure Qty
Box 2 Contents Figure Qty
Box 1 Tools and Hardware Not Shown Qty
Machine Placement
Cleaning Machine
Mounting Headstock to Column
To install the headstock on the column, do these steps
Mounting to Workbench
To mount the mill to the workbench, do these steps
Compound Slide Table
To install the compound slide table, do these steps
To install the vise, do these steps
Vise
Test Run and Spindle Break-in
Table Travel
Operations
General
Headstock Height
Graduated Dials
Backlash
To use the downfeed lever, do this step
Downfeed Controls
Digital Height Gauge
To use the micro downfeed handwheel, do these steps
To set the depth stop, do these steps
Depth Stop
Changing RPM
To change the RPM, do these steps
Drill Chuck Removal
To install a drill bit, do these steps
Drill Chuck
To remove a drill bit, do these steps
Collets
To install the collet chuck, do these steps
To install the collet in the collet chuck, do these steps
Table & Base
Maintenance
Cleaning
Lubrication
Cross slide and saddle ways Quill shaft
Gibs
Service
To adjust the gibs, do these steps
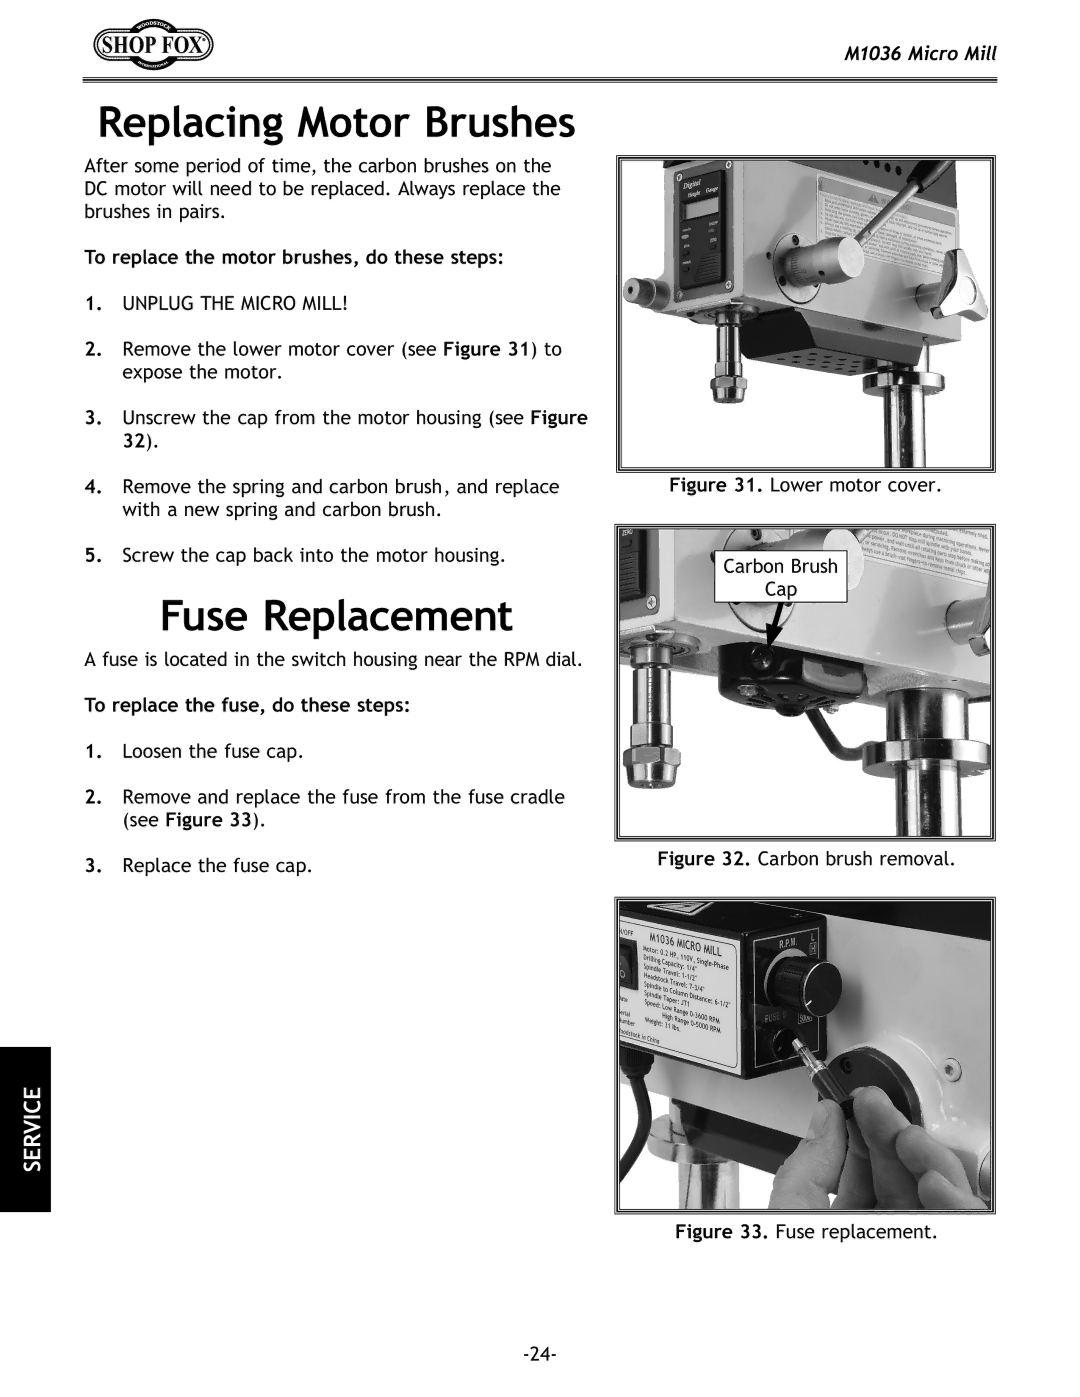
Replacing Motor Brushes
Fuse Replacement
Unscrew the cap from the motor housing see Figure
To replace the motor brushes, do these steps
Electrical Components
Troubleshooting
Symptom Possible Cause Corrective Action
Parts
Parts List
PART# Description
FLATWASHER24MM
Warranty
Warranty Registration
Comments
BOX BELLINGHAM, WA

