Roady Guide keys 4" x 4" 8/5/03 1:40 PM Page 7
6
Section | Getting Started: Activating Roady | |||||||||
1. Set up your Roady Receiver using the installation instructions in Section 5 | ||||||||||
| To quickly begin enjoying Delphi XM Satellite Radio, follow these simple steps: | |||||||||
1 | of this guide (see page 15) or with the help of a professional installer. | |||||||||
|
|
|
|
|
|
|
|
|
| |
| 2. Press the power button to turn the Roady Receiver on and verify that it | |||||||||
| is playing Channel 1, the XM Preview Channel. | |||||||||
| 3. Select Channel 0. The receiver’s | |||||||||
| number will appear on the display. Write the number here: | |||||||||
|
|
|
|
|
|
|
|
|
|
|
|
|
|
|
|
|
|
|
|
|
|
Note: Carefully check your XM Radio ID. The letters I, O, S, and F are not used.
4.Activate your XM Satellite Radio service. To subscribe, make sure you have a major credit card and your XM Satellite Radio ID number handy and contact XM at http://activate.xmradio.com. You can also activate your service by calling
Note: You will need to keep your Roady on for at least one hour after activation and installation to receive the full channel lineup.
7
Roady Receiver |
|
|
| Section |
Roady Display Screen |
|
| ||
|
|
| ||
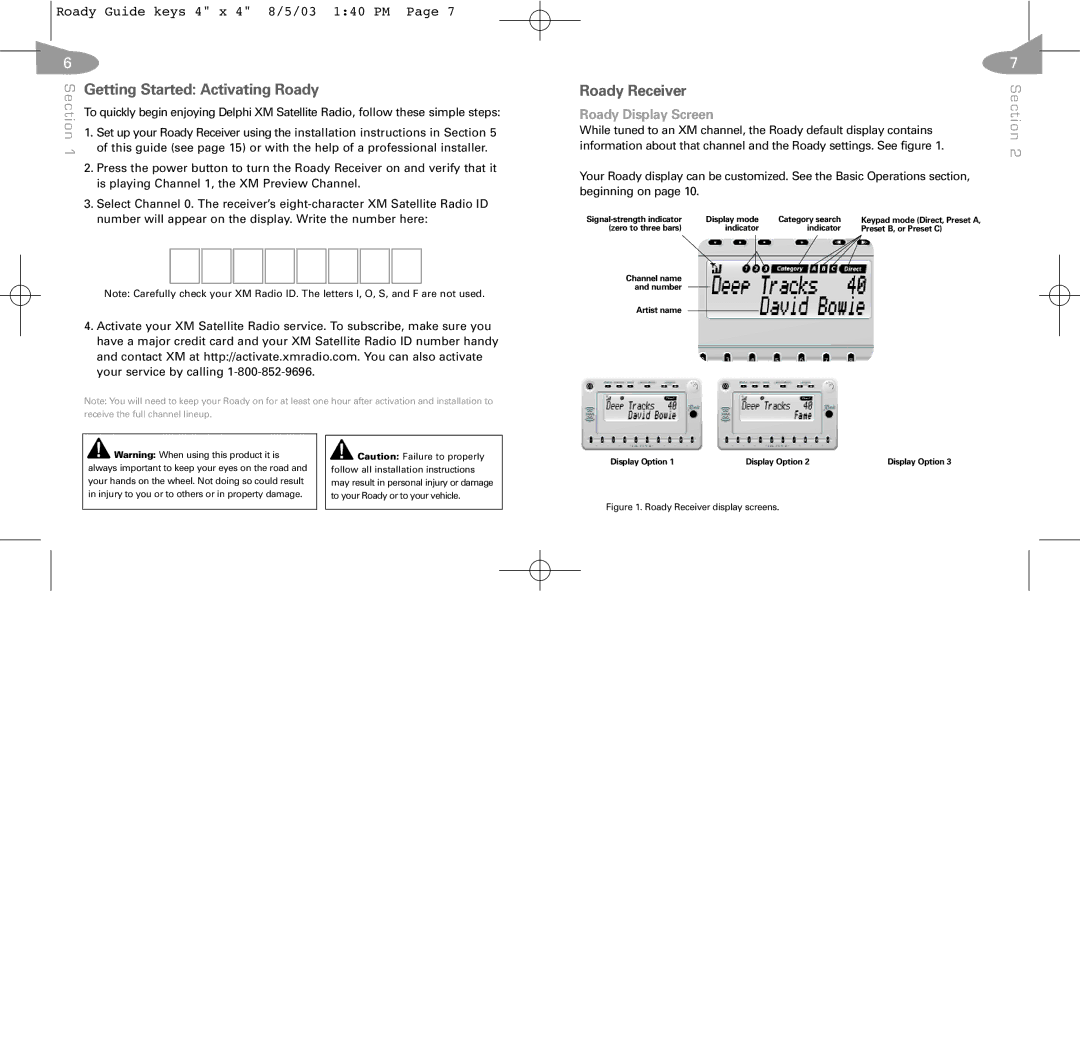
While tuned to an XM channel, the Roady default display contains |
| |||
information about that channel and the Roady settings. See figure 1. | 2 | |||
|
|
|
| |
Your Roady display can be customized. See the Basic Operations section, |
| |||
beginning on page 10. |
|
|
|
|
Display mode | Category search | Keypad mode (Direct, Preset A, |
| |
(zero to three bars) | indicator | indicator | Preset B, or Preset C) |
|
Channel name and number
Artist name
![]() Warning: When using this product it is always important to keep your eyes on the road and your hands on the wheel. Not doing so could result in injury to you or to others or in property damage.
Warning: When using this product it is always important to keep your eyes on the road and your hands on the wheel. Not doing so could result in injury to you or to others or in property damage.
![]() Caution: Failure to properly follow all installation instructions may result in personal injury or damage to your Roady or to your vehicle.
Caution: Failure to properly follow all installation instructions may result in personal injury or damage to your Roady or to your vehicle.
Display Option 1 | Display Option 2 | Display Option 3 |
