Feature Details
Mic Channels (MIC 1, MIC 2, MIC 3 )
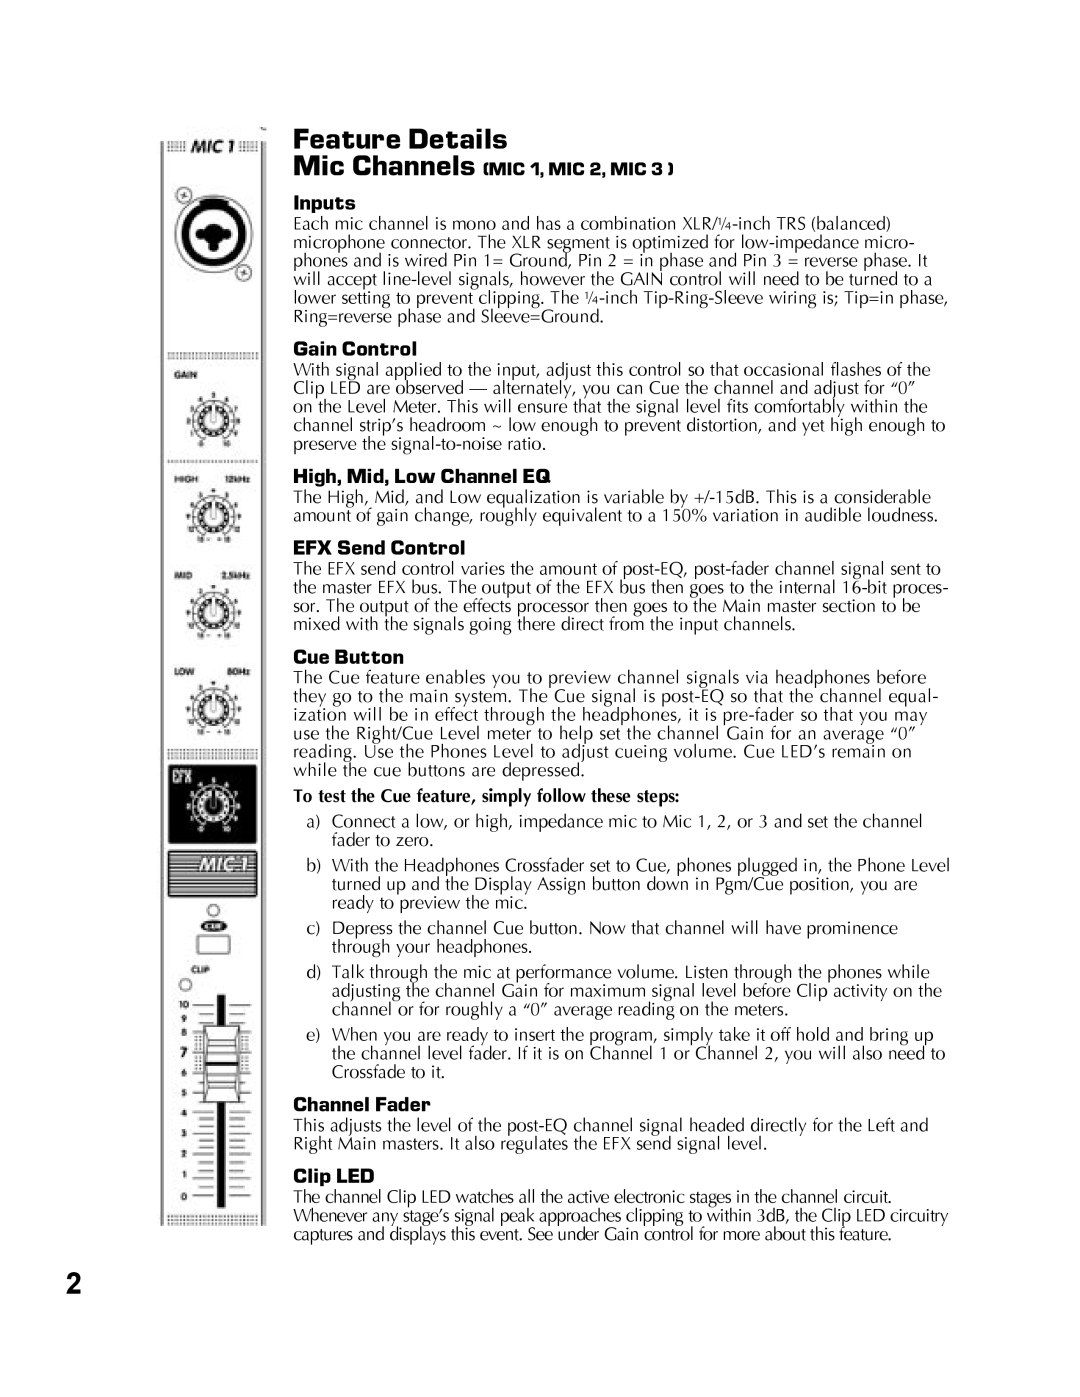
Inputs
Each mic channel is mono and has a combination
Gain Control
With signal applied to the input, adjust this control so that occasional flashes of the Clip LED are observed — alternately, you can Cue the channel and adjust for “0” on the Level Meter. This will ensure that the signal level fits comfortably within the channel strip’s headroom ~ low enough to prevent distortion, and yet high enough to preserve the
High, Mid, Low Channel EQ
The High, Mid, and Low equalization is variable by
EFX Send Control
The EFX send control varies the amount of
Cue Button
The Cue feature enables you to preview channel signals via headphones before they go to the main system. The Cue signal is
To test the Cue feature, simply follow these steps:
a)Connect a low, or high, impedance mic to Mic 1, 2, or 3 and set the channel fader to zero.
b)With the Headphones Crossfader set to Cue, phones plugged in, the Phone Level turned up and the Display Assign button down in Pgm/Cue position, you are ready to preview the mic.
c)Depress the channel Cue button. Now that channel will have prominence through your headphones.
d)Talk through the mic at performance volume. Listen through the phones while adjusting the channel Gain for maximum signal level before Clip activity on the channel or for roughly a “0” average reading on the meters.
e)When you are ready to insert the program, simply take it off hold and bring up the channel level fader. If it is on Channel 1 or Channel 2, you will also need to Crossfade to it.
Channel Fader
This adjusts the level of the
Clip LED
The channel Clip LED watches all the active electronic stages in the channel circuit. Whenever any stage’s signal peak approaches clipping to within 3dB, the Clip LED circuitry captures and displays this event. See under Gain control for more about this feature.
2