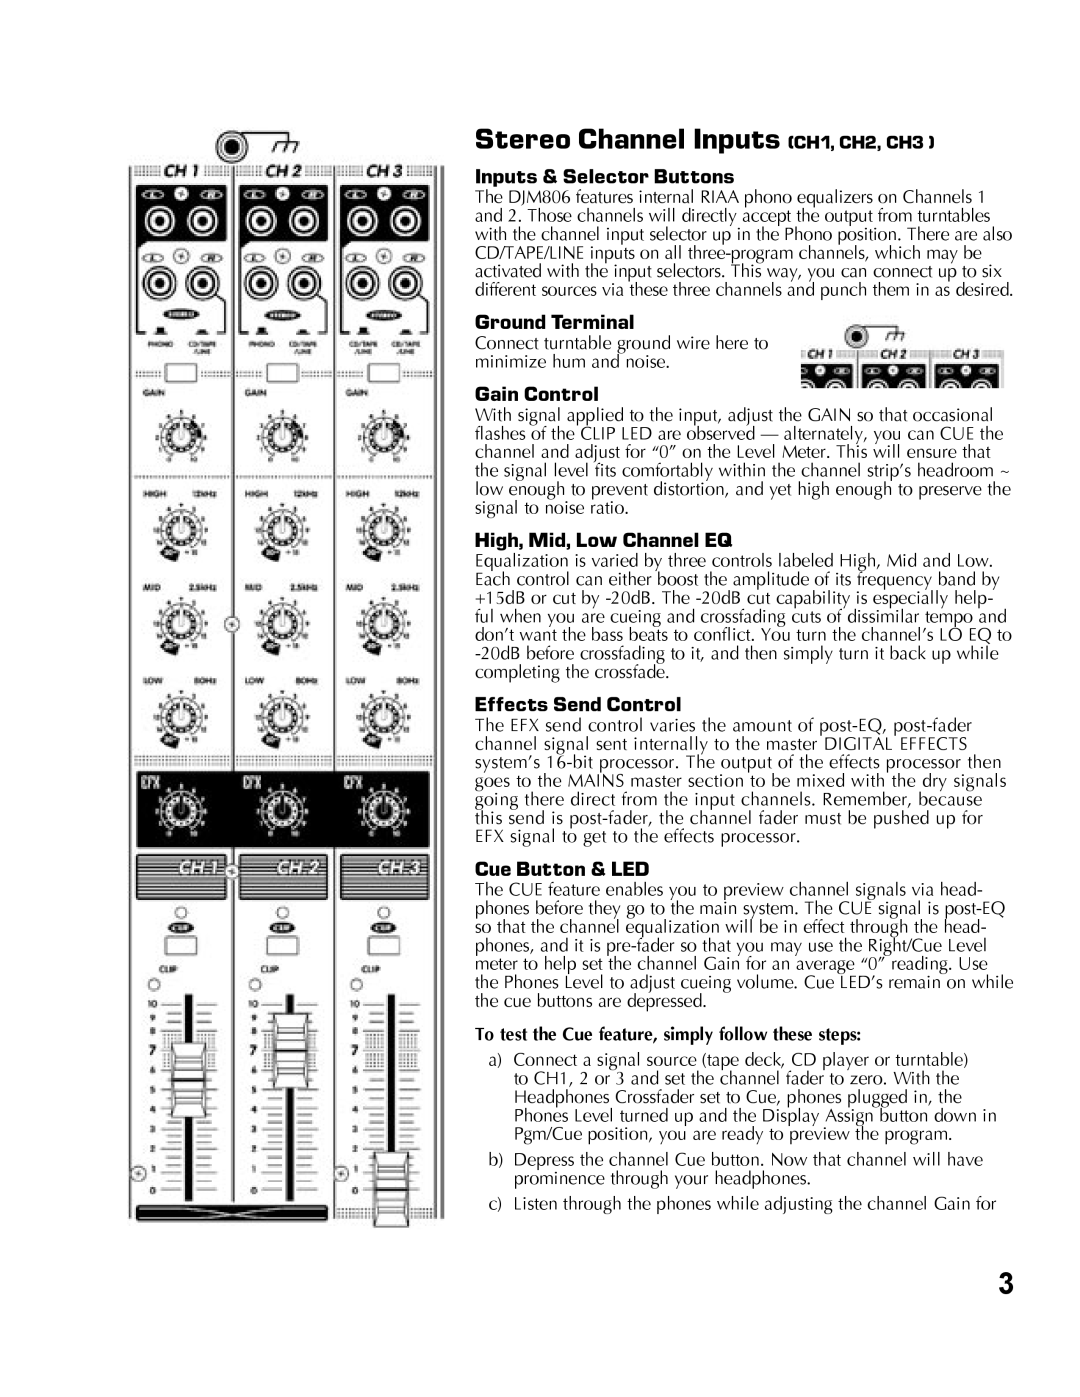
Stereo Channel Inputs (CH1, CH2, CH3 )
Inputs & Selector Buttons
The DJM806 features internal RIAA phono equalizers on Channels 1 and 2. Those channels will directly accept the output from turntables with the channel input selector up in the Phono position. There are also CD/TAPE/LINE inputs on all
Ground Terminal
Connect turntable ground wire here to minimize hum and noise.
Gain Control
With signal applied to the input, adjust the GAIN so that occasional flashes of the CLIP LED are observed — alternately, you can CUE the channel and adjust for “0” on the Level Meter. This will ensure that the signal level fits comfortably within the channel strip’s headroom ~ low enough to prevent distortion, and yet high enough to preserve the signal to noise ratio.
High, Mid, Low Channel EQ
Equalization is varied by three controls labeled High, Mid and Low. Each control can either boost the amplitude of its frequency band by +15dB or cut by
Effects Send Control
The EFX send control varies the amount of
Cue Button & LED
The CUE feature enables you to preview channel signals via head- phones before they go to the main system. The CUE signal is
To test the Cue feature, simply follow these steps:
a)Connect a signal source (tape deck, CD player or turntable) to CH1, 2 or 3 and set the channel fader to zero. With the Headphones Crossfader set to Cue, phones plugged in, the Phones Level turned up and the Display Assign button down in Pgm/Cue position, you are ready to preview the program.
b)Depress the channel Cue button. Now that channel will have prominence through your headphones.
c)Listen through the phones while adjusting the channel Gain for
3