Warning! To discard the appliance, follow the procedure:
•Pull the mains plug out of the socket.
•Cut off the mains cable and mains plug and discard them.
Installation
Warning! Make sure that mains plug is disconnected from the mains socket during
installation.
Important! Obey the instructions in the enclosed template to:
•
•Install the furniture panel.
•Connect to the water supply and drain.
Install the appliance under a counter (kitchen worktop or sink).
If a repair is necessary, the appliance must be easily ac- cessible for the engineer.
Put the appliance adjacent to a water tap and a drain. For the venting of the dishwasher only water fill, water drain and power supply cable openings are necessary.
Water connection
Water inlet hose
Connected the appliance to a hot (max. 60°) or cold water supply.
If the hot water comes from alternative sources of energy that are more environmentally friendly (e.g. solar or pho- tovoltaic panels and aeolian), use a hot water supply to decrease energy consumption.
Connect the inlet hose to a water tap with an external thread of 3/4”.
Caution! Do not use connection hoses from an old appliance.
The water pressure must be in the limits (refer to the chapter 'Technical data'). Make sure that the local water authority gives you the average mains pressure in your area.
Make sure that there are no kinks in the water inlet hose and that the water inlet hose is not squashed or entangled. Turn the inlet hose to the left or the right to suit the in- stallation. Fit the locknut correctly to prevent water leaks.
14
•Discard the door catch. This prevents the children to close themselves inside the appliance and endanger their lives.
The dishwasher has adjustable feet to allow the adjust- ment of the height.
Make sure that the water inlet hose, the drain hose and the supply cable are not kinked or squashed, when you insert the machine.
Attaching the appliance to the adjacent units
Make sure that the counter below which you attach the appliance is a safe structure (adjacent kitchen units, cab- inets, wall).
Adjusting the level of the appliance
Make sure that the appliance is level to close and seal the door correctly. If the level of the appliance is correct, the door does not catch on the sides of the cabinet. If the door does not close correctly, loosen or tighten the adjustable feet until the appliance is level.
Caution! Do not connect the appliance to new pipes or pipes that are not used for a long time. Let the
water run for some minutes, then connect the inlet hose.
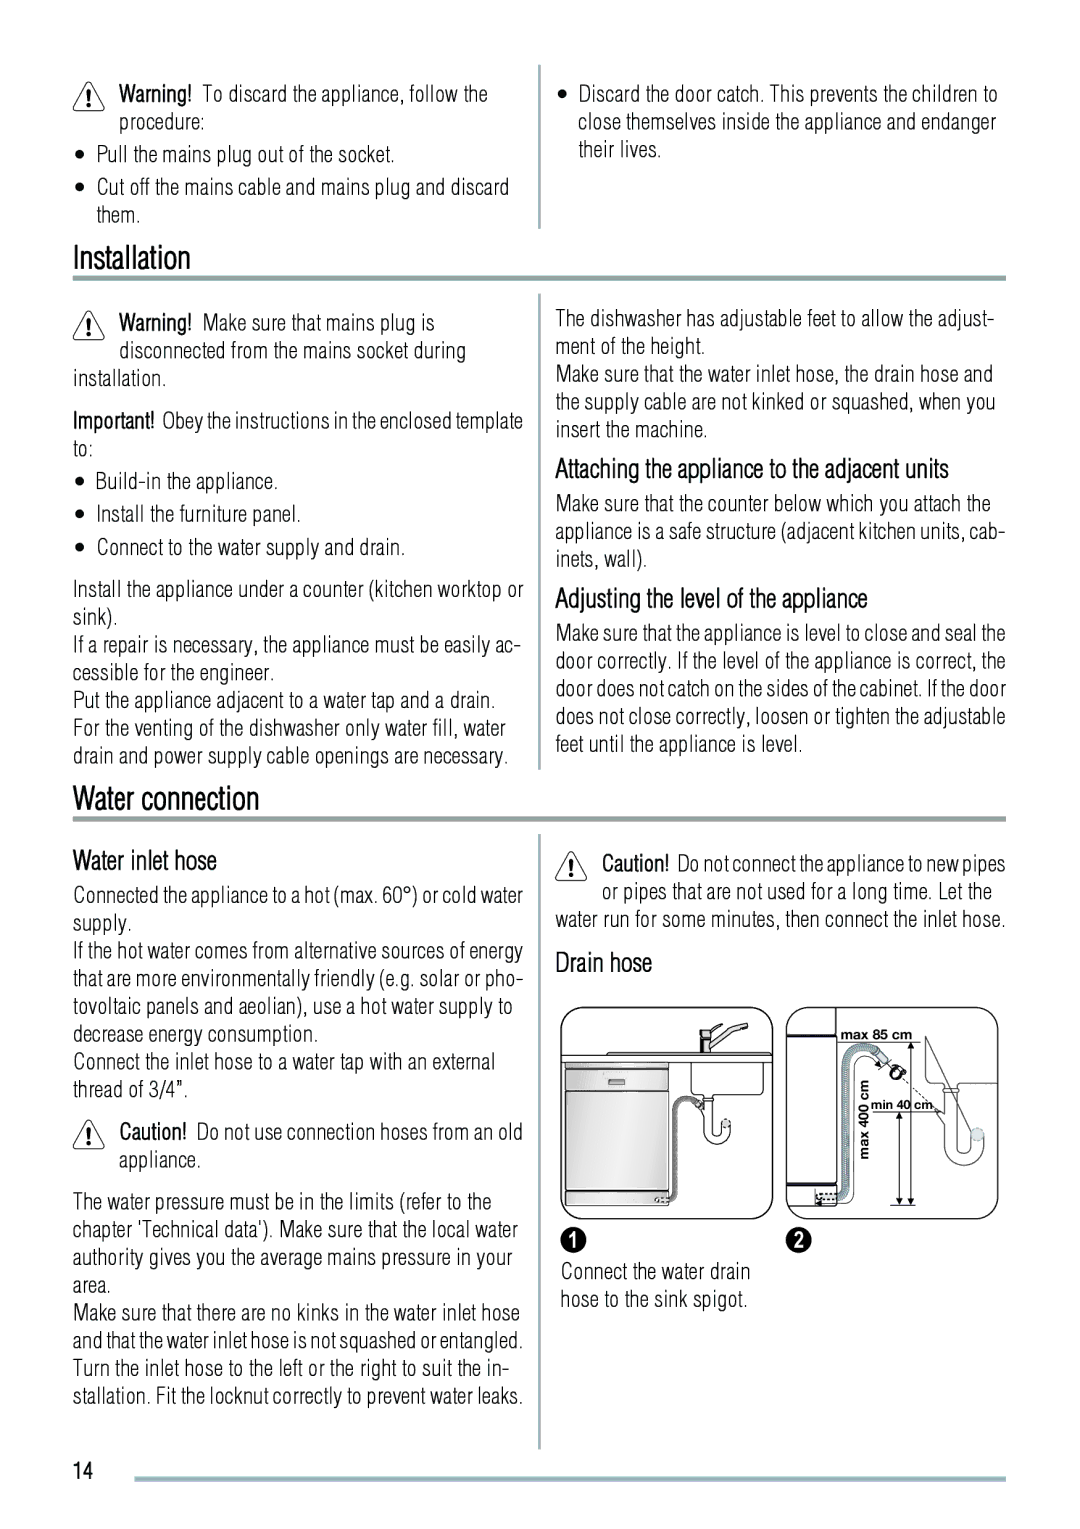
Drain hose
![]() max 85 cm
max 85 cm
cm | min 40 cm | |
max 400 | ||
|
12
Connect the water drain hose to the sink spigot.