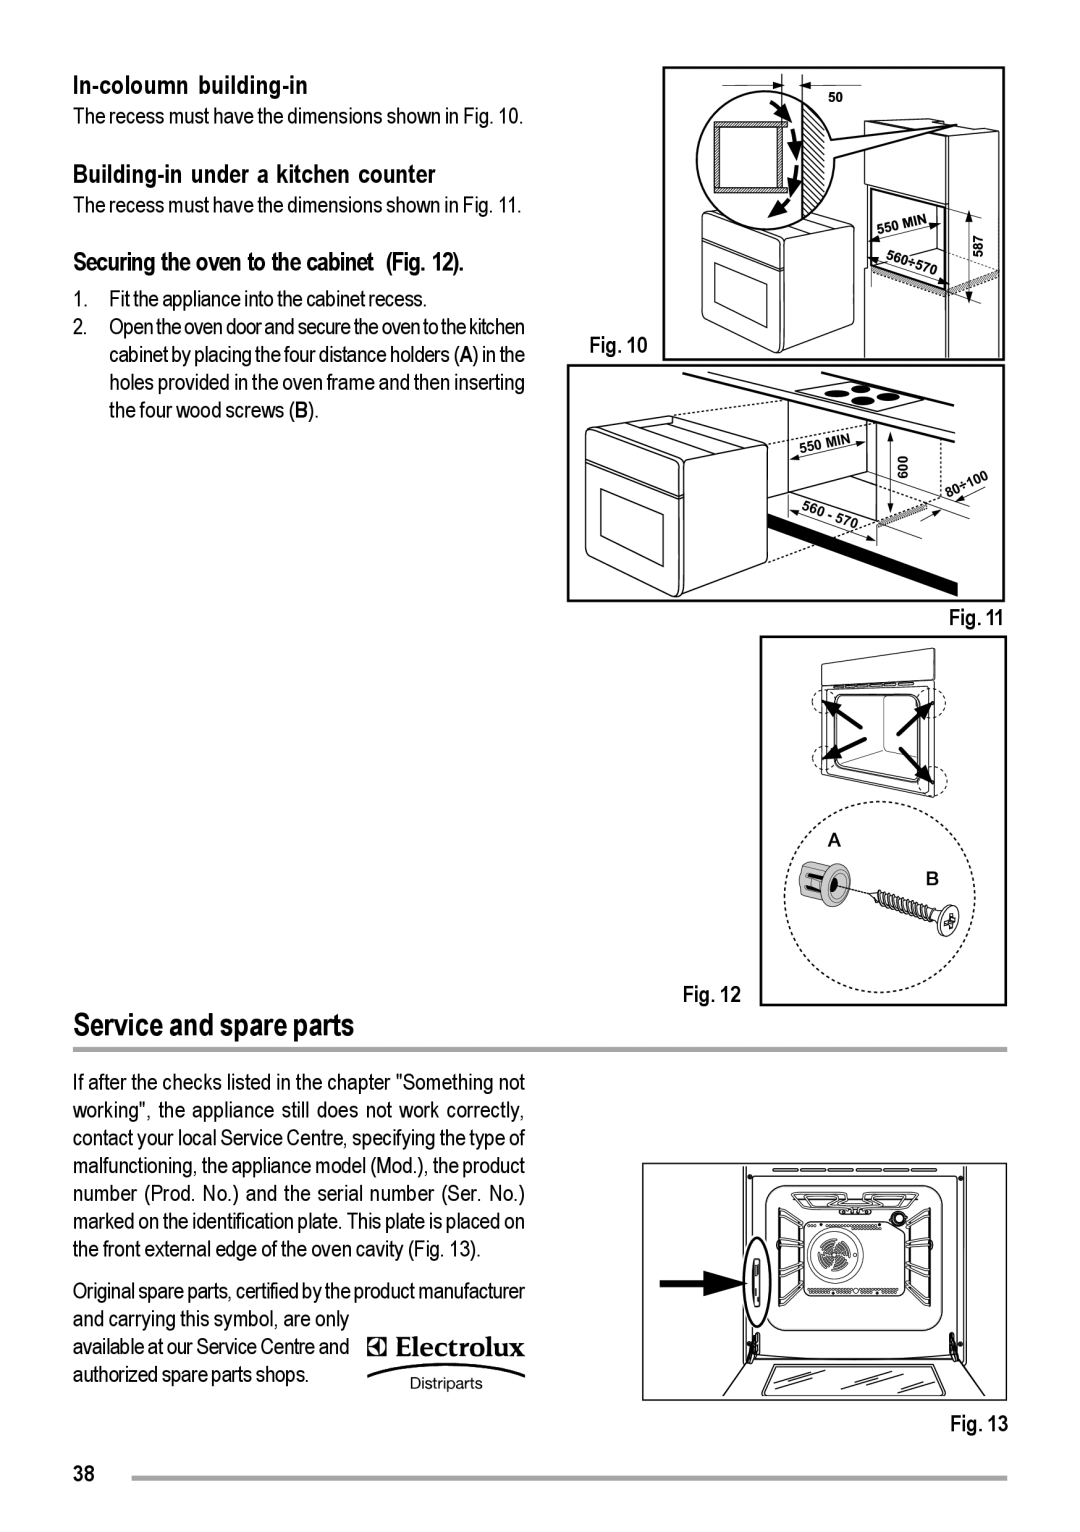
In-coloumn building-in
The recess must have the dimensions shown in Fig. 10.
Building-in under a kitchen counter
The recess must have the dimensions shown in Fig. 11.
Securing the oven to the cabinet (Fig. 12).
1.Fit the appliance into the cabinet recess.
2.Open the oven door and secure the oven to the kitchen cabinet by placing the four distance holders (A) in the holes provided in the oven frame and then inserting the four wood screws (B).
Fig. 10
550 | MIN |
|
|
|
|
|
600 |
|
|
|
|
| |
|
|
|
|
| 0 | |
|
|
|
|
|
| |
|
|
|
|
| 0 | |
|
|
|
| 1 |
| |
|
|
| ÷ |
|
| |
|
| 0 |
|
|
| |
560 |
| 8 |
|
|
|
|
- |
|
|
|
|
| |
| 570 |
|
|
|
|
|
Fig. 11
Fig. 12
Service and spare parts
If after the checks listed in the chapter "Something not working", the appliance still does not work correctly, contact your local Service Centre, specifying the type of malfunctioning, the appliance model (Mod.), the product number (Prod. No.) and the serial number (Ser. No.) marked on the identification plate. This plate is placed on the front external edge of the oven cavity (Fig. 13).
Original spare parts, certified by the product manufacturer and carrying this symbol, are only
available at our Service Centre and authorized spare parts shops.
Fig. 13
38
