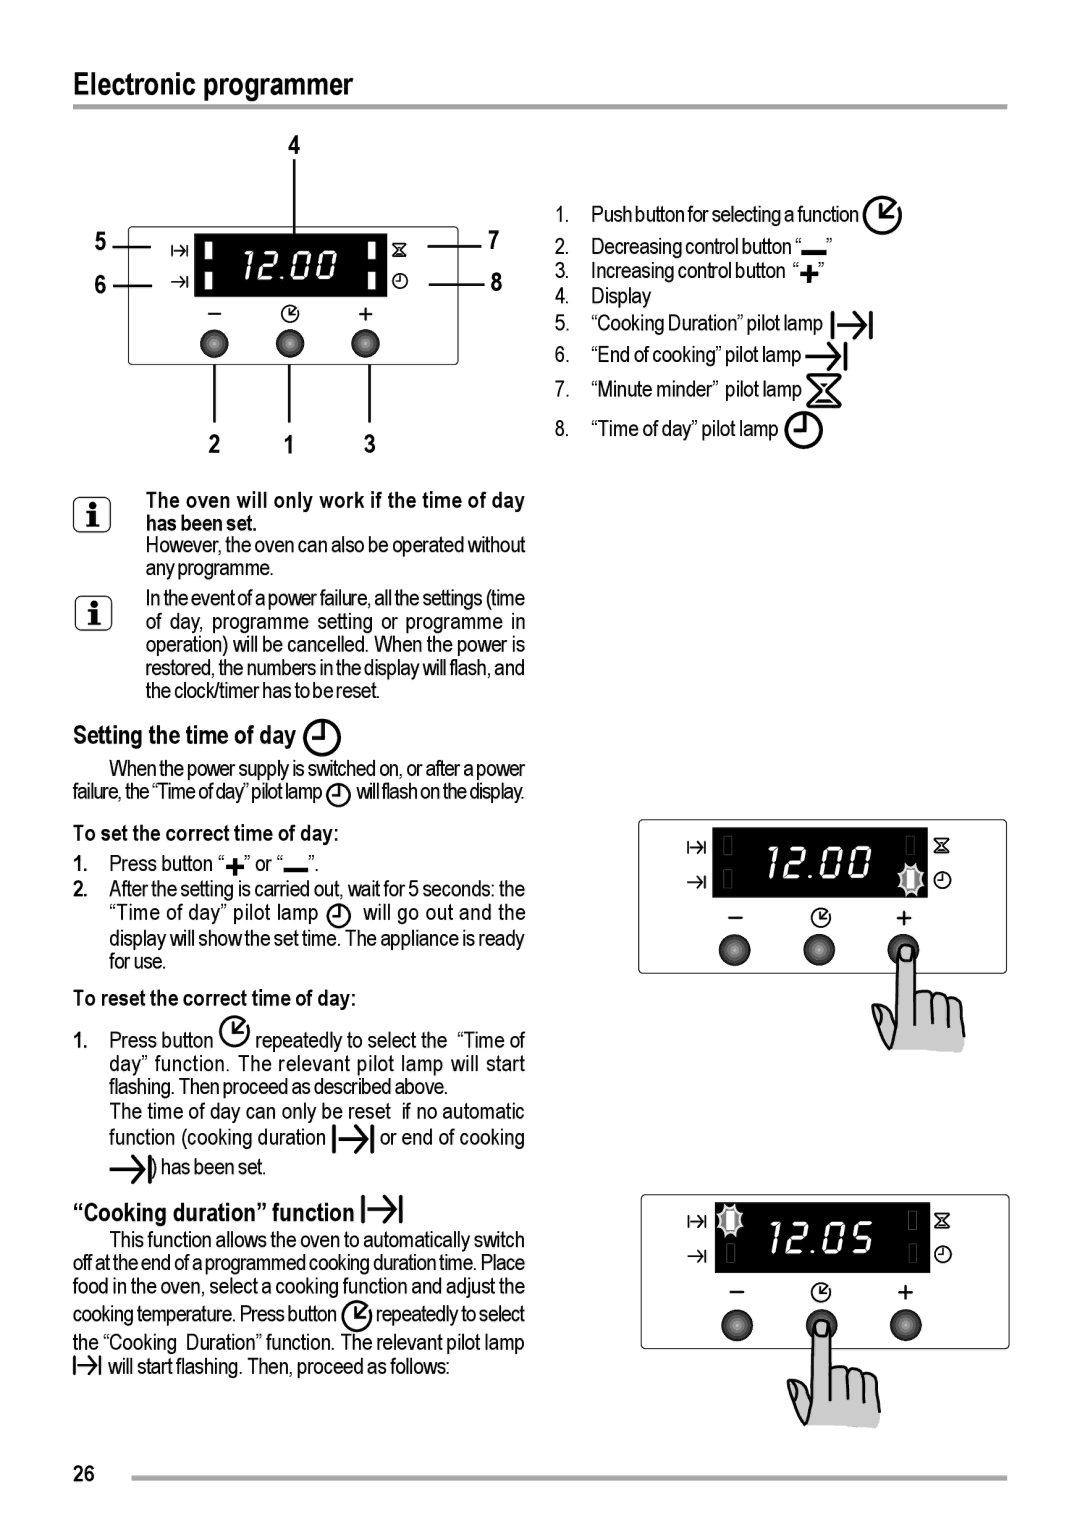
Electronic programmer
|
|
|
| 4 |
|
|
|
|
|
|
| |||
5 |
|
|
|
|
|
|
|
|
|
|
|
| 7 | |
|
|
|
|
|
|
|
|
|
|
| ||||
|
|
|
|
|
|
|
|
|
|
| ||||
6 |
|
|
|
|
|
|
|
|
|
|
| 8 | ||
|
|
|
|
|
| |||||||||
|
|
|
|
|
|
|
|
| ||||||
2 1 3
The oven will only work if the time of day has been set.
However, the oven can also be operated without any programme.
In the event of a power failure, all the settings (time of day, programme setting or programme in operation) will be cancelled. When the power is restored, the numbers in the display will flash, and the clock/timer has to be reset.
Setting the time of day
When the power supply is switched on, or after a power failure, the “Time of day” pilot lamp![]() will flash on the display.
will flash on the display.
To set the correct time of day:
1.Press button “ ” or “ ”.
2.After the setting is carried out, wait for 5 seconds: the
“Time of day” pilot lamp |
|
| will go out and the |
| |||
|
|
display will show the set time. The appliance is ready for use.
To reset the correct time of day:
1.Press button![]() repeatedly to select the “Time of day” function. The relevant pilot lamp will start flashing. Then proceed as described above.
repeatedly to select the “Time of day” function. The relevant pilot lamp will start flashing. Then proceed as described above.
The time of day can only be reset if no automatic
function (cooking duration | or end of cooking |
) has been set. |
|
“Cooking duration” function
This function allows the oven to automatically switch off at the end of a programmed cooking duration time. Place food in the oven, select a cooking function and adjust the
cooking temperature. Press button | repeatedly to select |
the “Cooking Duration” function. The relevant pilot lamp ![]()
![]() will start flashing. Then, proceed as follows:
will start flashing. Then, proceed as follows:
1. Push button for selecting a function
2. Decreasing control button “ ”
3.Increasing control button “ ”
4.Display
5.“Cooking Duration” pilot lamp ![]()
![]()
6.“End of cooking” pilot lamp![]()
7.“Minute minder” pilot lamp![]()
8.“Time of day” pilot lamp ![]()
26
